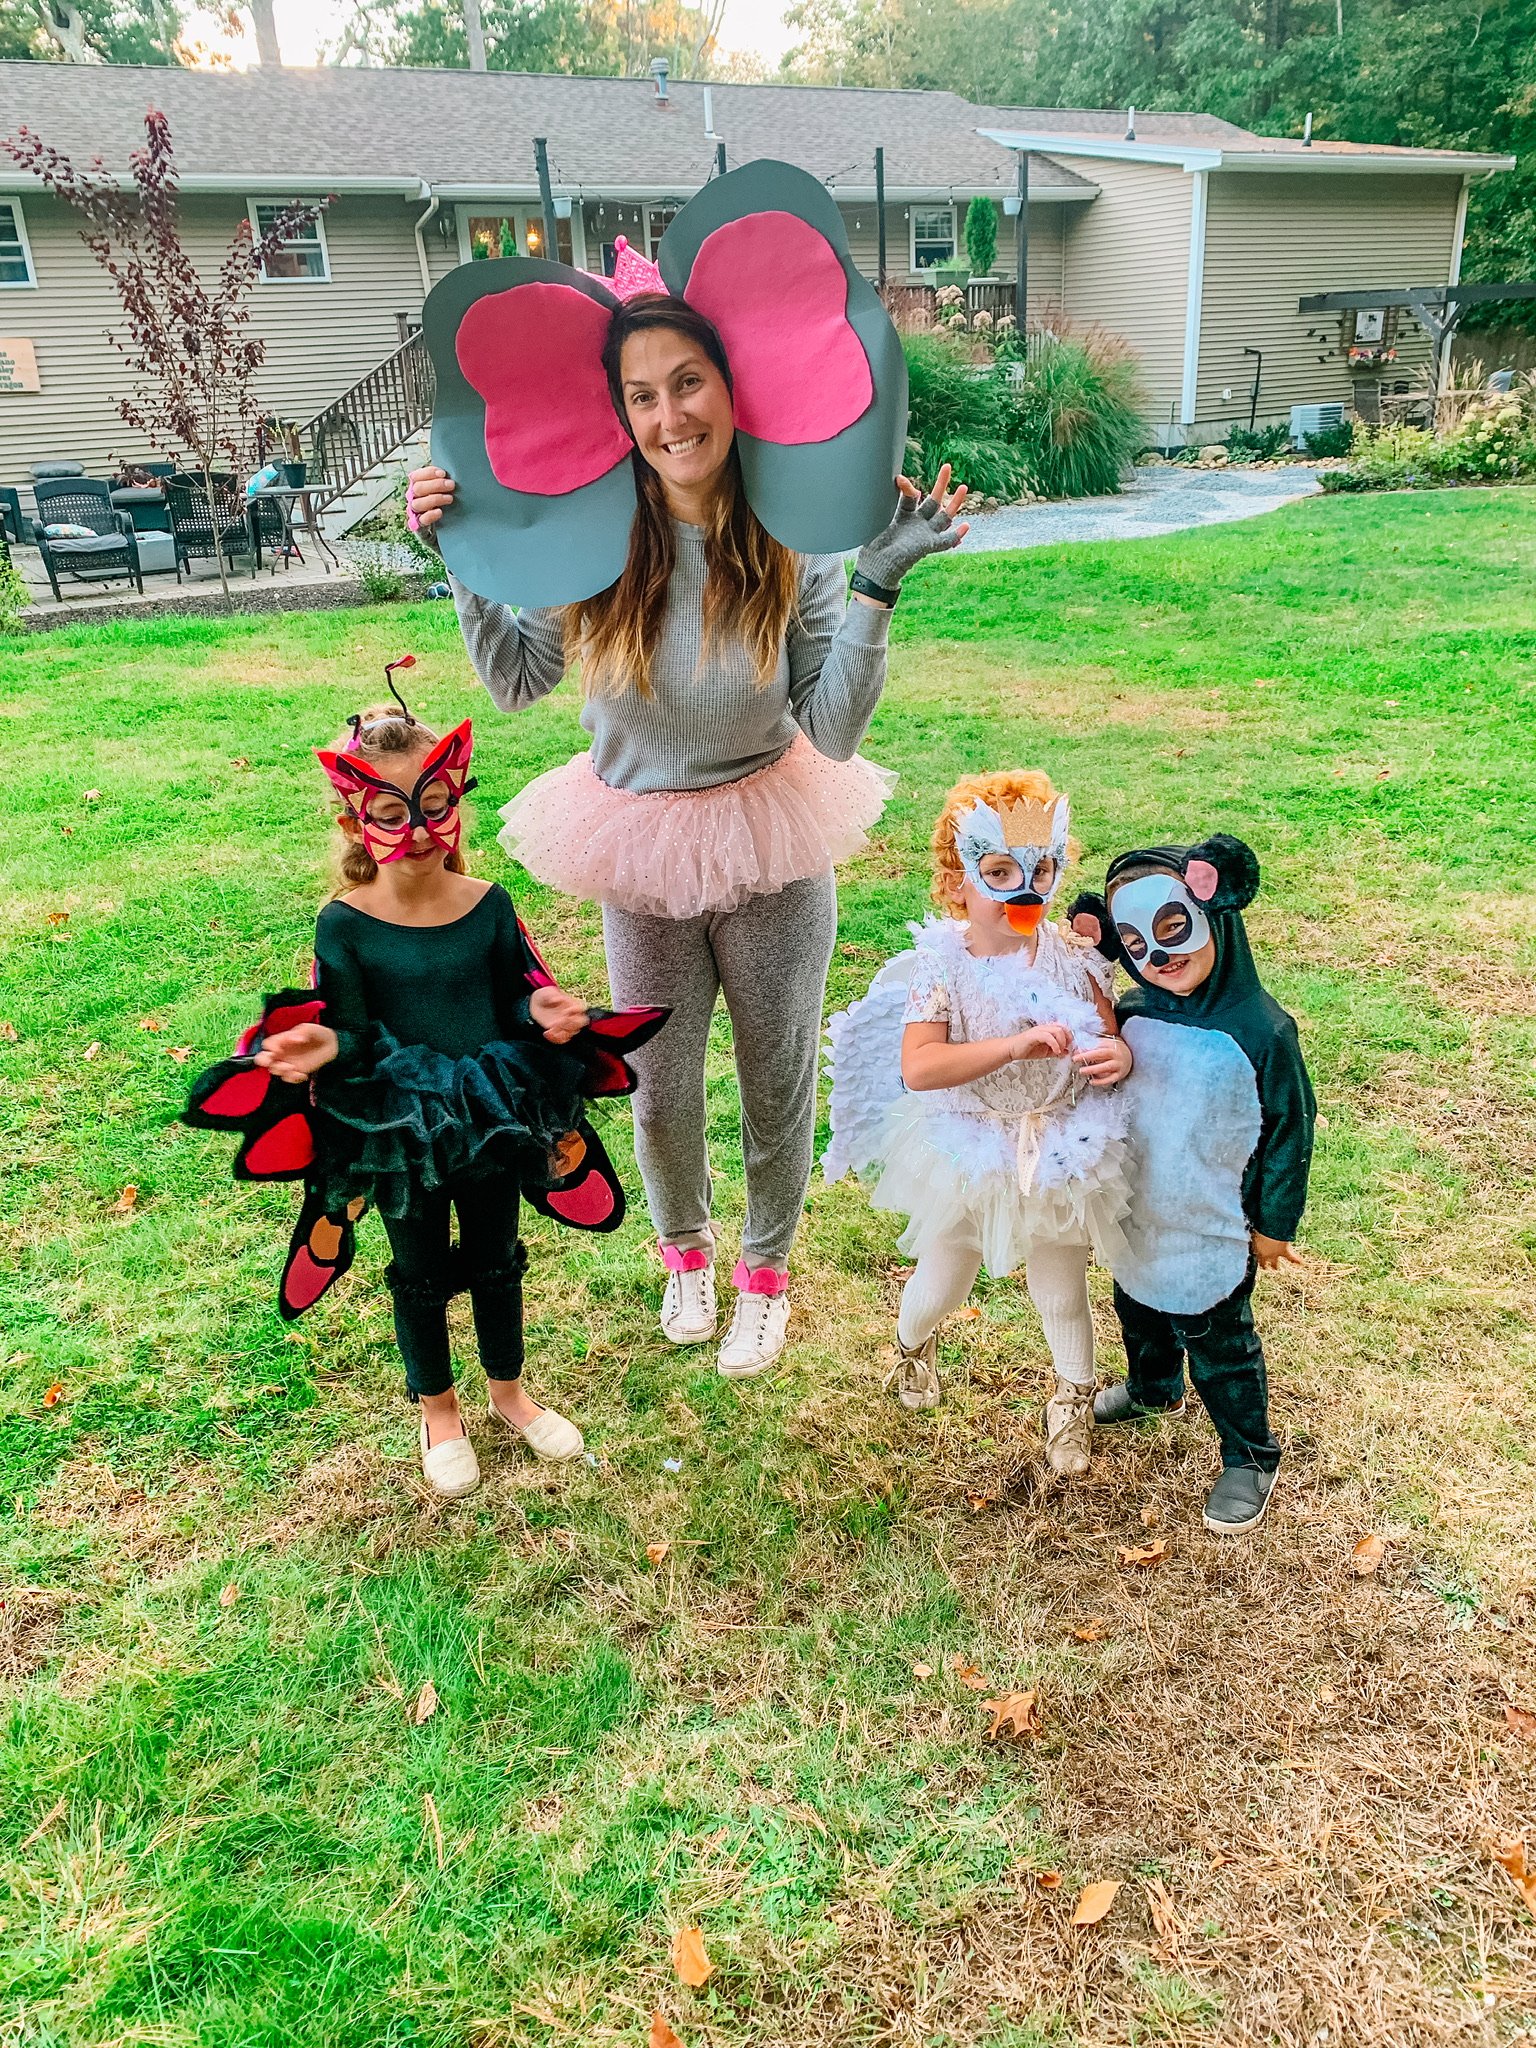
First DIY costumes of the Halloween season! The zoo crew
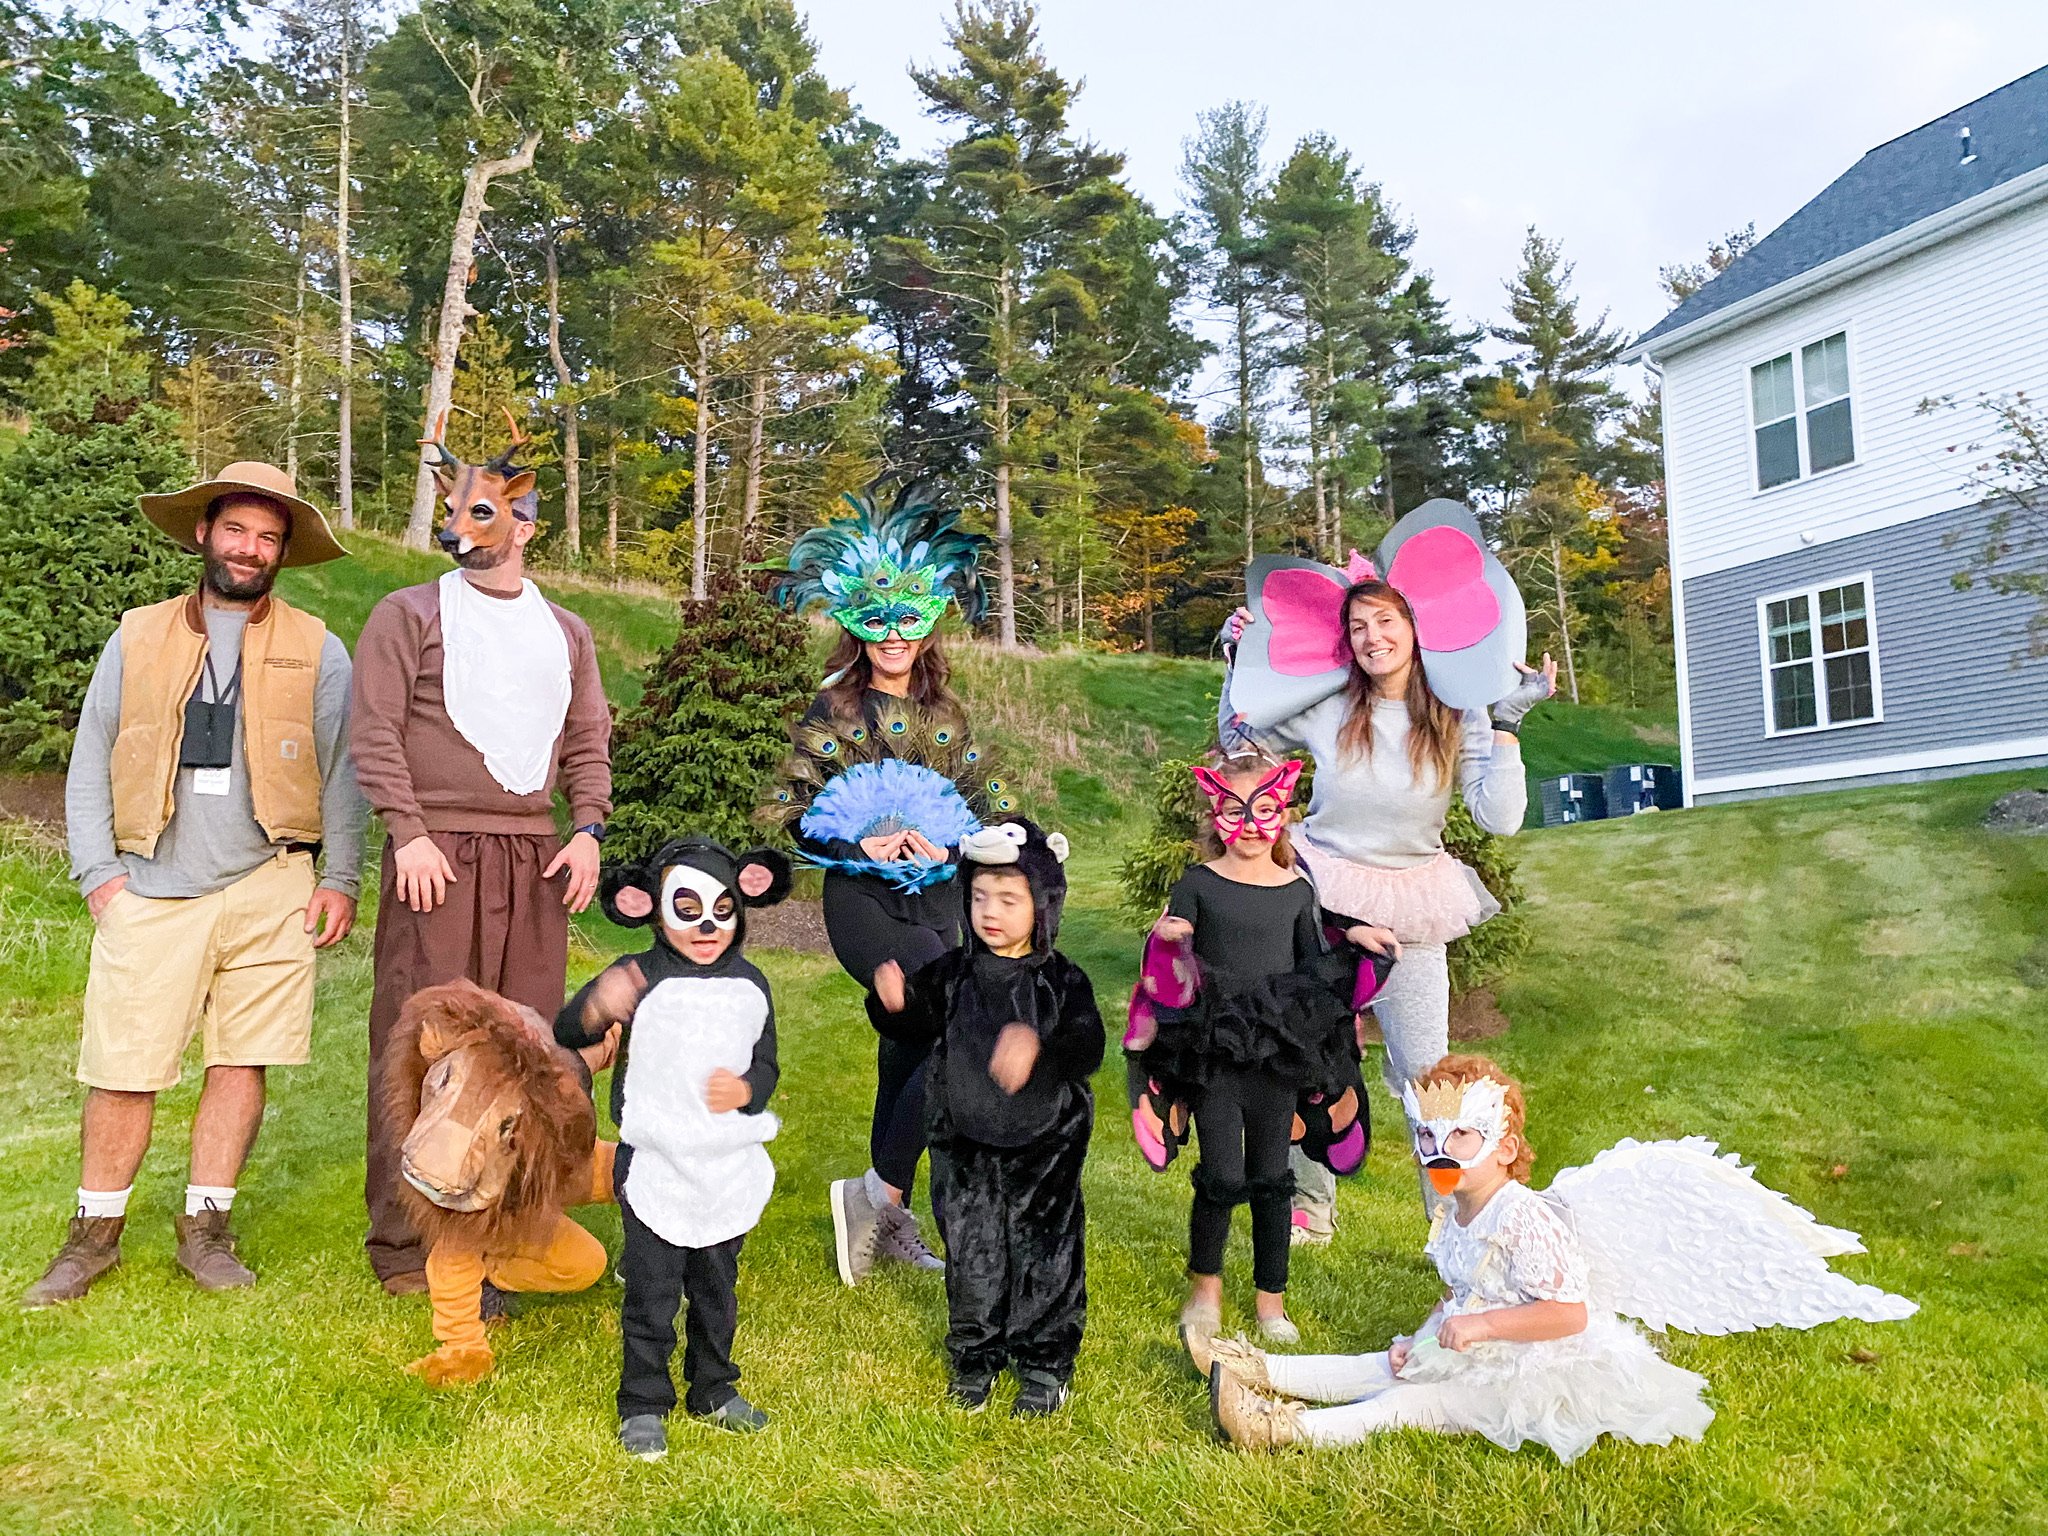
A friend of mine asked me on a Wednesday if we wanted to do trunk or treat with her and her family that frisay- of course I said yes! And when I found out they were all being animals I decided to run with the theme but I had to DIY all of it since I didn’t have time to order anything. We ended up being the cutest little zoo crew ever. Her family was a peacock, a lion, a gorilla and a deer. We were the zookeeper, an elephant, a swan, a panda and a butterfly!

Here’s my little swan in action! The swan was really costume I was most worried about- but it came out great! She had a white tutu dress from @iloveplum that I paired with tights and a white feather boa.
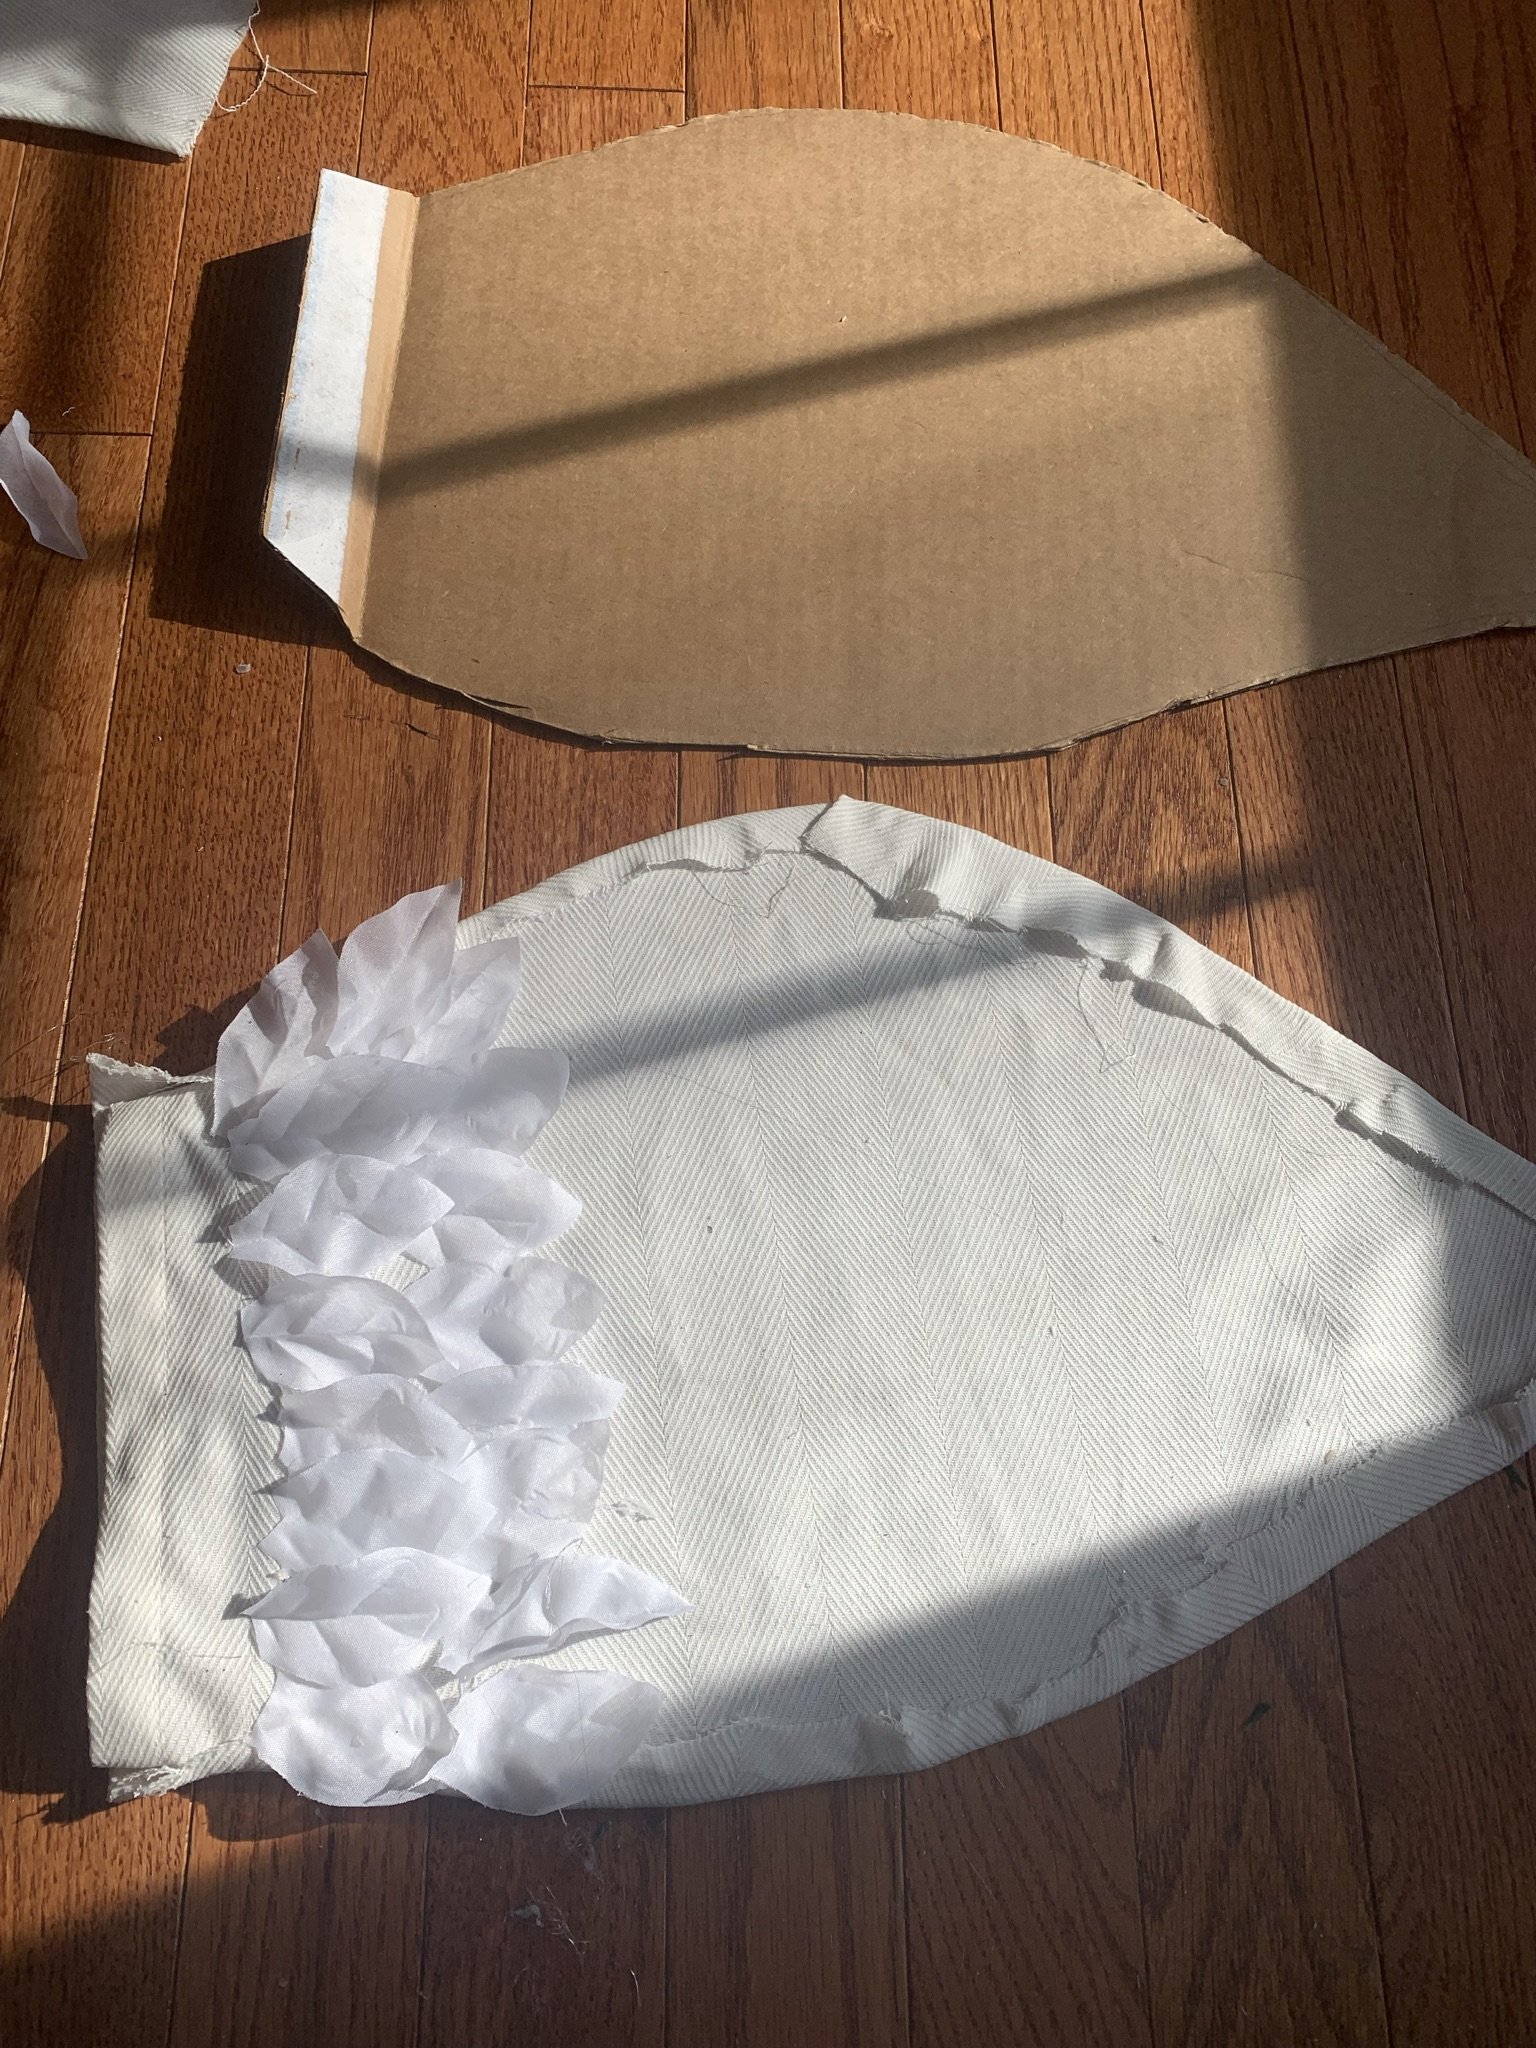
The wings we’re getting toughest part. I cut the base out of a cardboard box we had, then covered them in white fabric we had but spray paint, or white paper would have worked fine too.
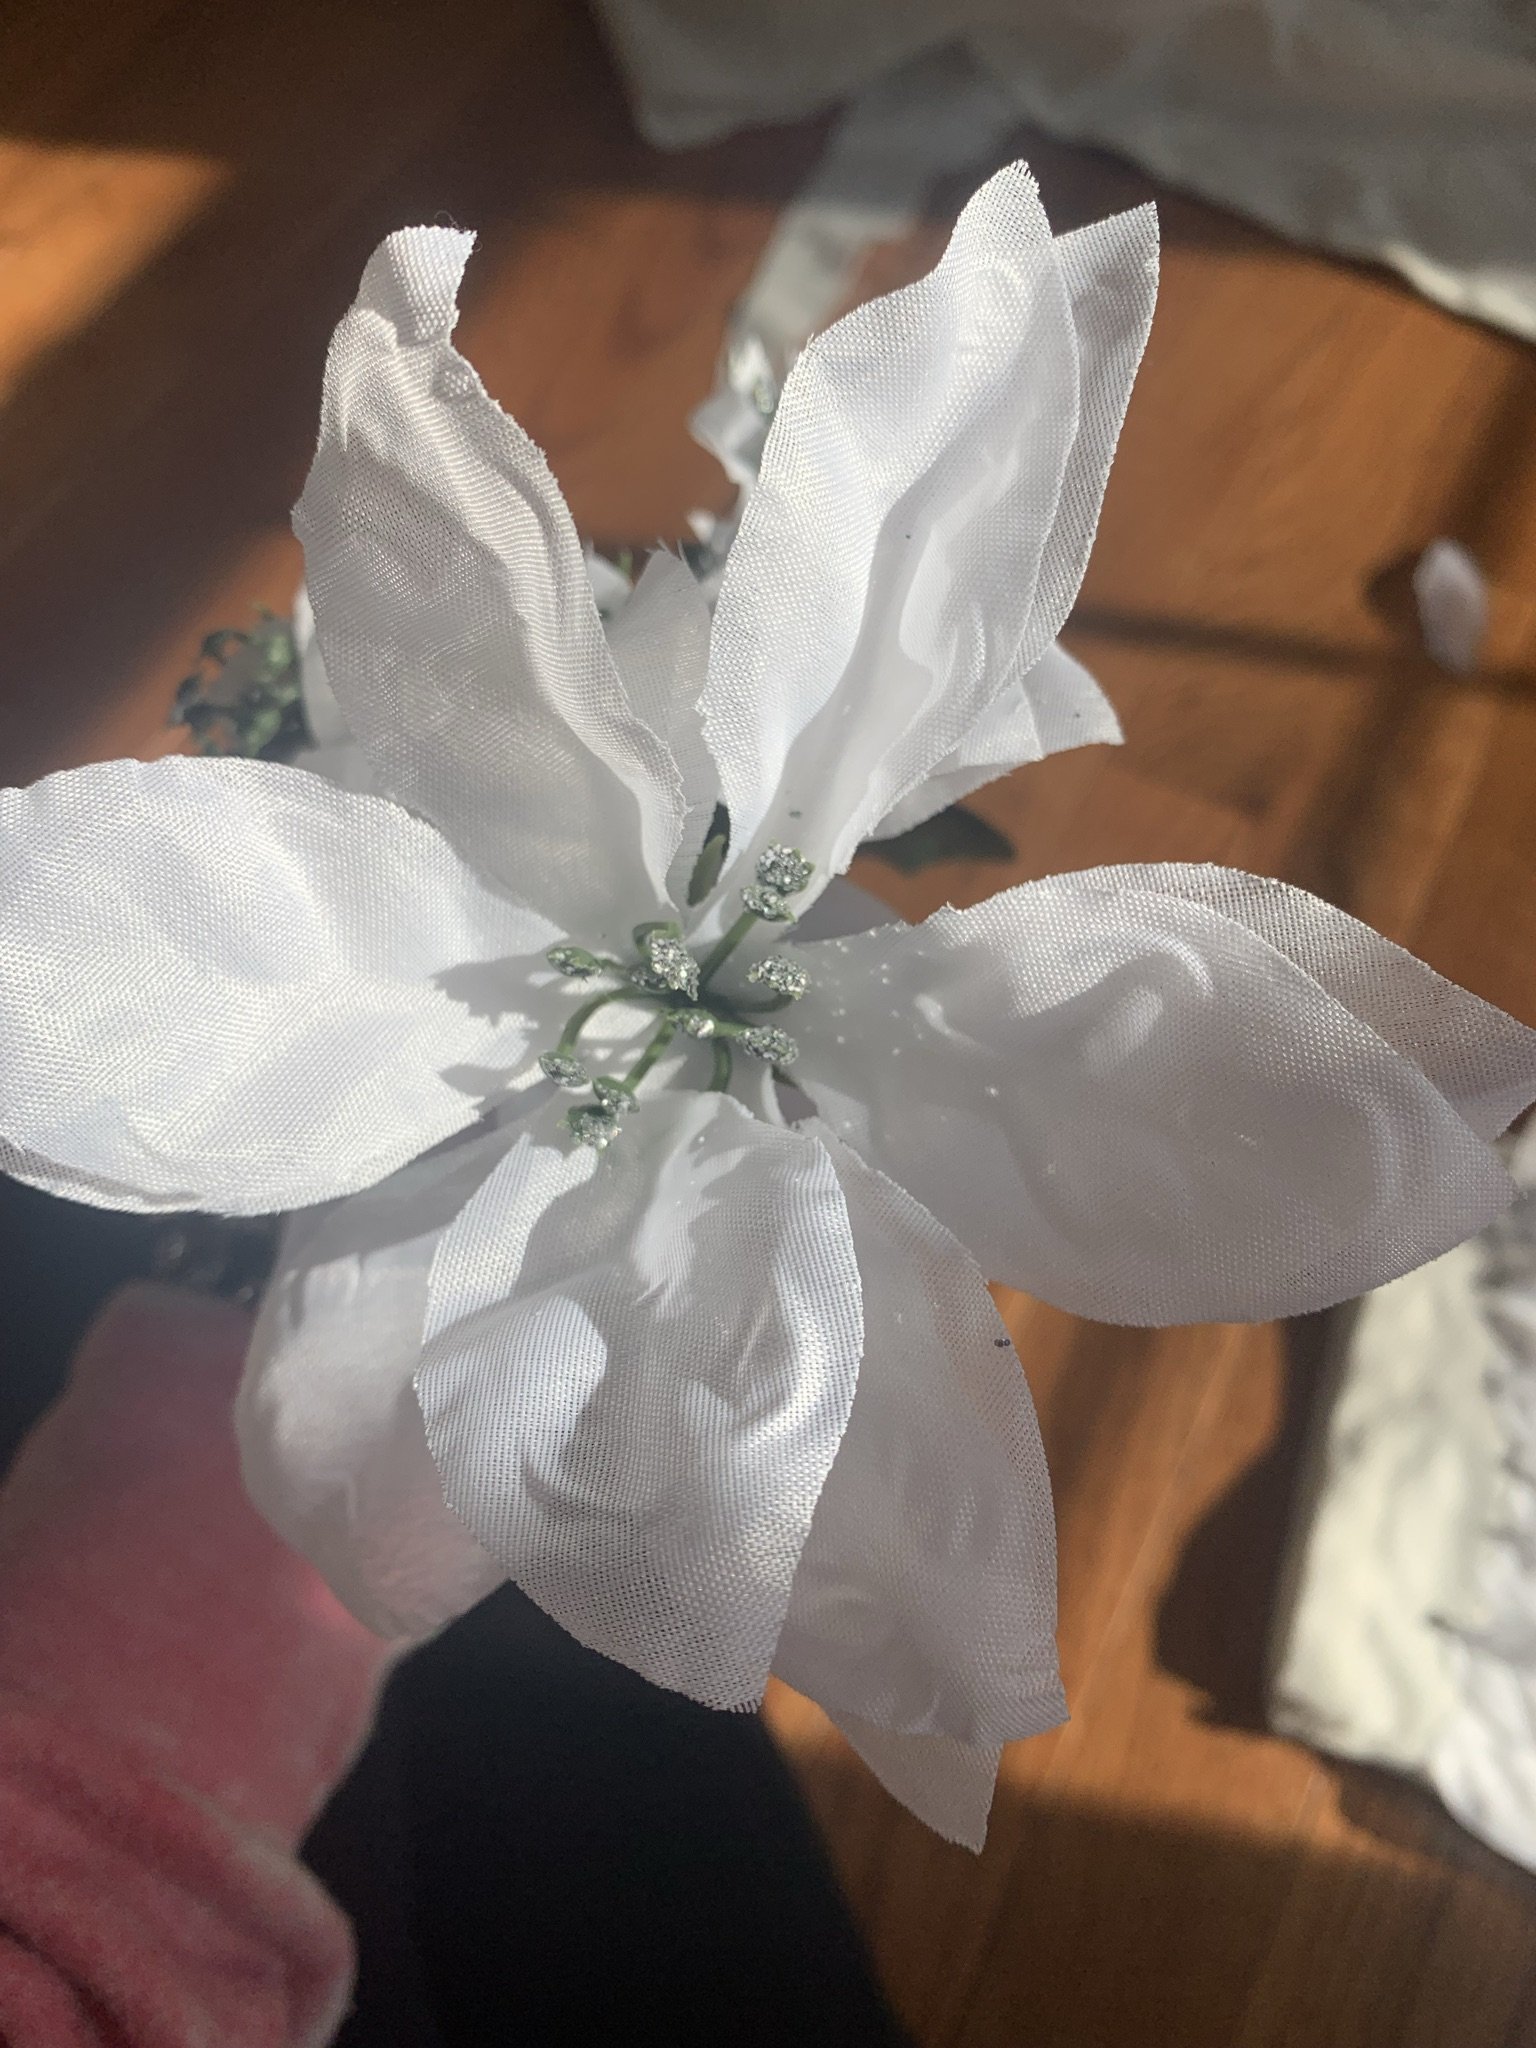
I couldn’t find more than one small pack of white feathers ANYWHERE near me (like I said it was last minute) so I had to improvise. I went to dollar tree and got these white Christmas flowers that I cut at the base to make the feathers on the wings. I think it turned out great!
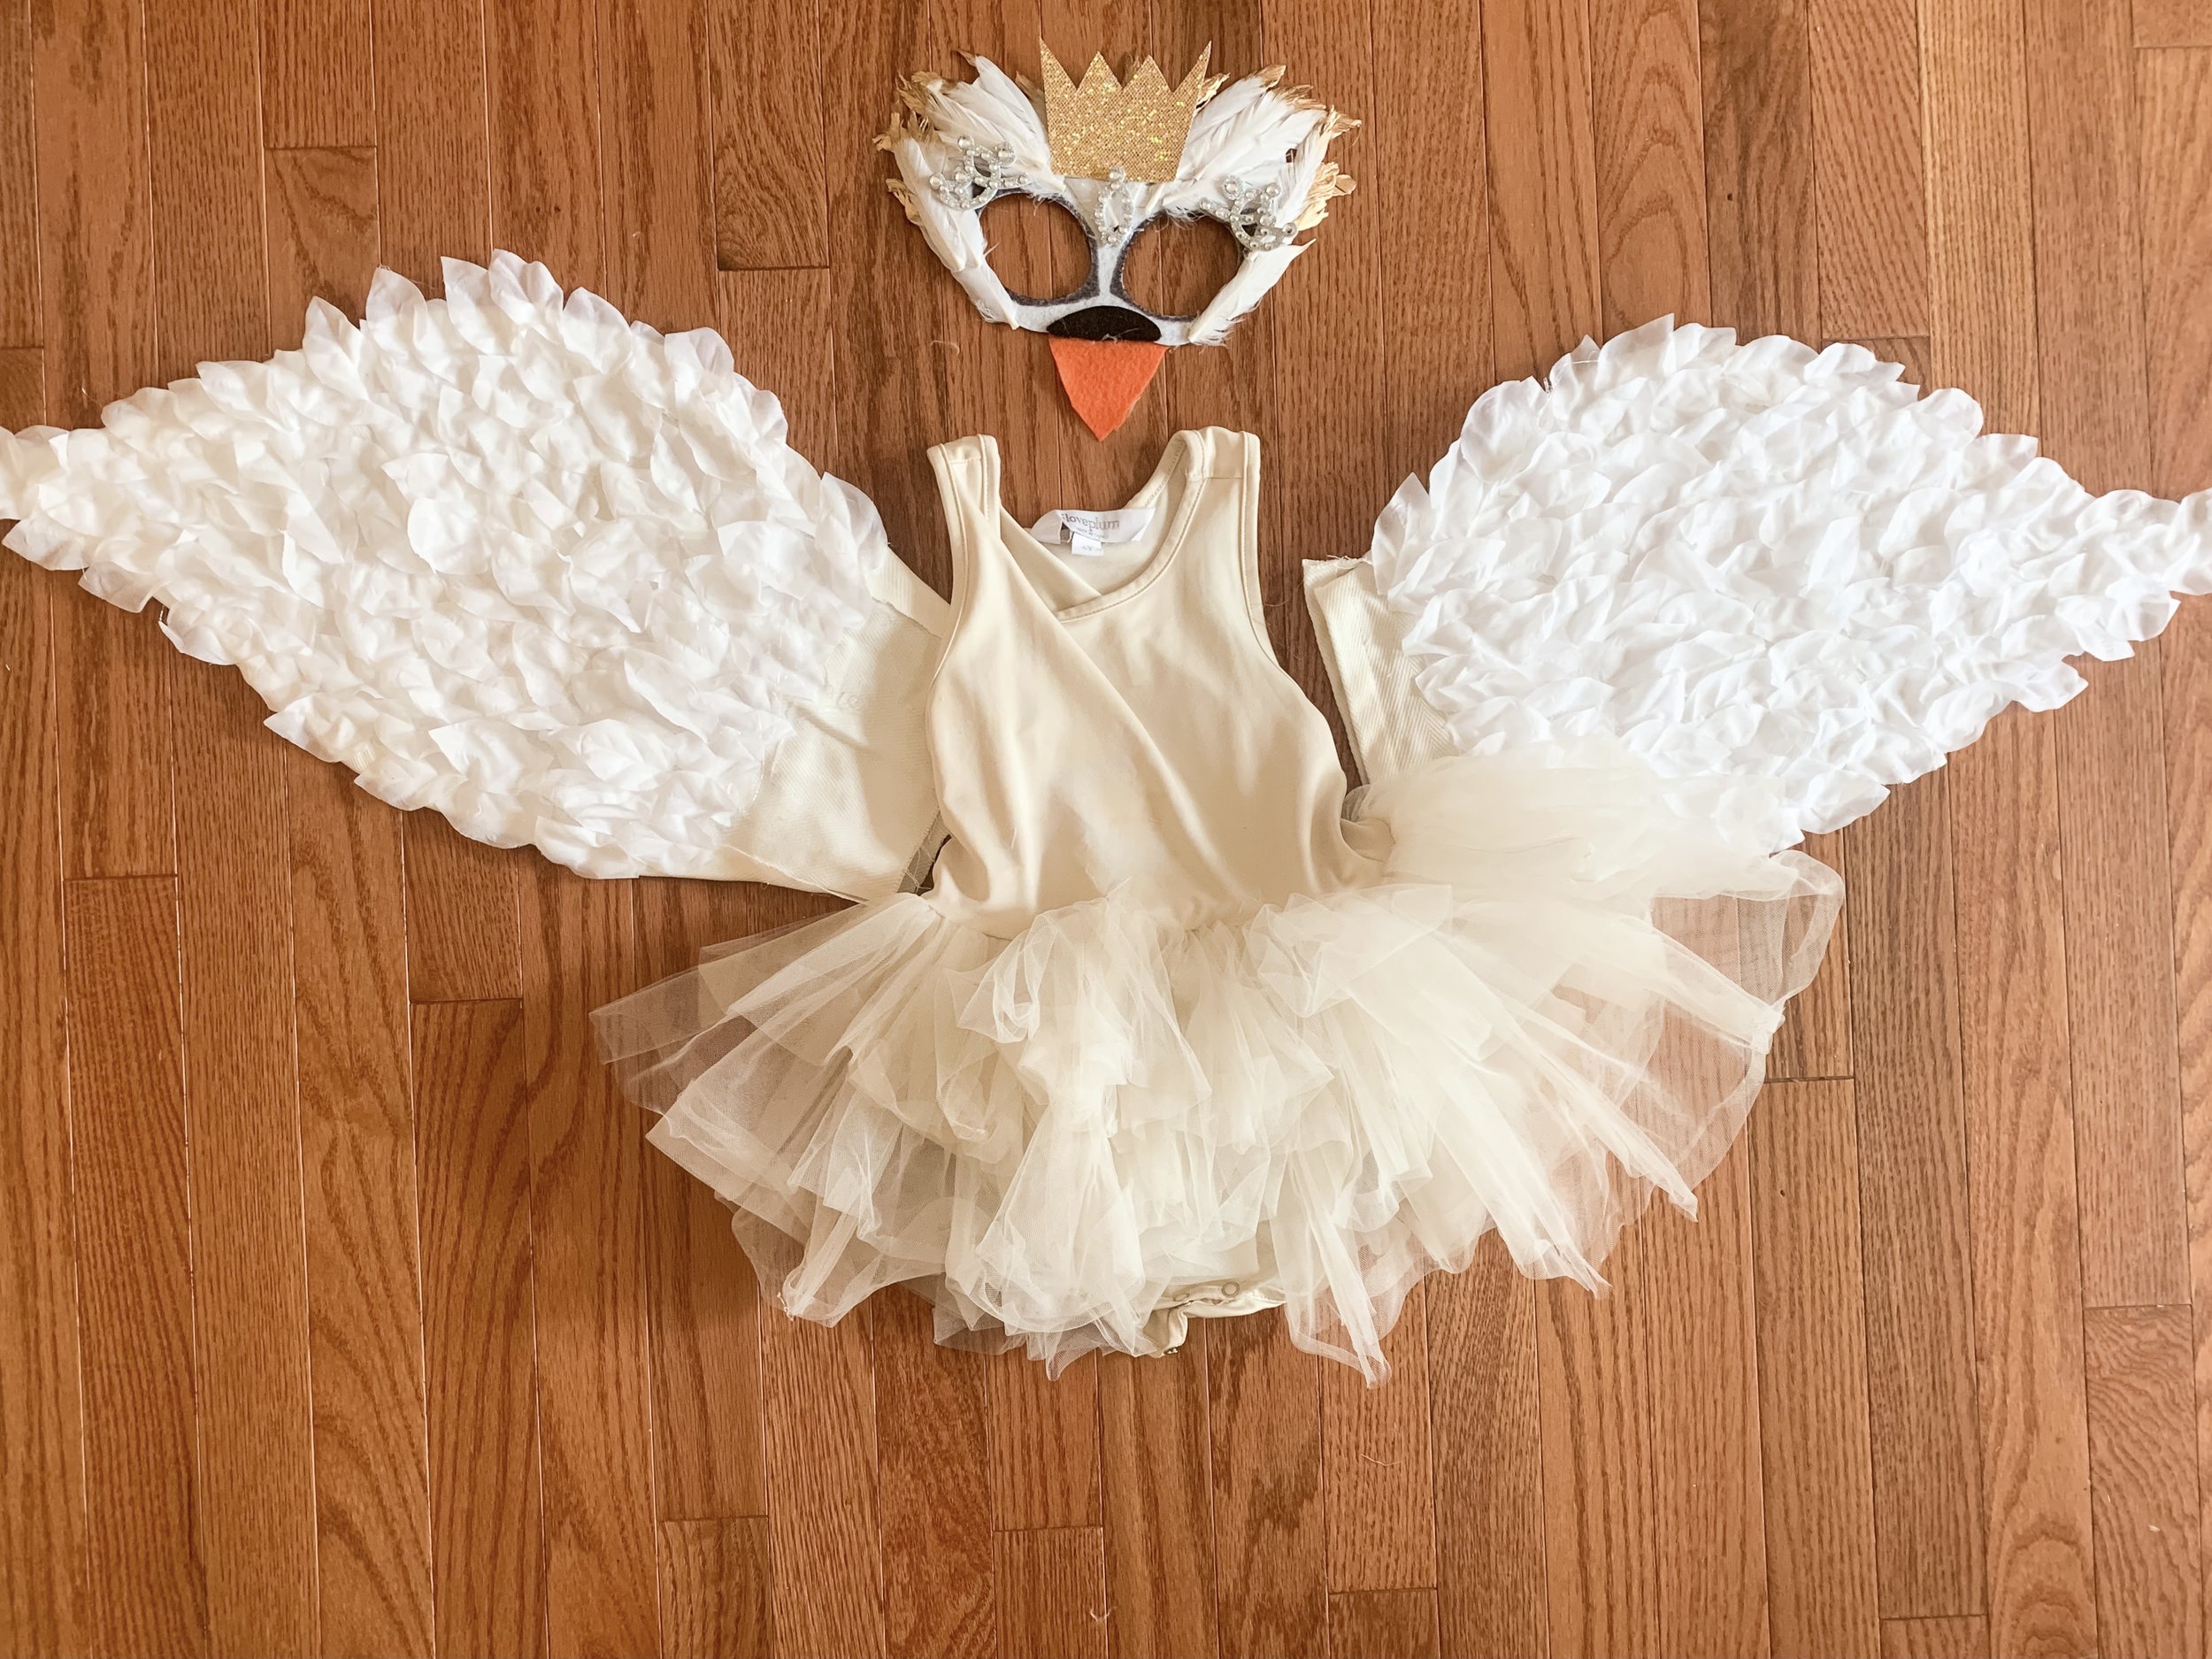
I cut a mask out of white cardstock we had and added the feathers, marker around the eye holes, gems and a crown! She loved her mask and still wears it for dress up!

Next up to make was this beautiful little butterfly! The tutu (also from @iloveplum) and leggings were items we already had so all I had to make were the wings, mask and antenna.
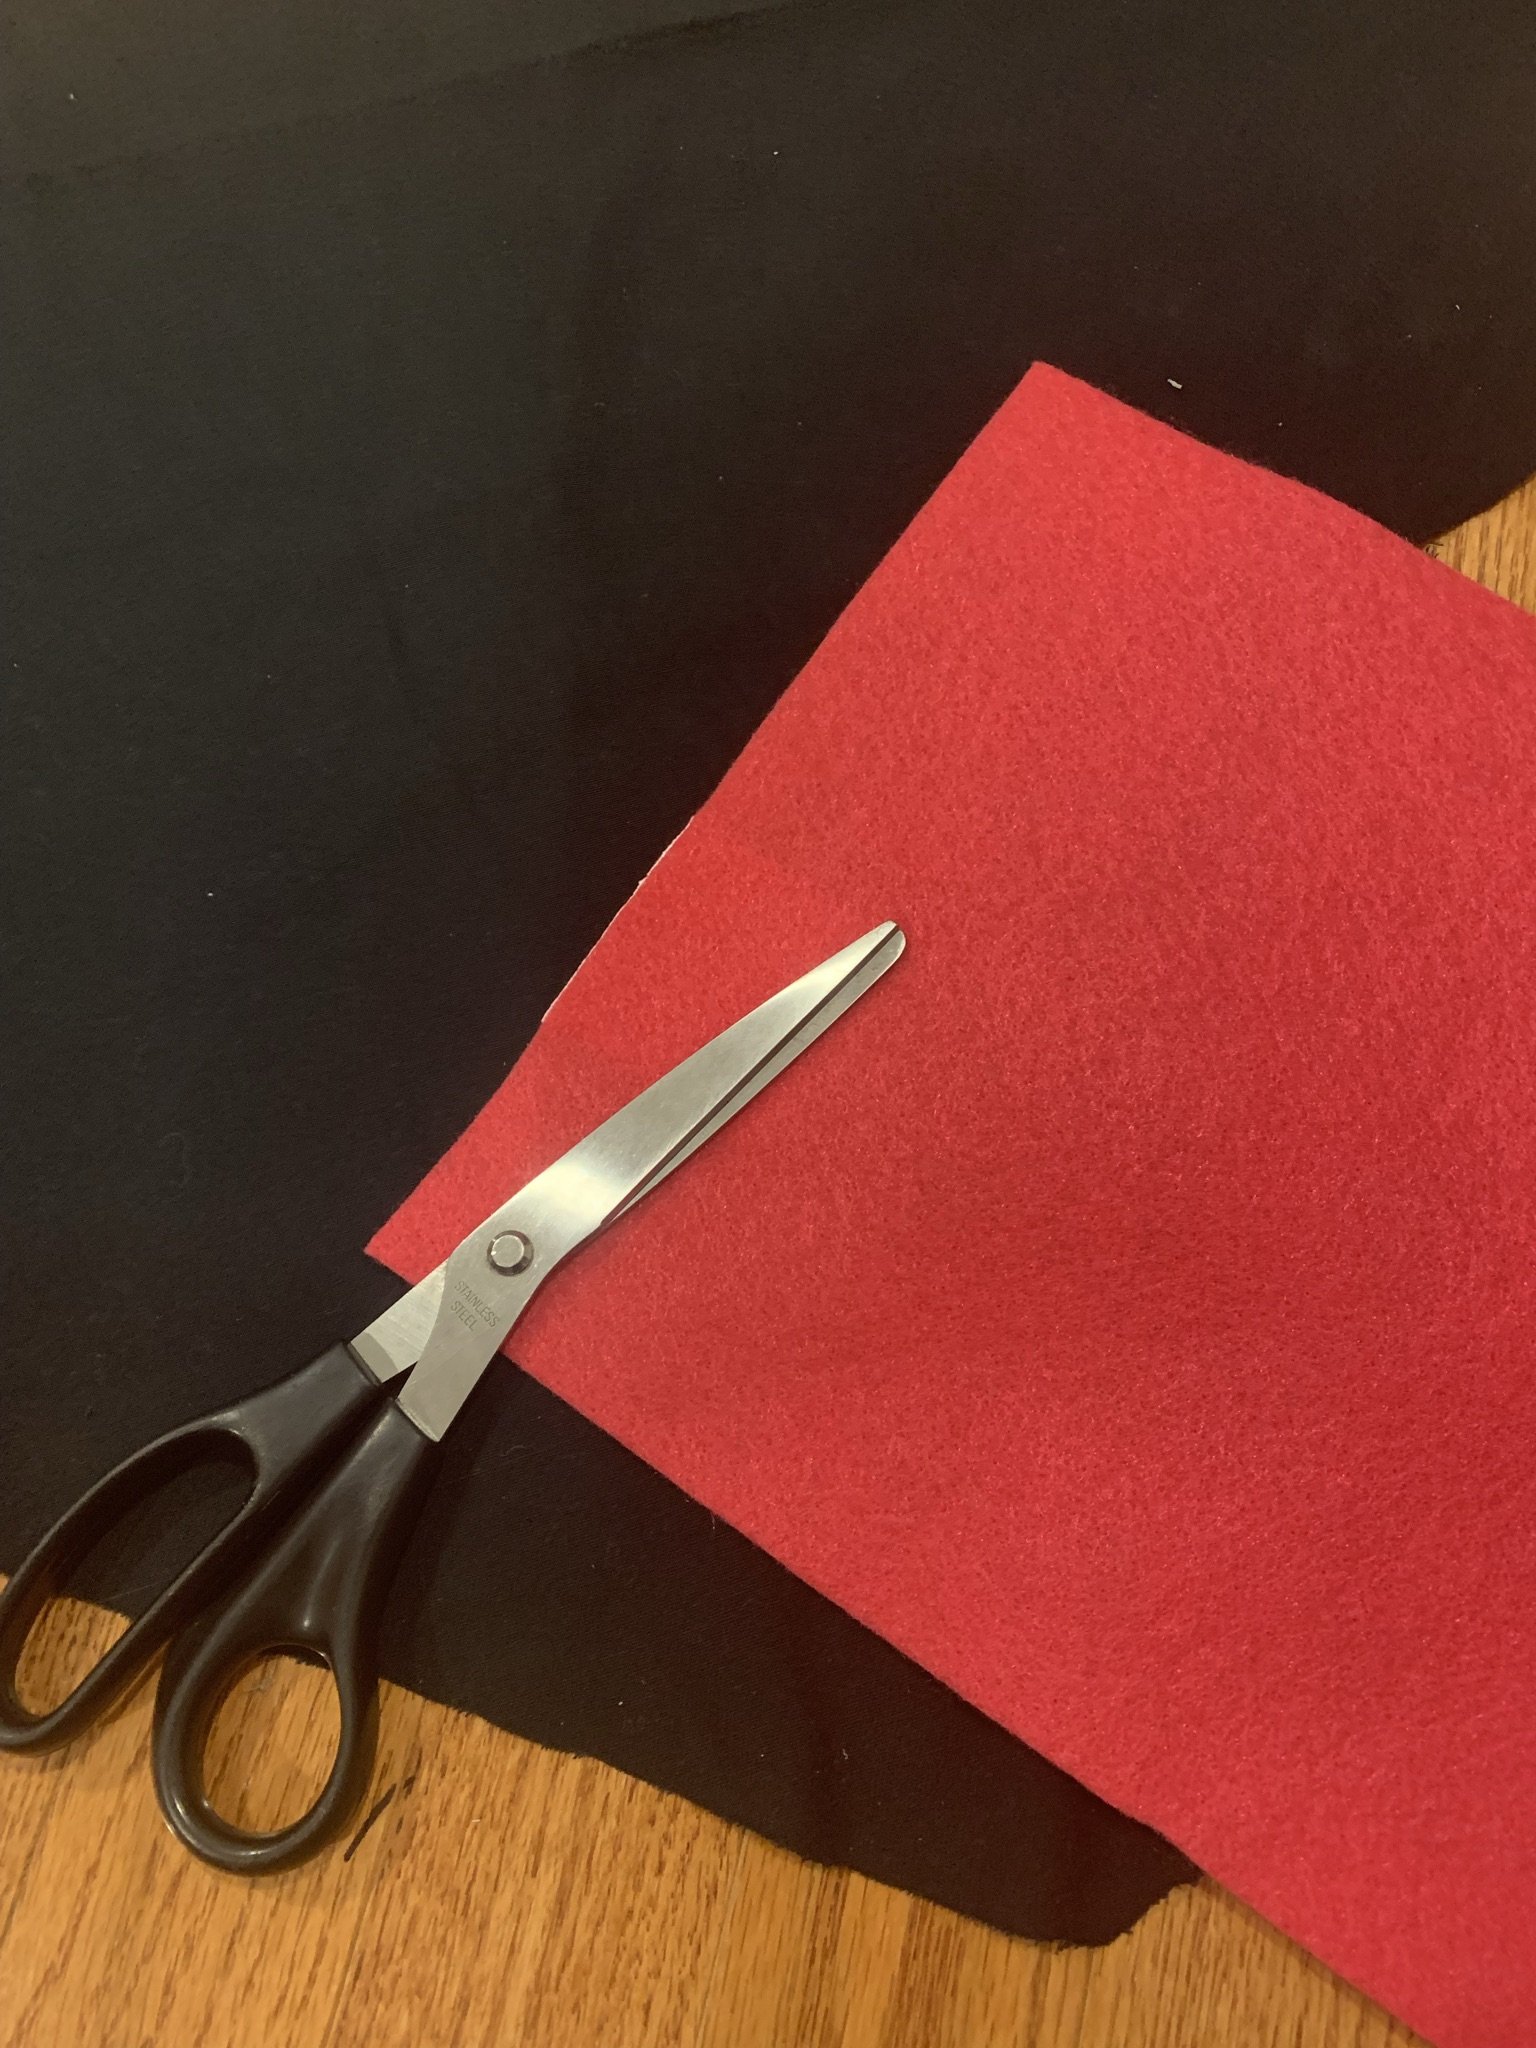
I started with some plain black fabric and measured from one of my daughters fingers to the next. With that measurement I cut the wings to tag length, since they were going to be attached to her fingers.
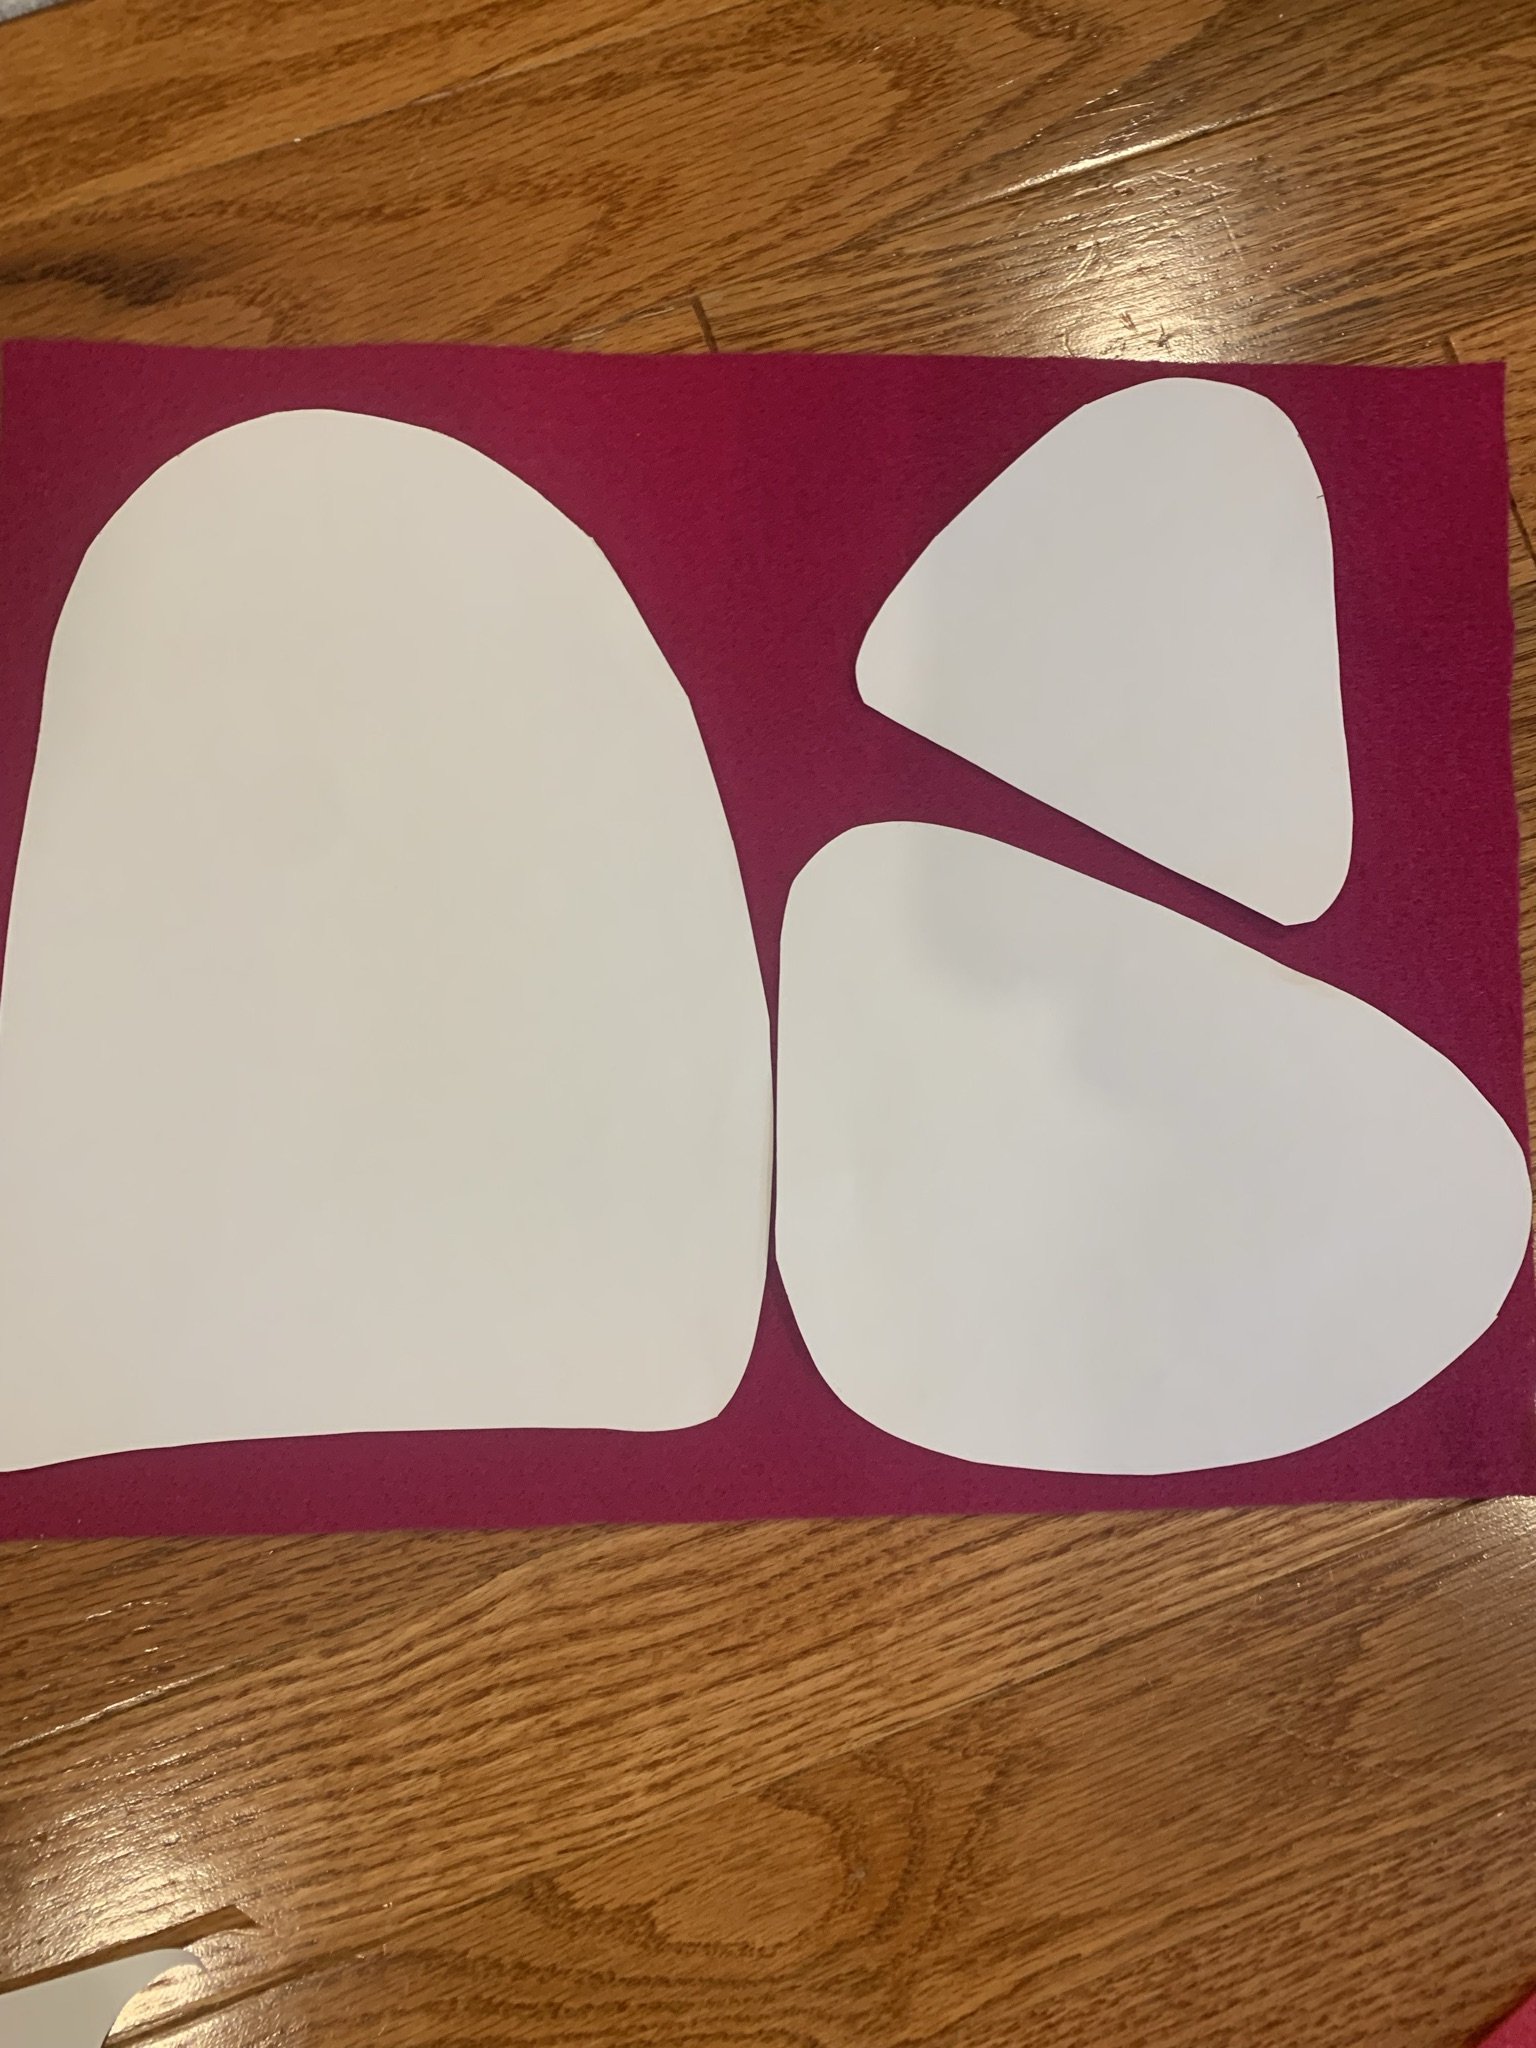
Then, I cut a template for the colors/shapes I wanted on the wings
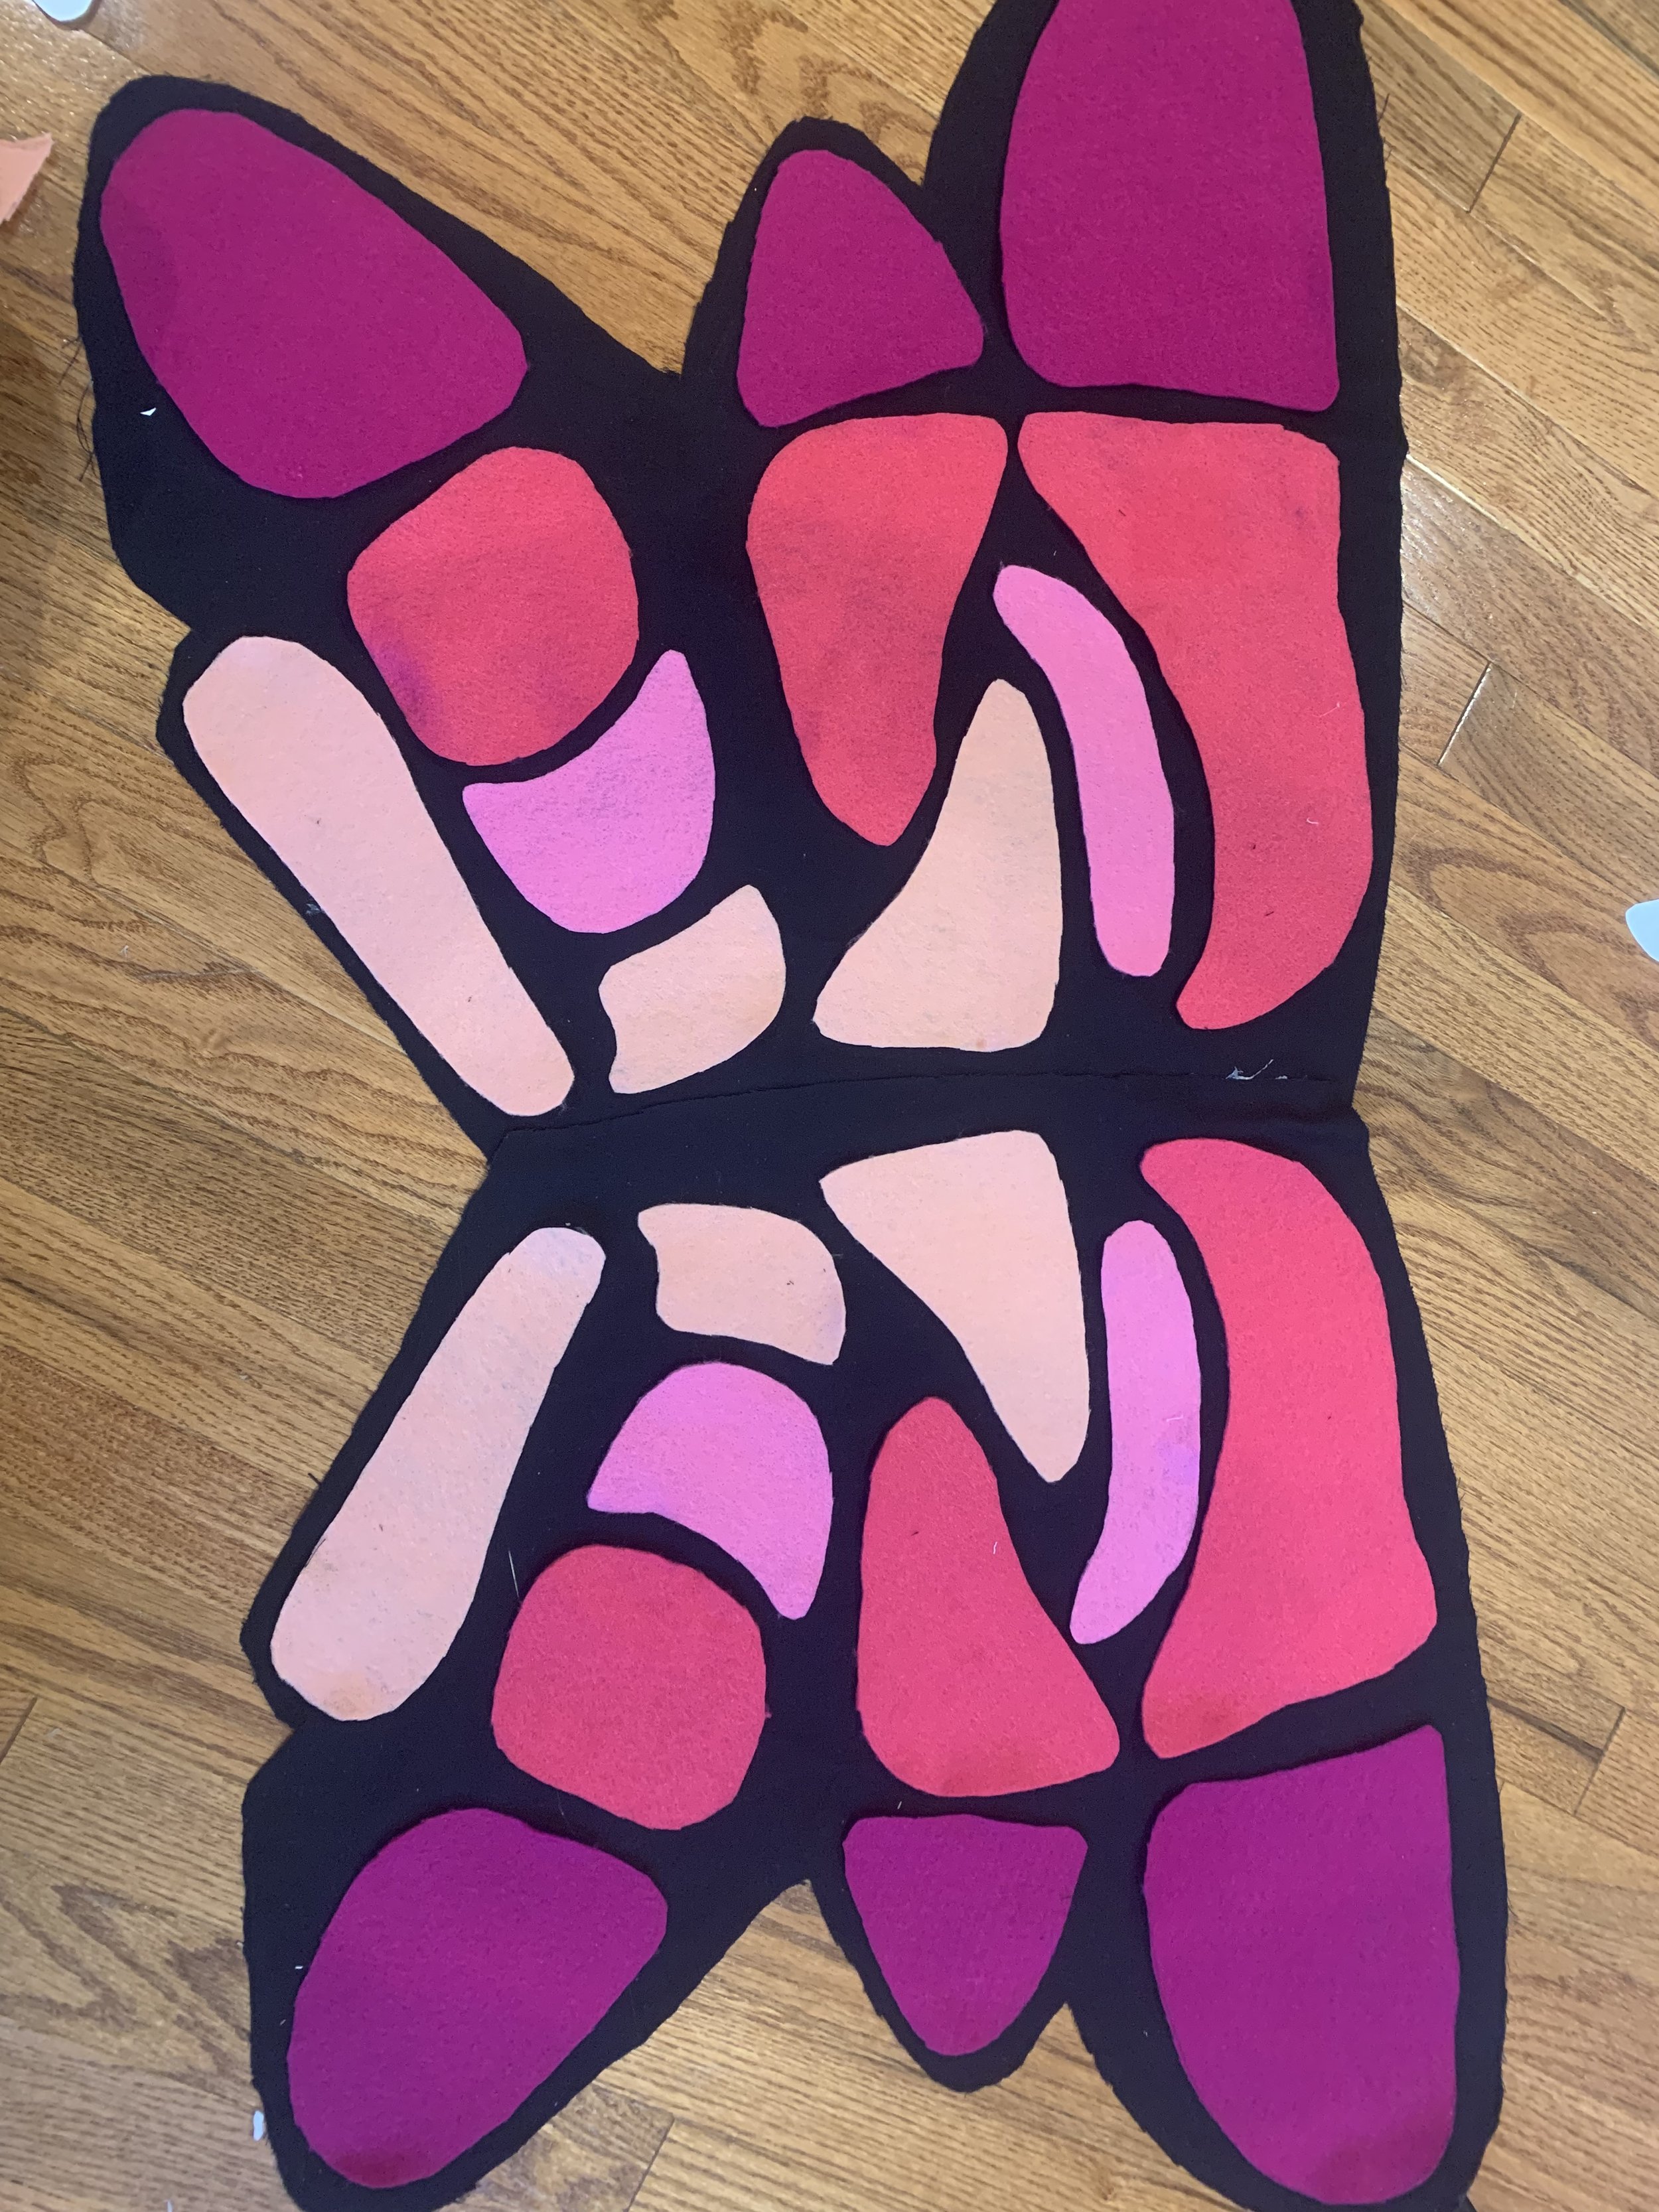
Once I had my shapes cut out of the colored felt my daughter picked, I laid them on the black wings and glued them one by one
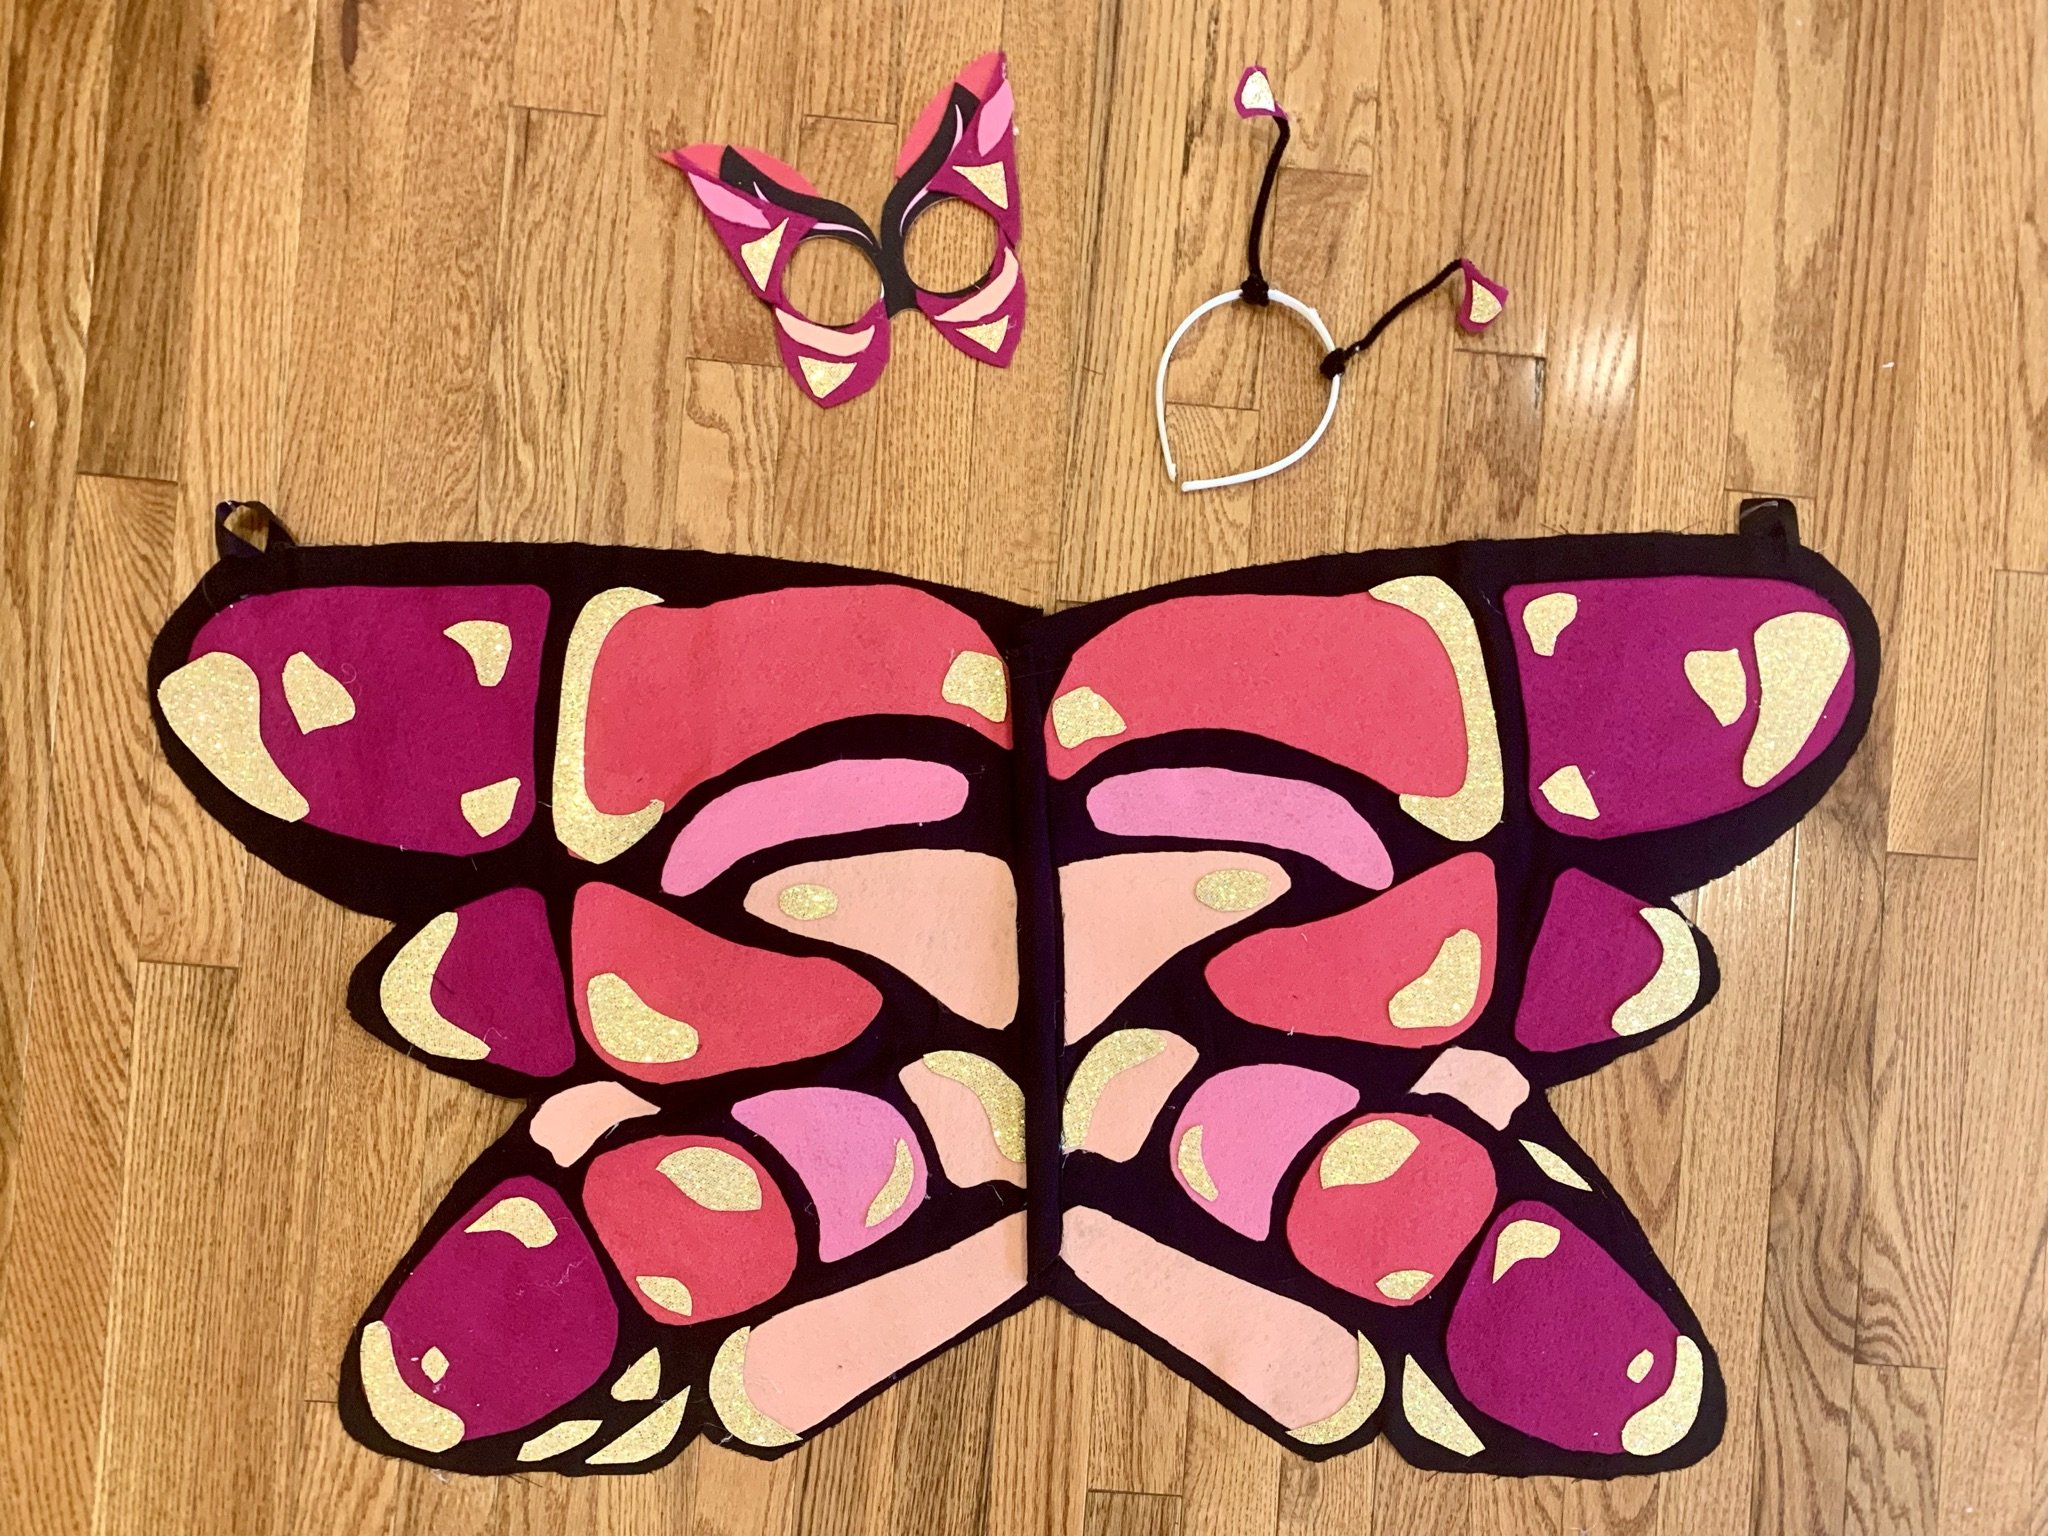
I added some sparkly gold touches to each shape for some pop! Then made the mask just like the swan. For the antenna I added pipe cleaners to a headband we had and added some matching felt colors.
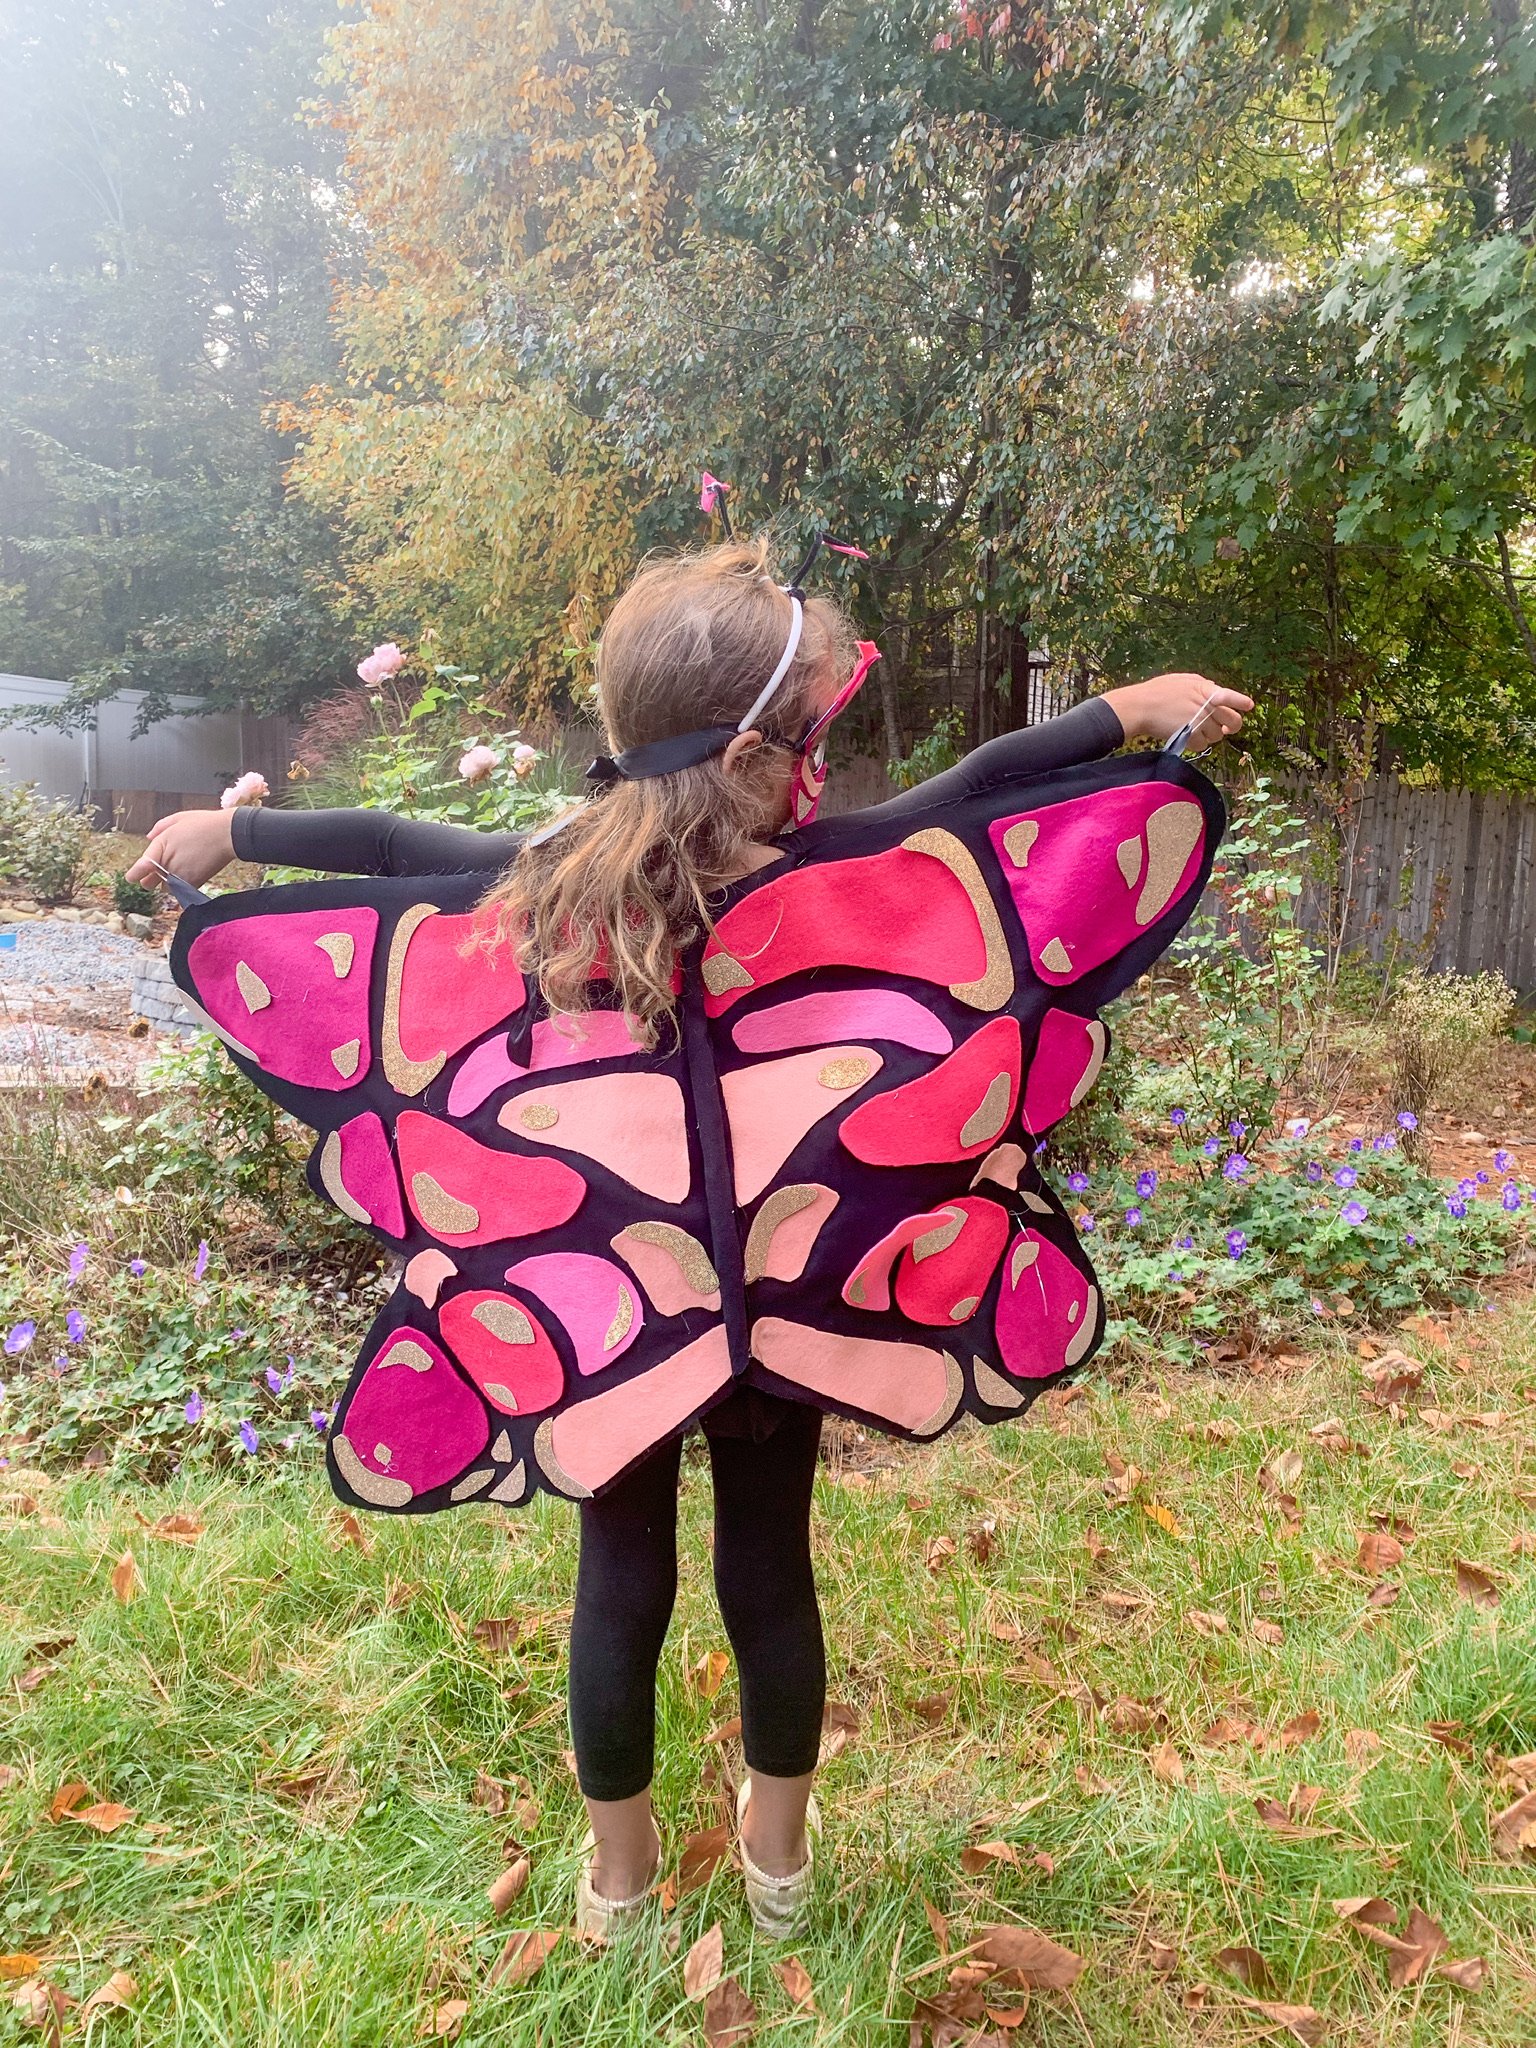
To attach the wings to her fingers I glued a small
loop of black ribbon to each side and looped it over her middle finger

Next up was the Panda man! His was super simple. I cut a piece of white batten that I had on hand into a long oval and glued it to a black sweatshirt he was about to outgrow. Paired it black pants and a diy panda mask. Then I added some ear muffs from dollar tree for the panda ears. Glued some pink fabric in the middle of each ear and he was done! Easy peasy

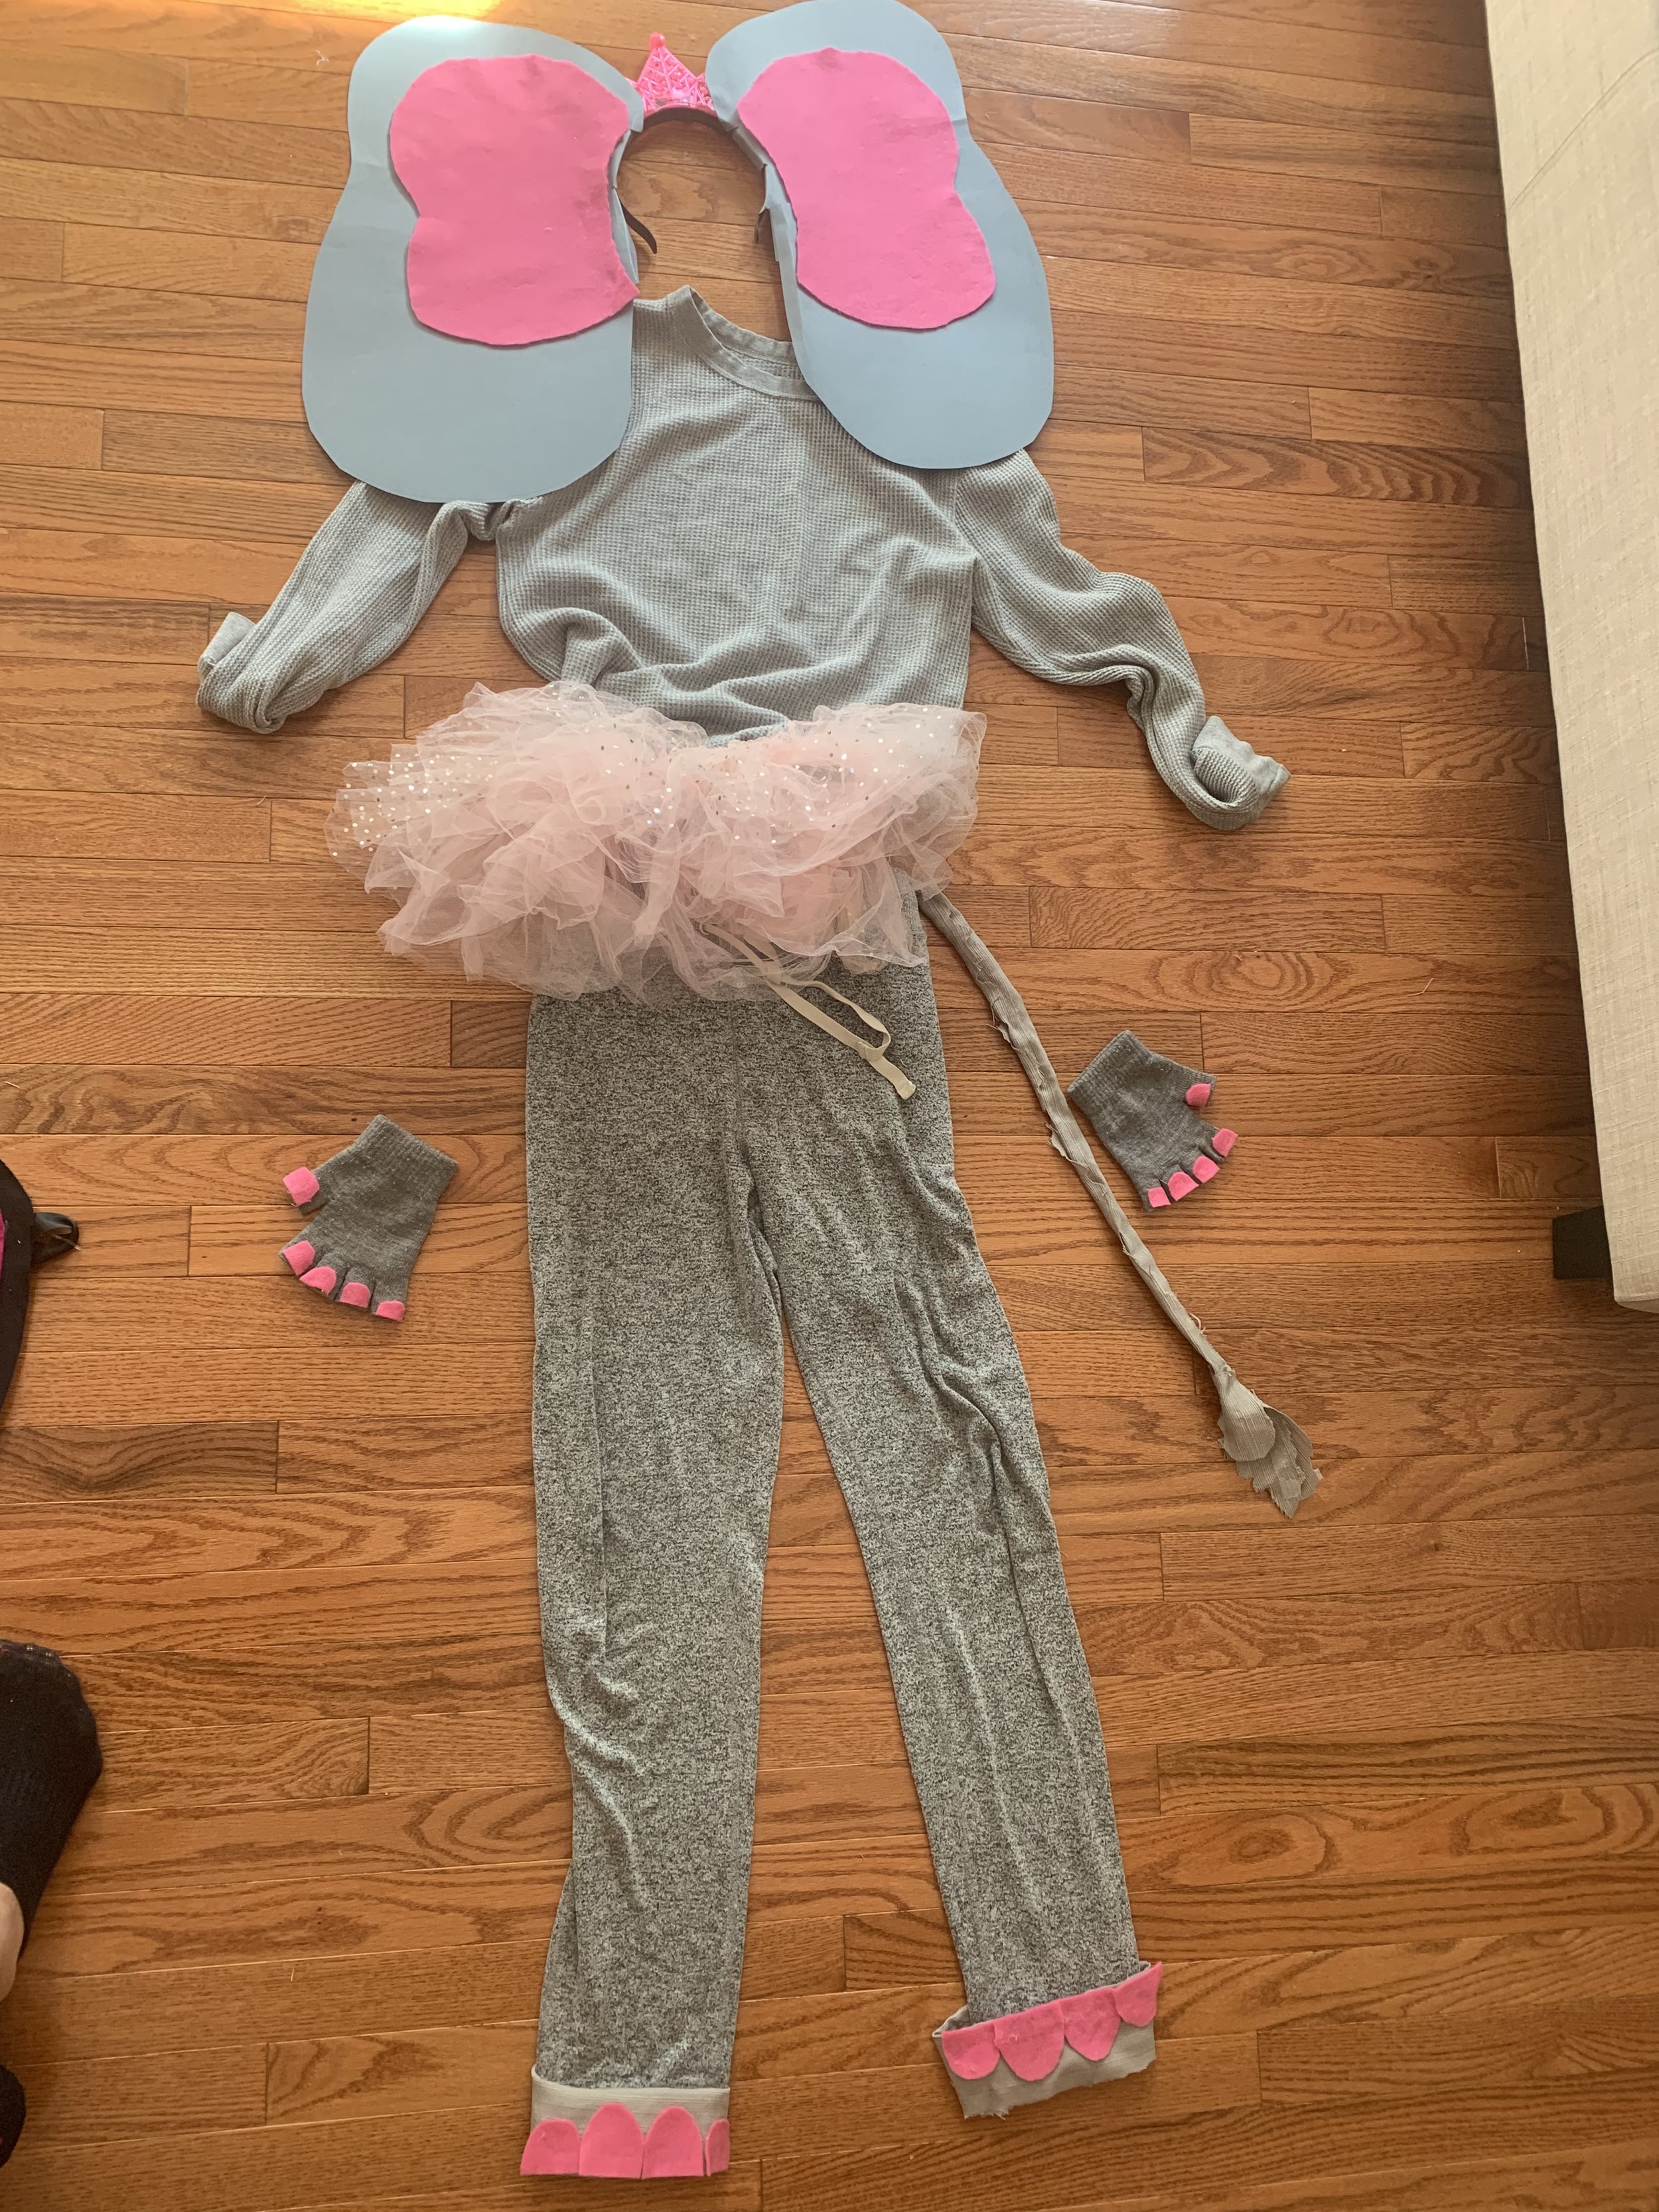
For my mama elephant I glued gray cardstock onto a headband in the shape of giant ears. I cut fingers off some gray gloves we had and wore a gray shirt and gray joggers, with a little pink tutu (my daughters) and attached a little gray tail made of a scrap of fabric. Done and done

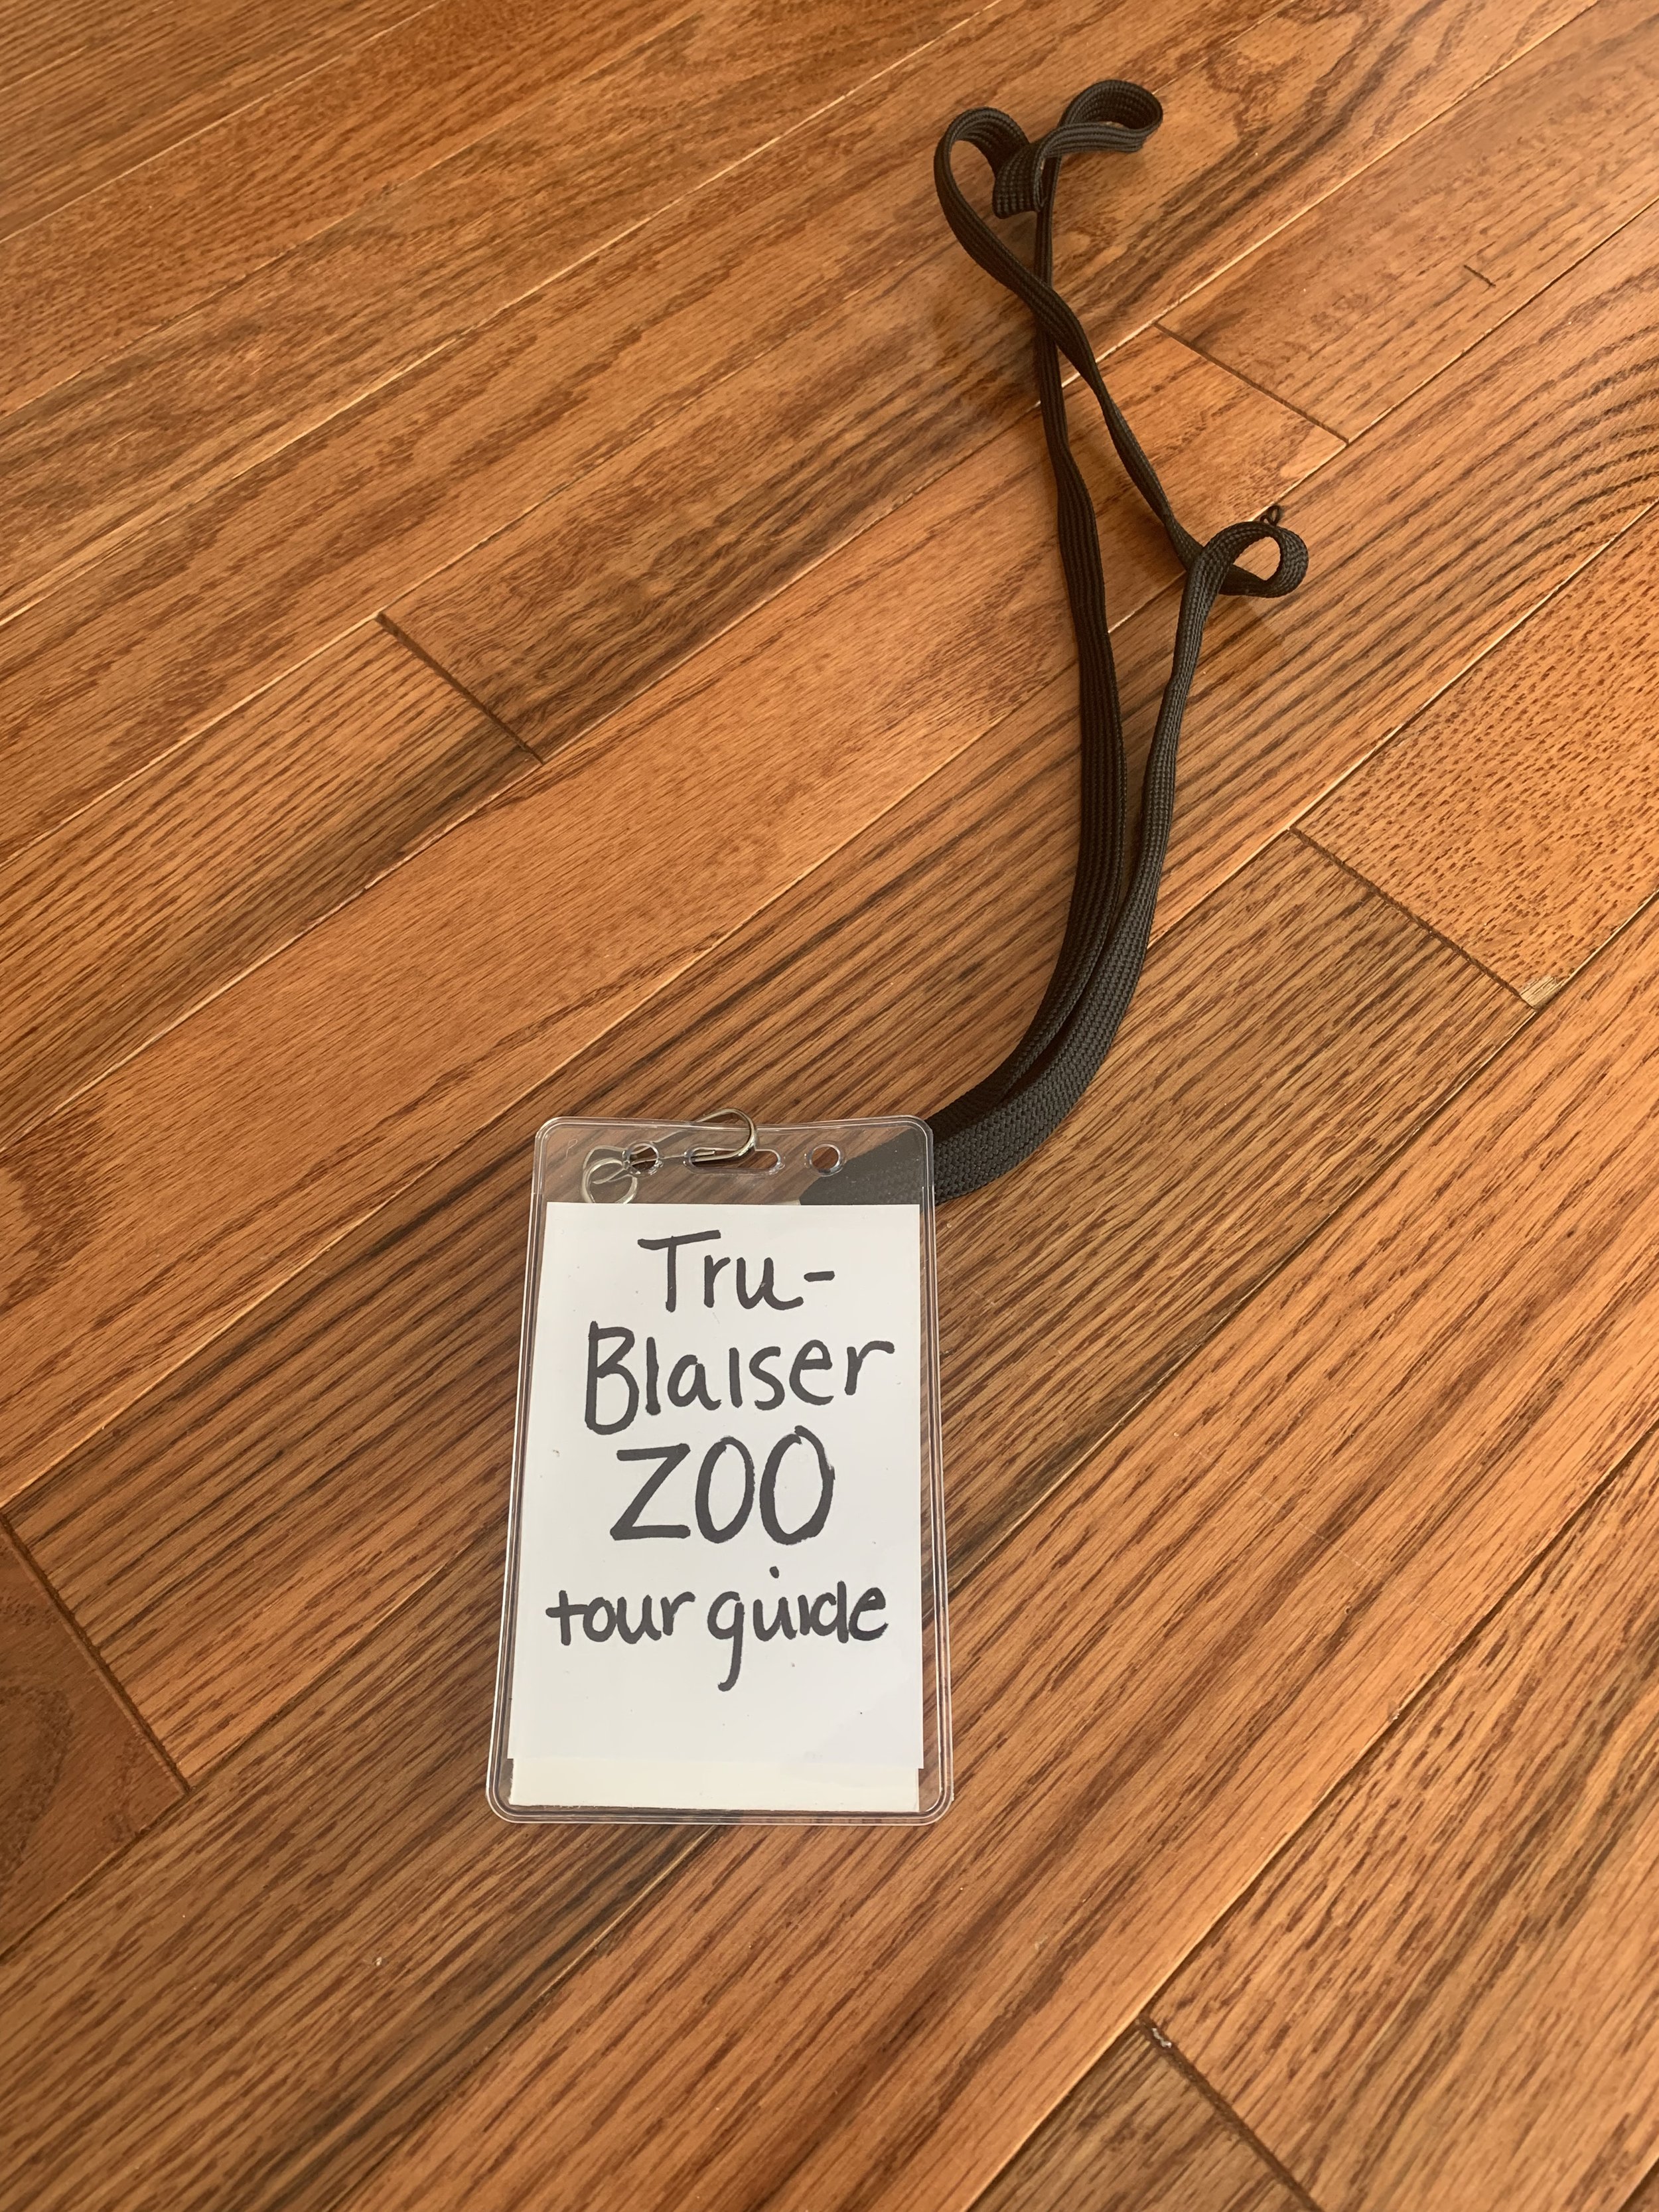
Last one in our crew was the zookeeper! All of it was items my husband already owned, a khaki vest, khaki pants, a safari hat, brown boots etc. I did make him a pair of binoculars and a zookeeper pass
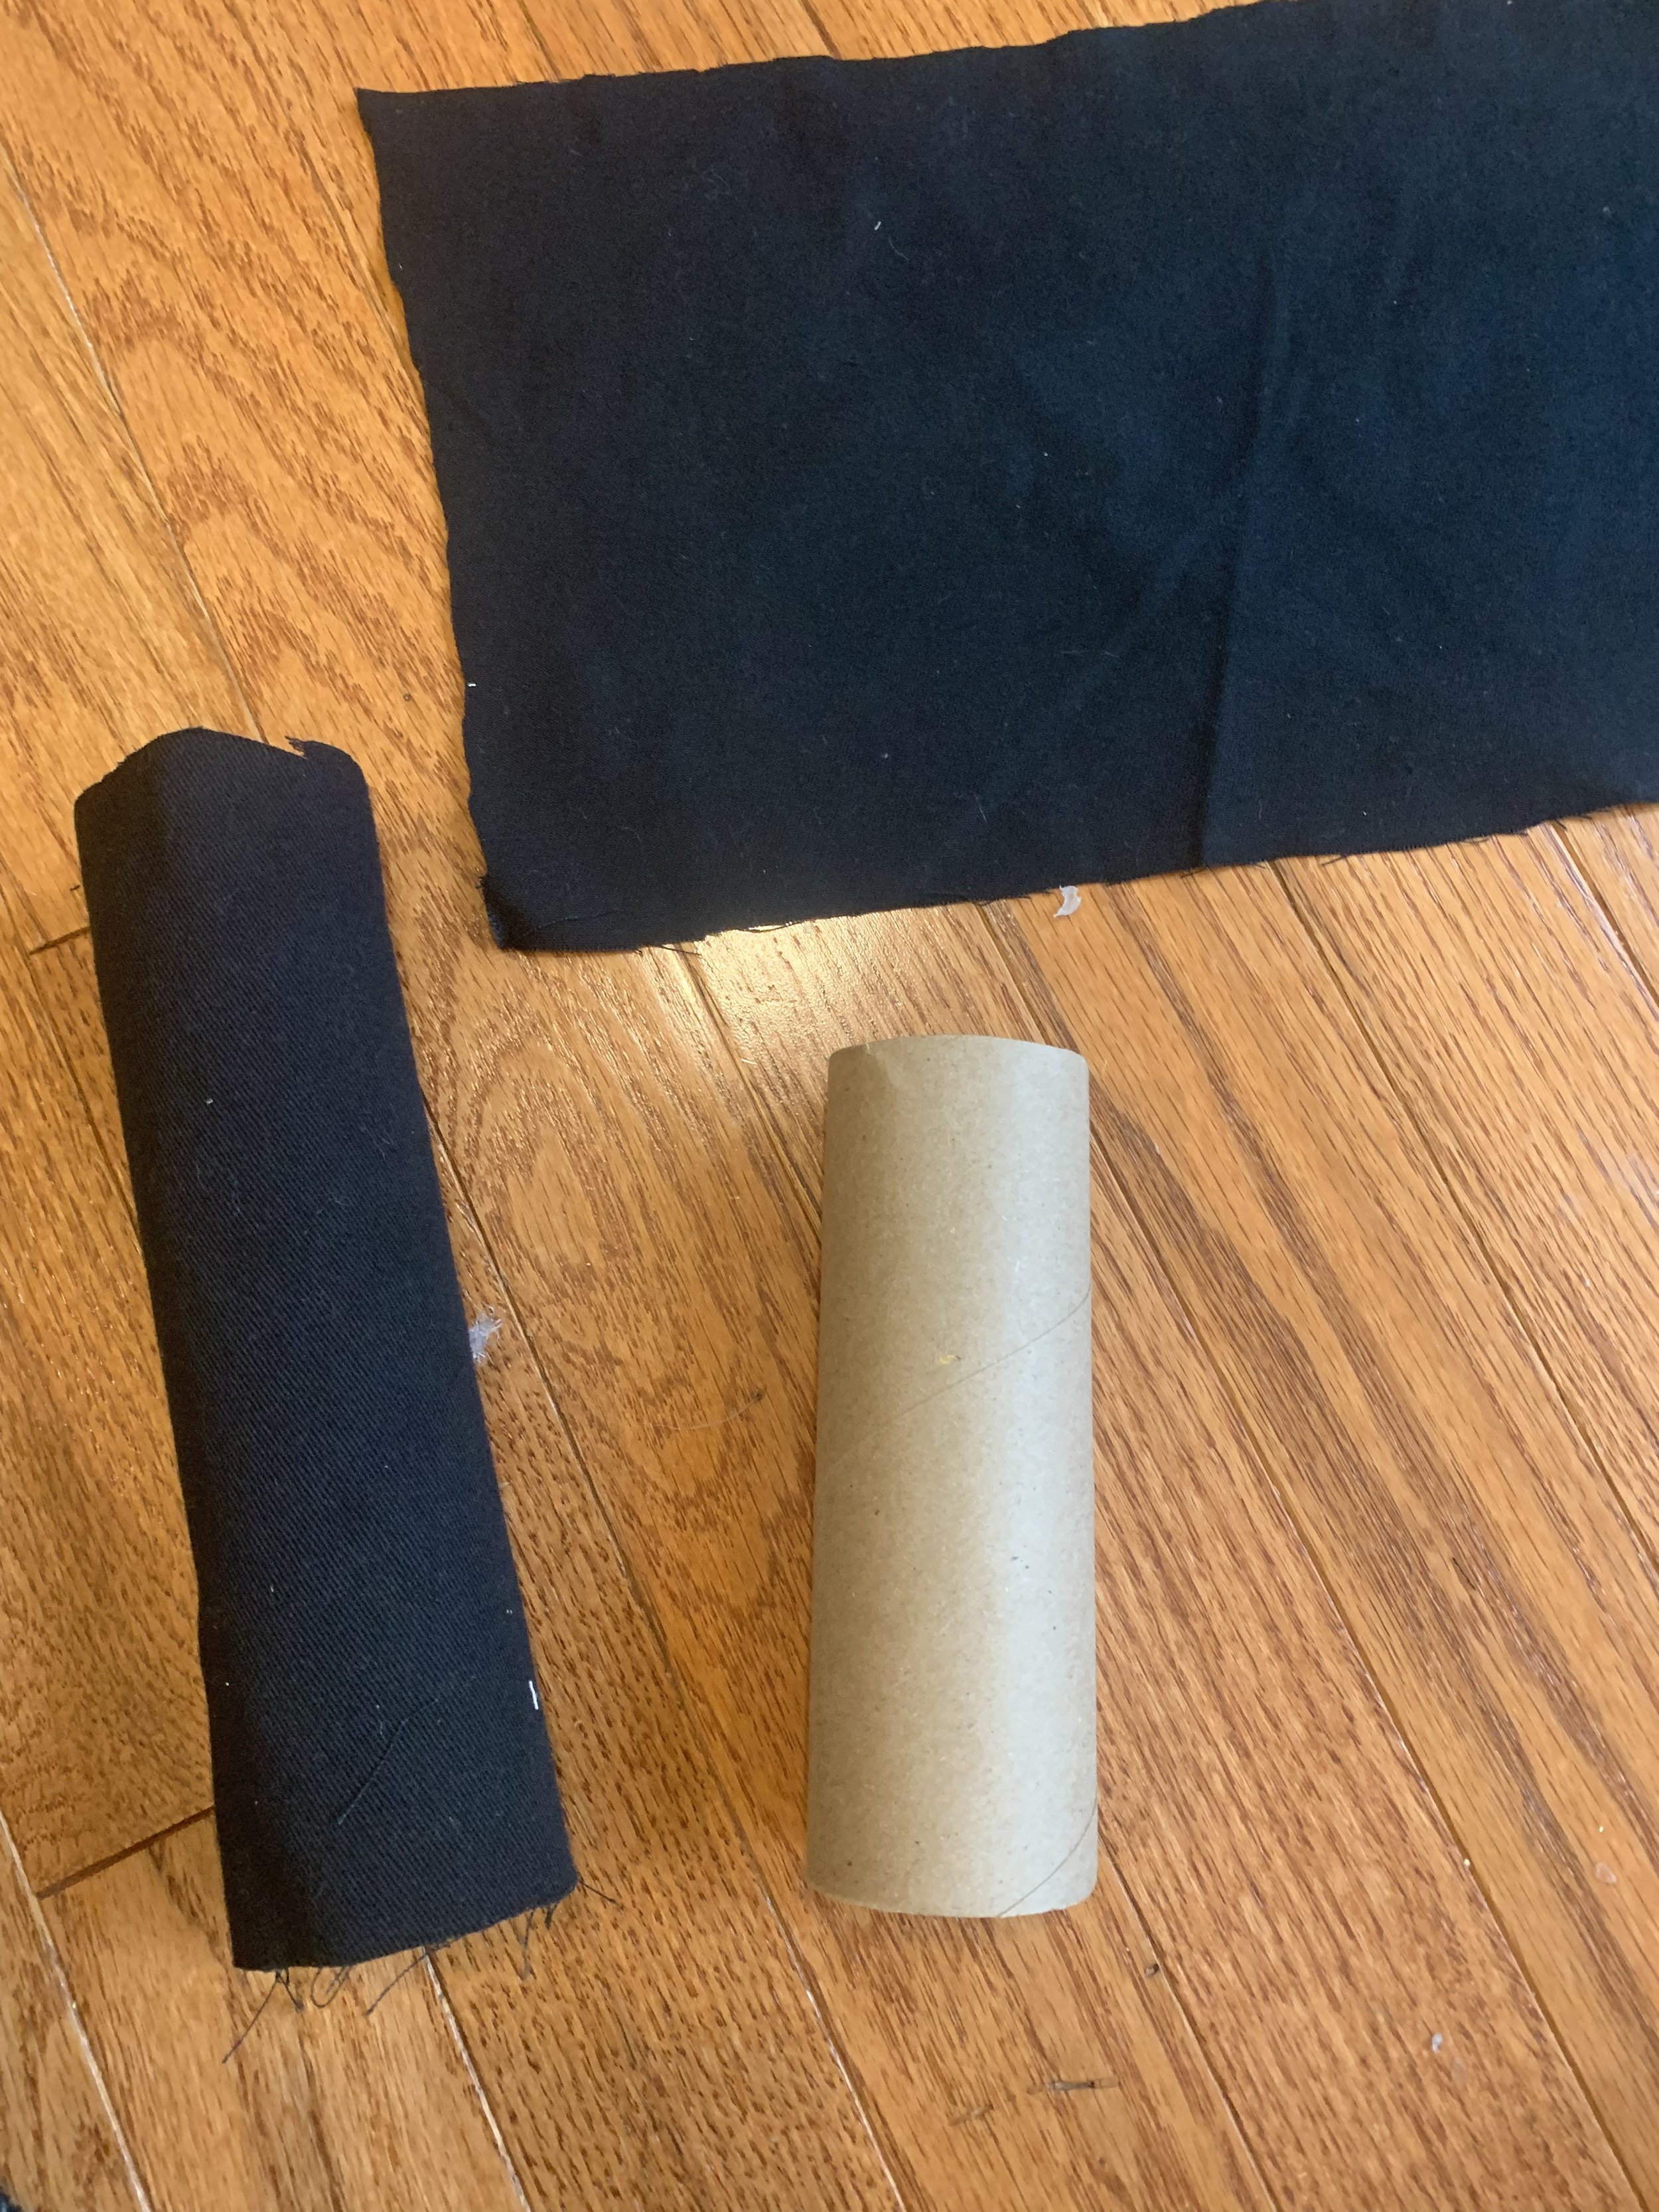
I cut a paper towel roll in half, glued on black fabric leftover from the butterfly project then glued the 2 rolls together and added ribbon for the neck strap

It totally got the point across and cost zero dollars!
It was a super fun night for us and the kids and I had a blast diying all the costumes at the last minute! Here’s some more pics of us enjoying the fun!


Lemonade stand fun!
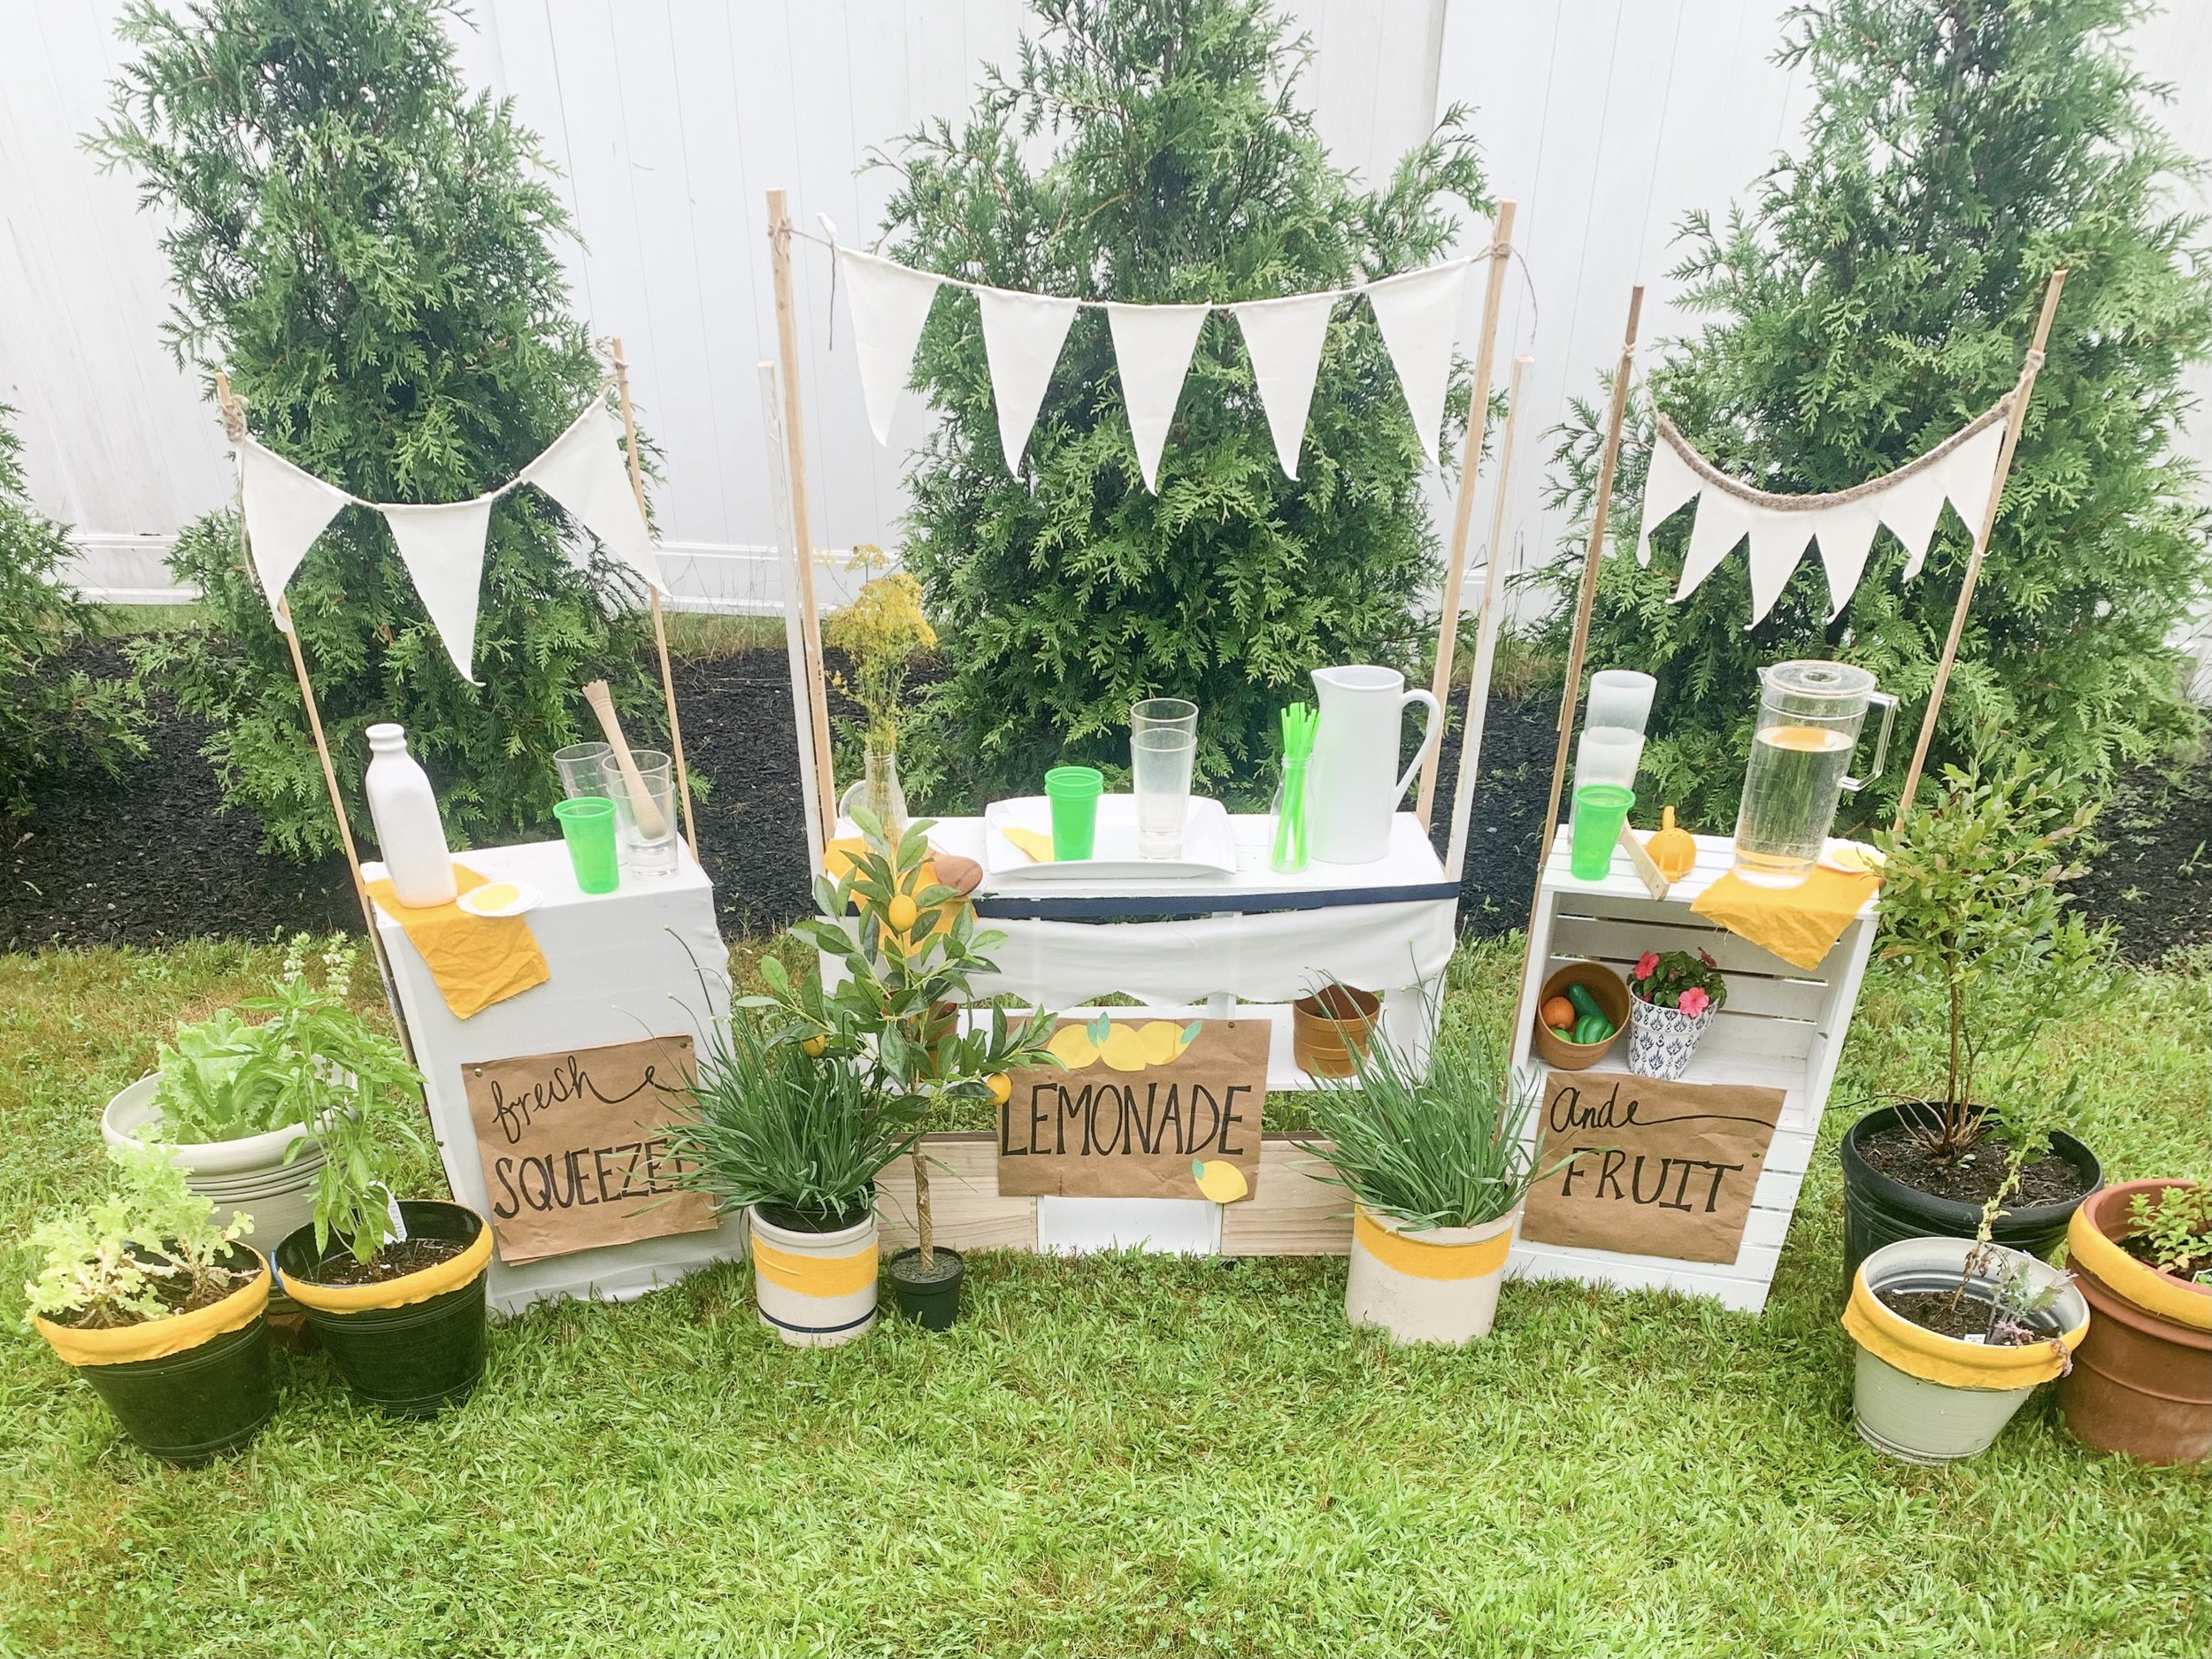
Its been a gloomy, rainy summer so I’m always trying to think of fun activities to spruce things up for the kids! It was an overcast day when we started up our lemonade stand- too cold for the beach or pool but too warm to be stuck inside all day so I recycled some items and made a fun stand for the kids.
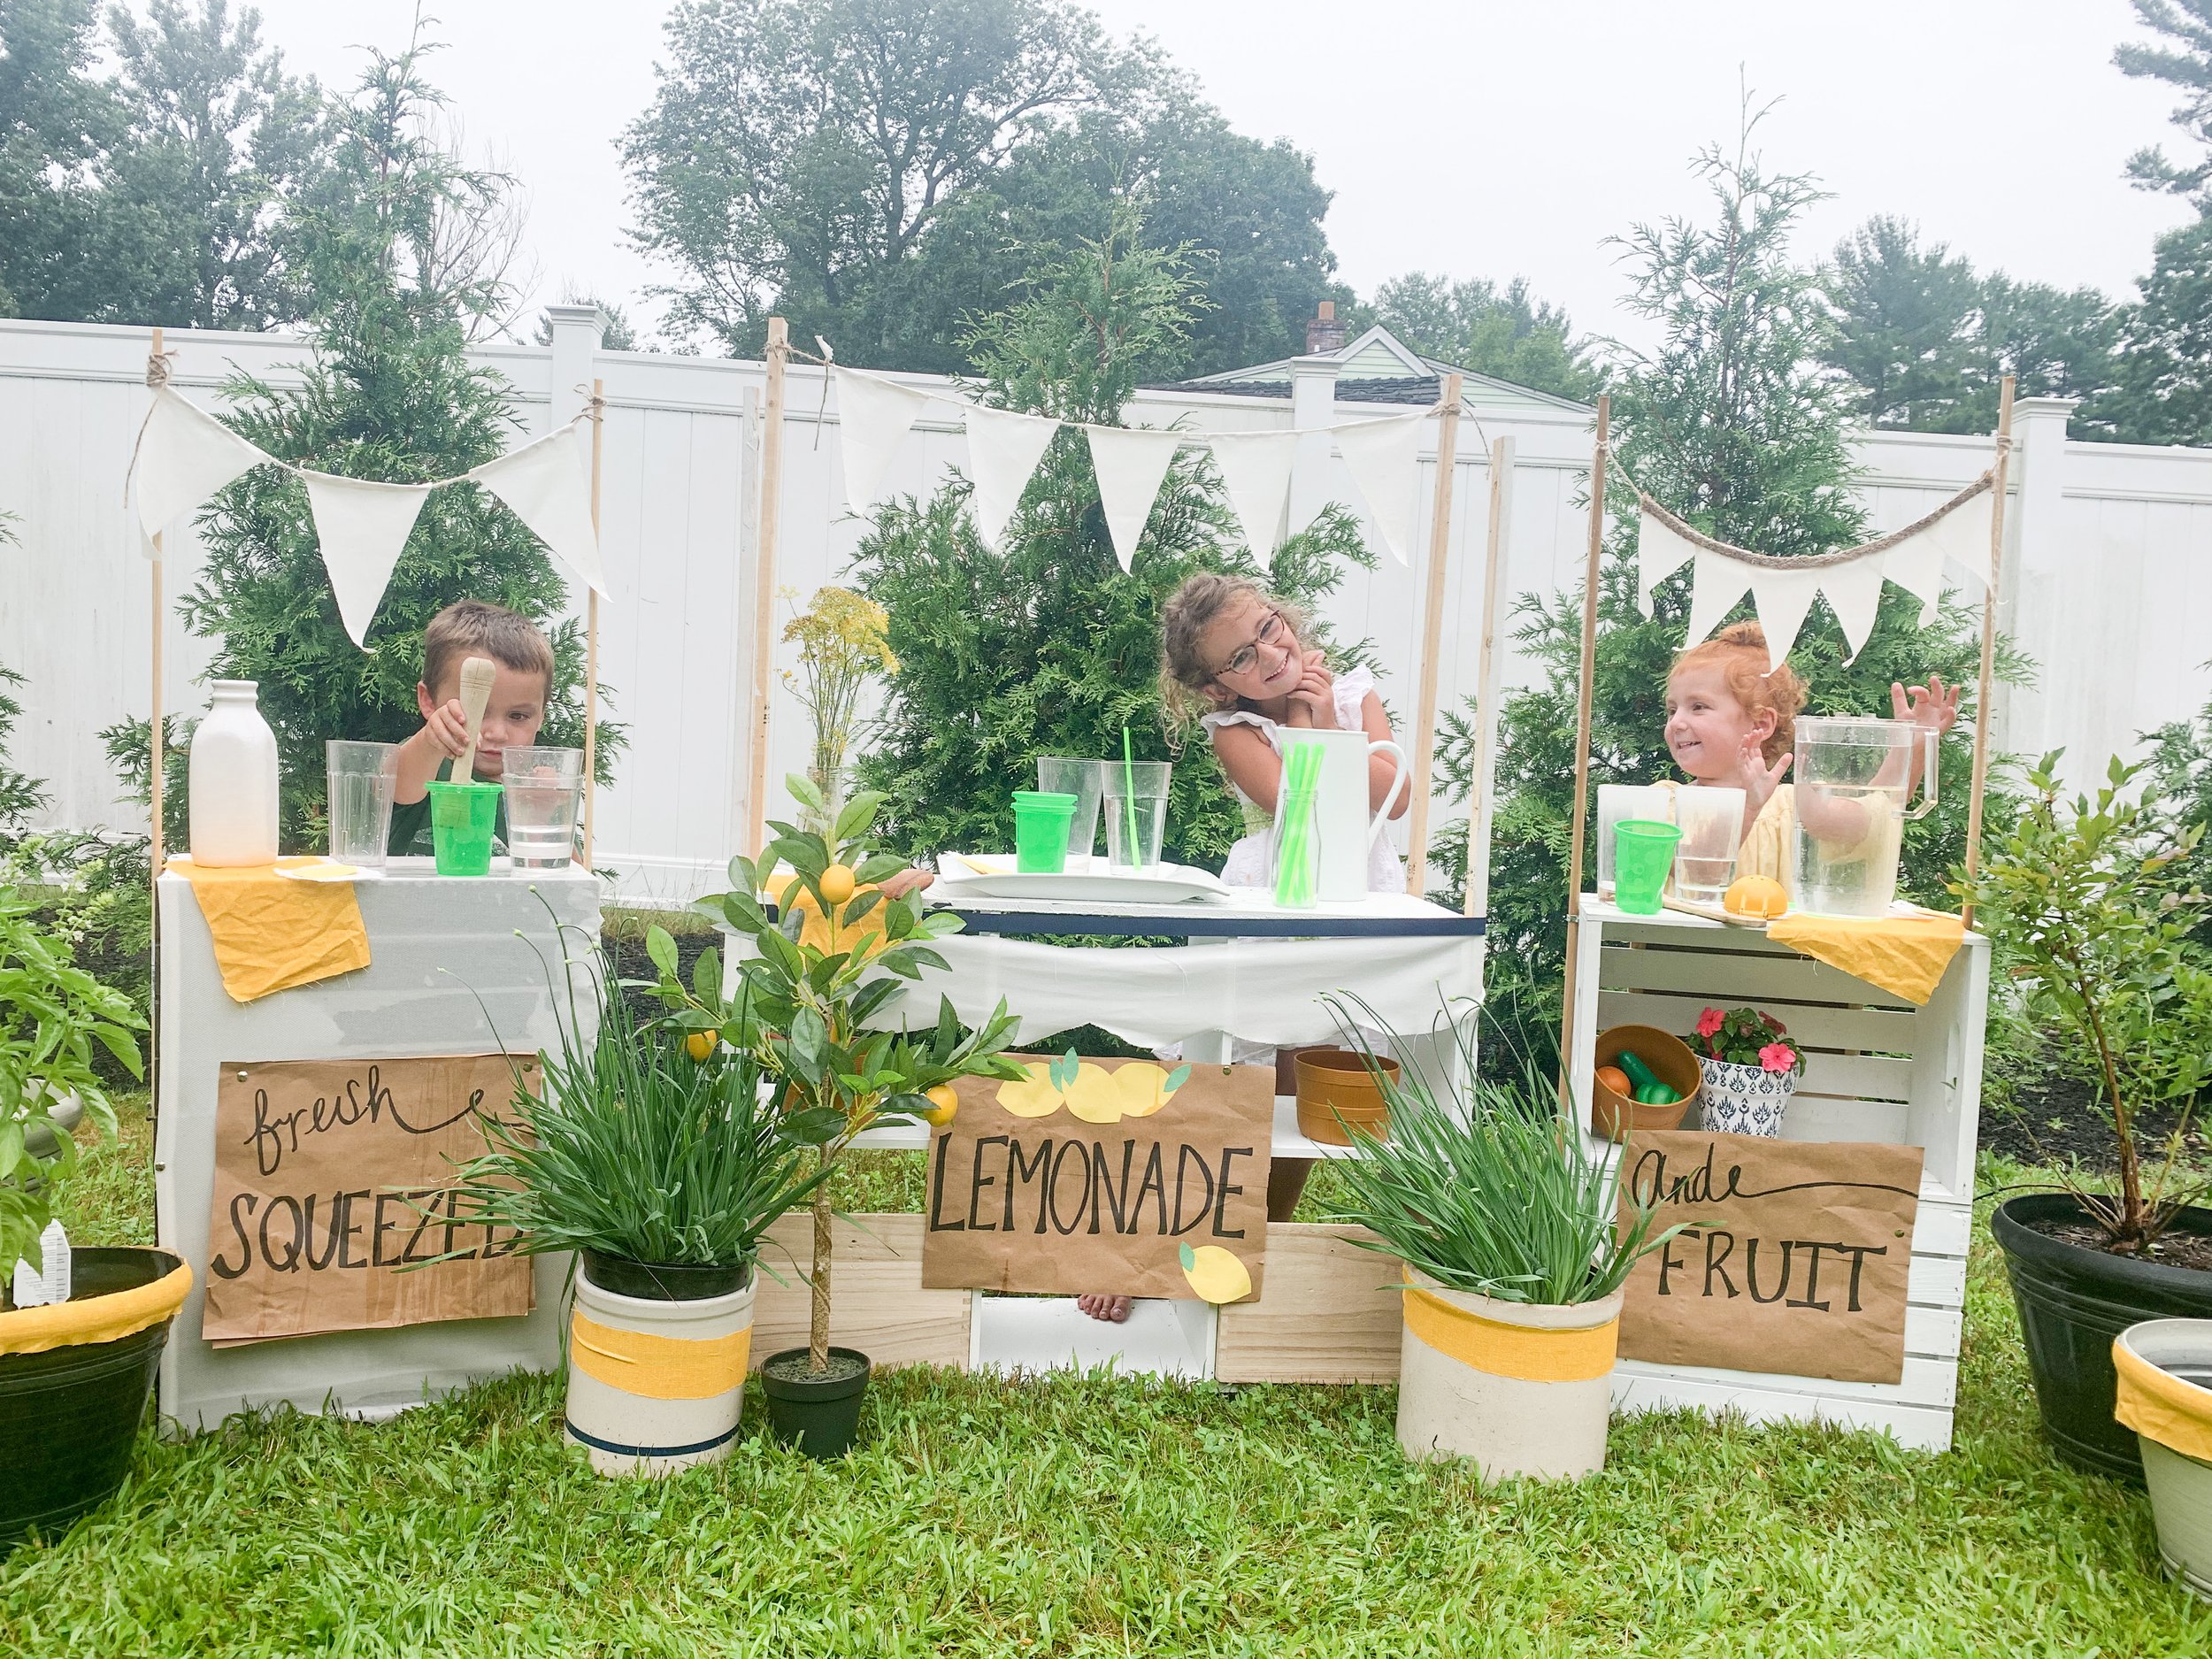
Each kid had their own stand area and they loved it!!

The two smaller stands are wooden crates from Michaels. The one on the right they already had as their “farmers market” but the one on the left needed to match everyone else’s. I covered it in some extra white fabric just tacked on so it would coordinate with the other 2 stands.

All the plants and planters came from our on yard- most of them were set up on our patio area but worked perfect with our lemonade set up!
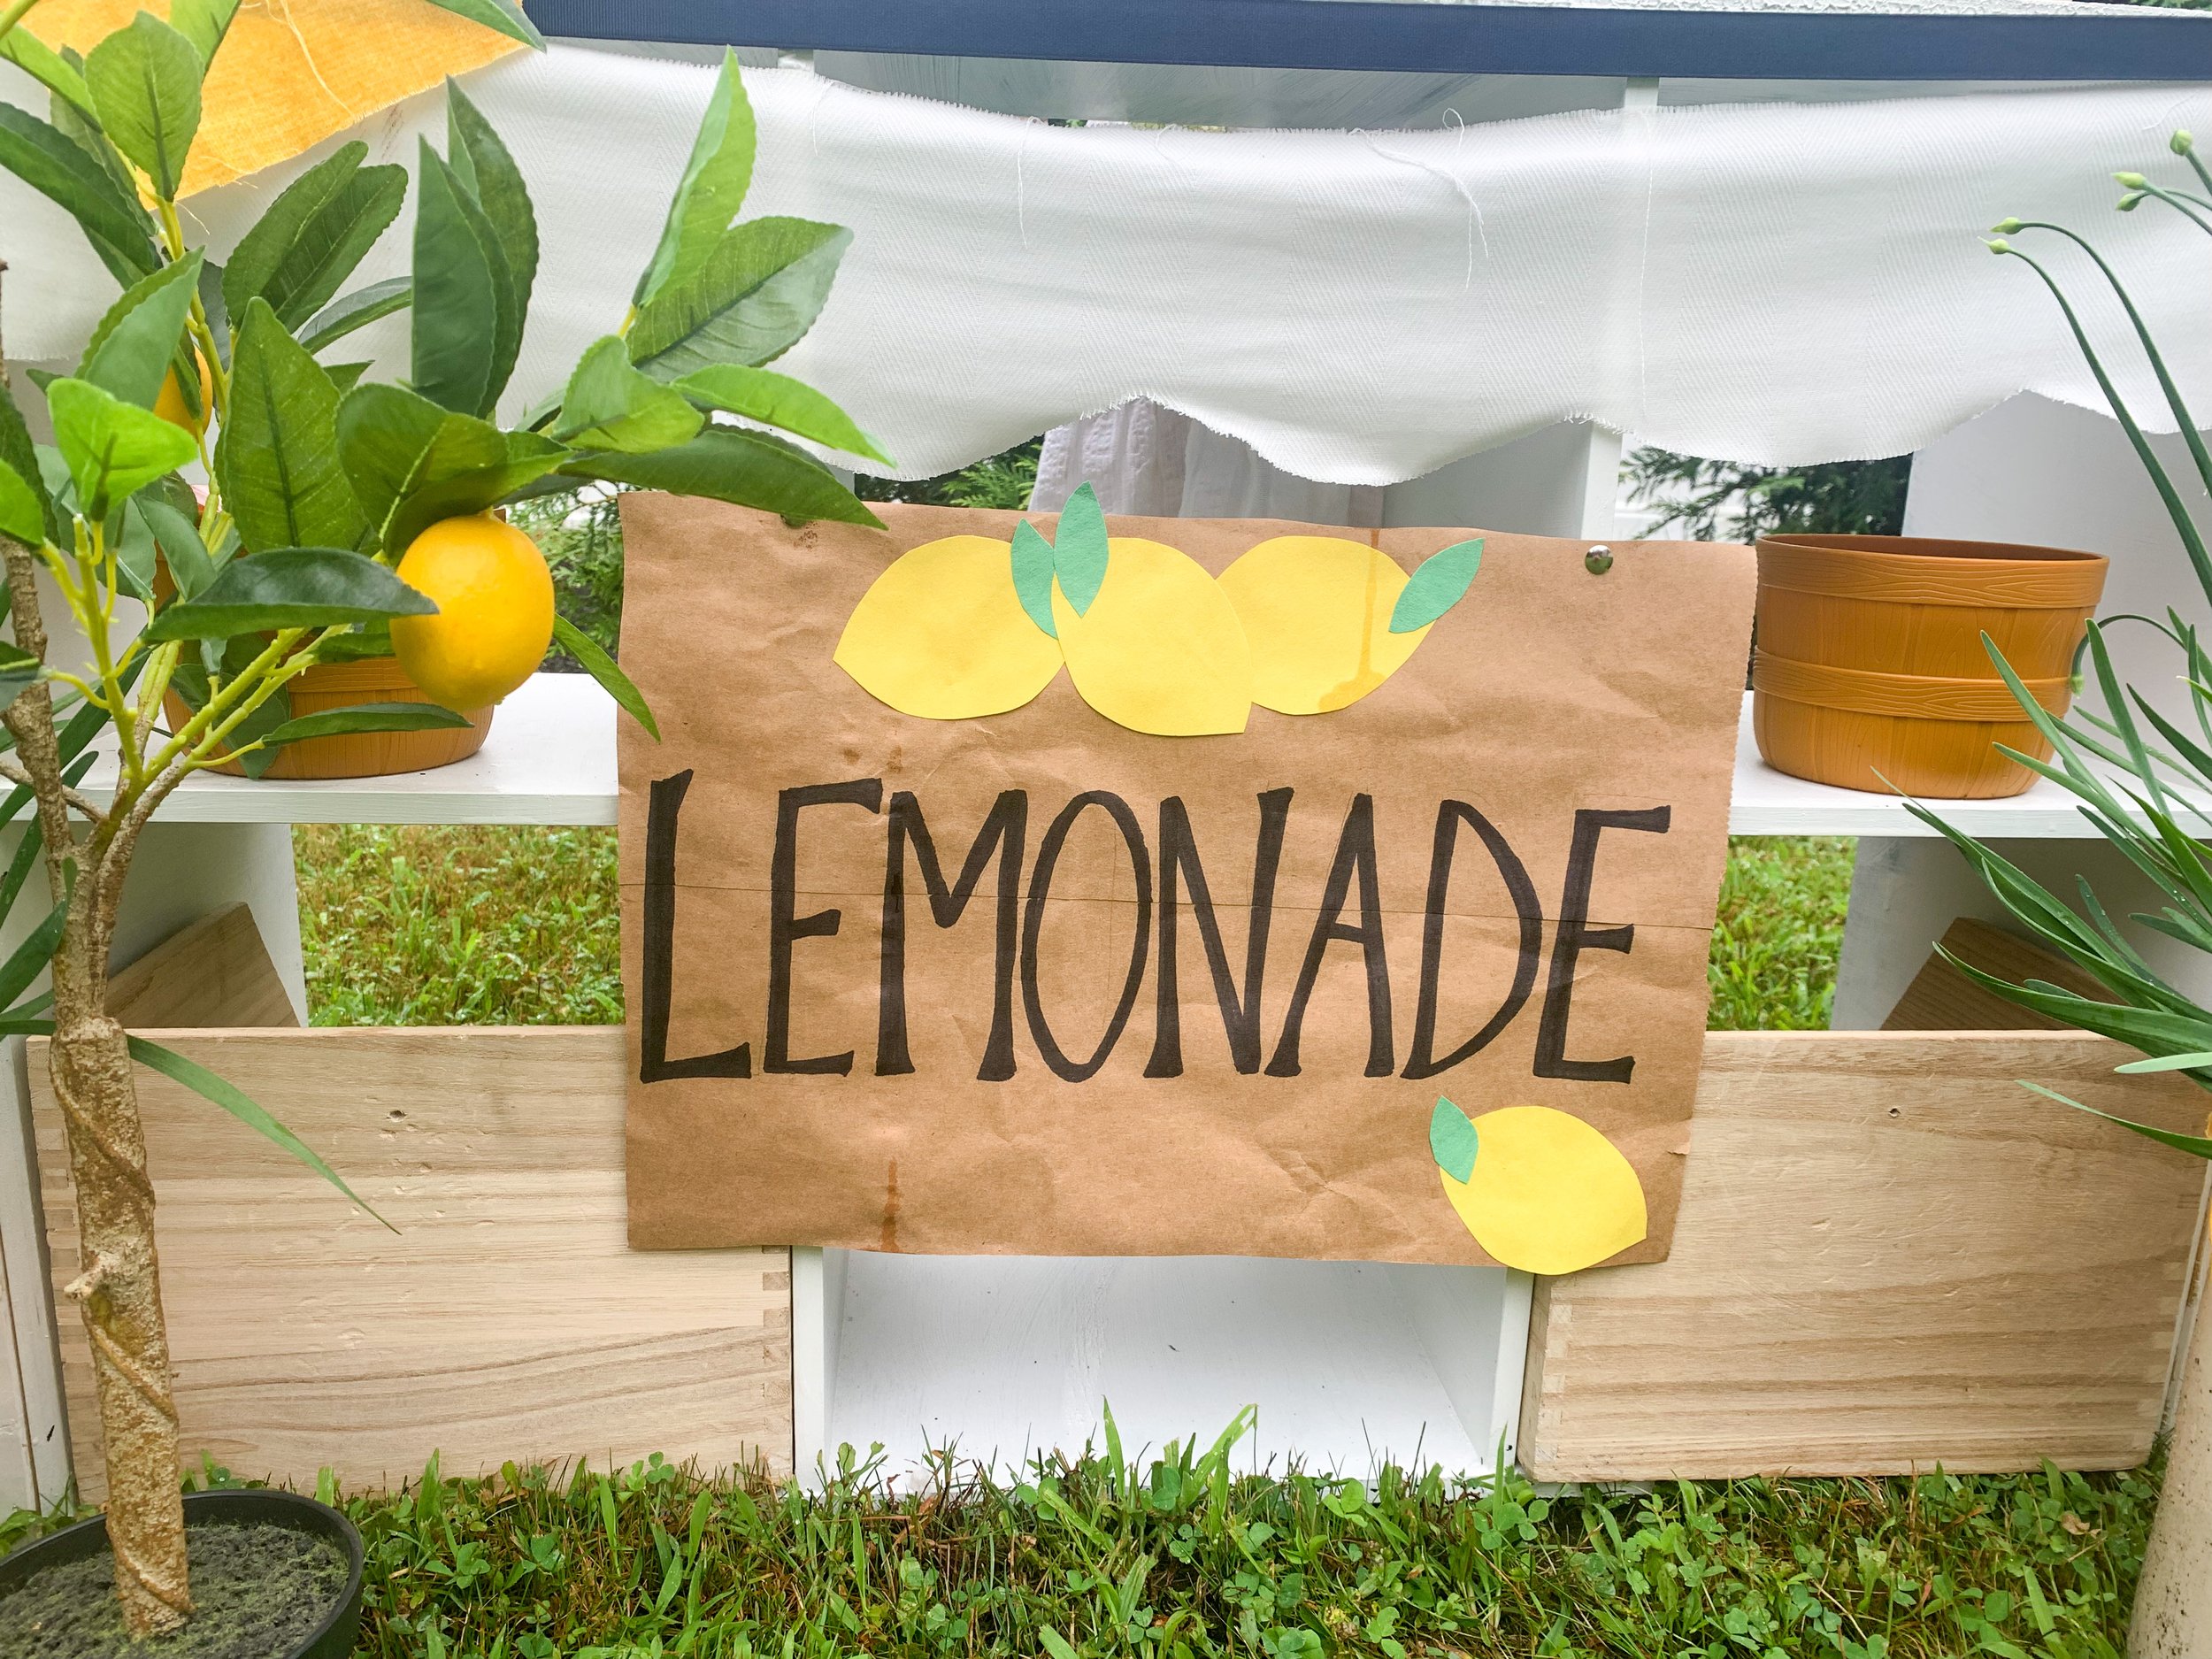
I made the signs for each stand out of old paper grocery bags. They say “fresh squeezed lemonade and fruit”. Super easy and free!
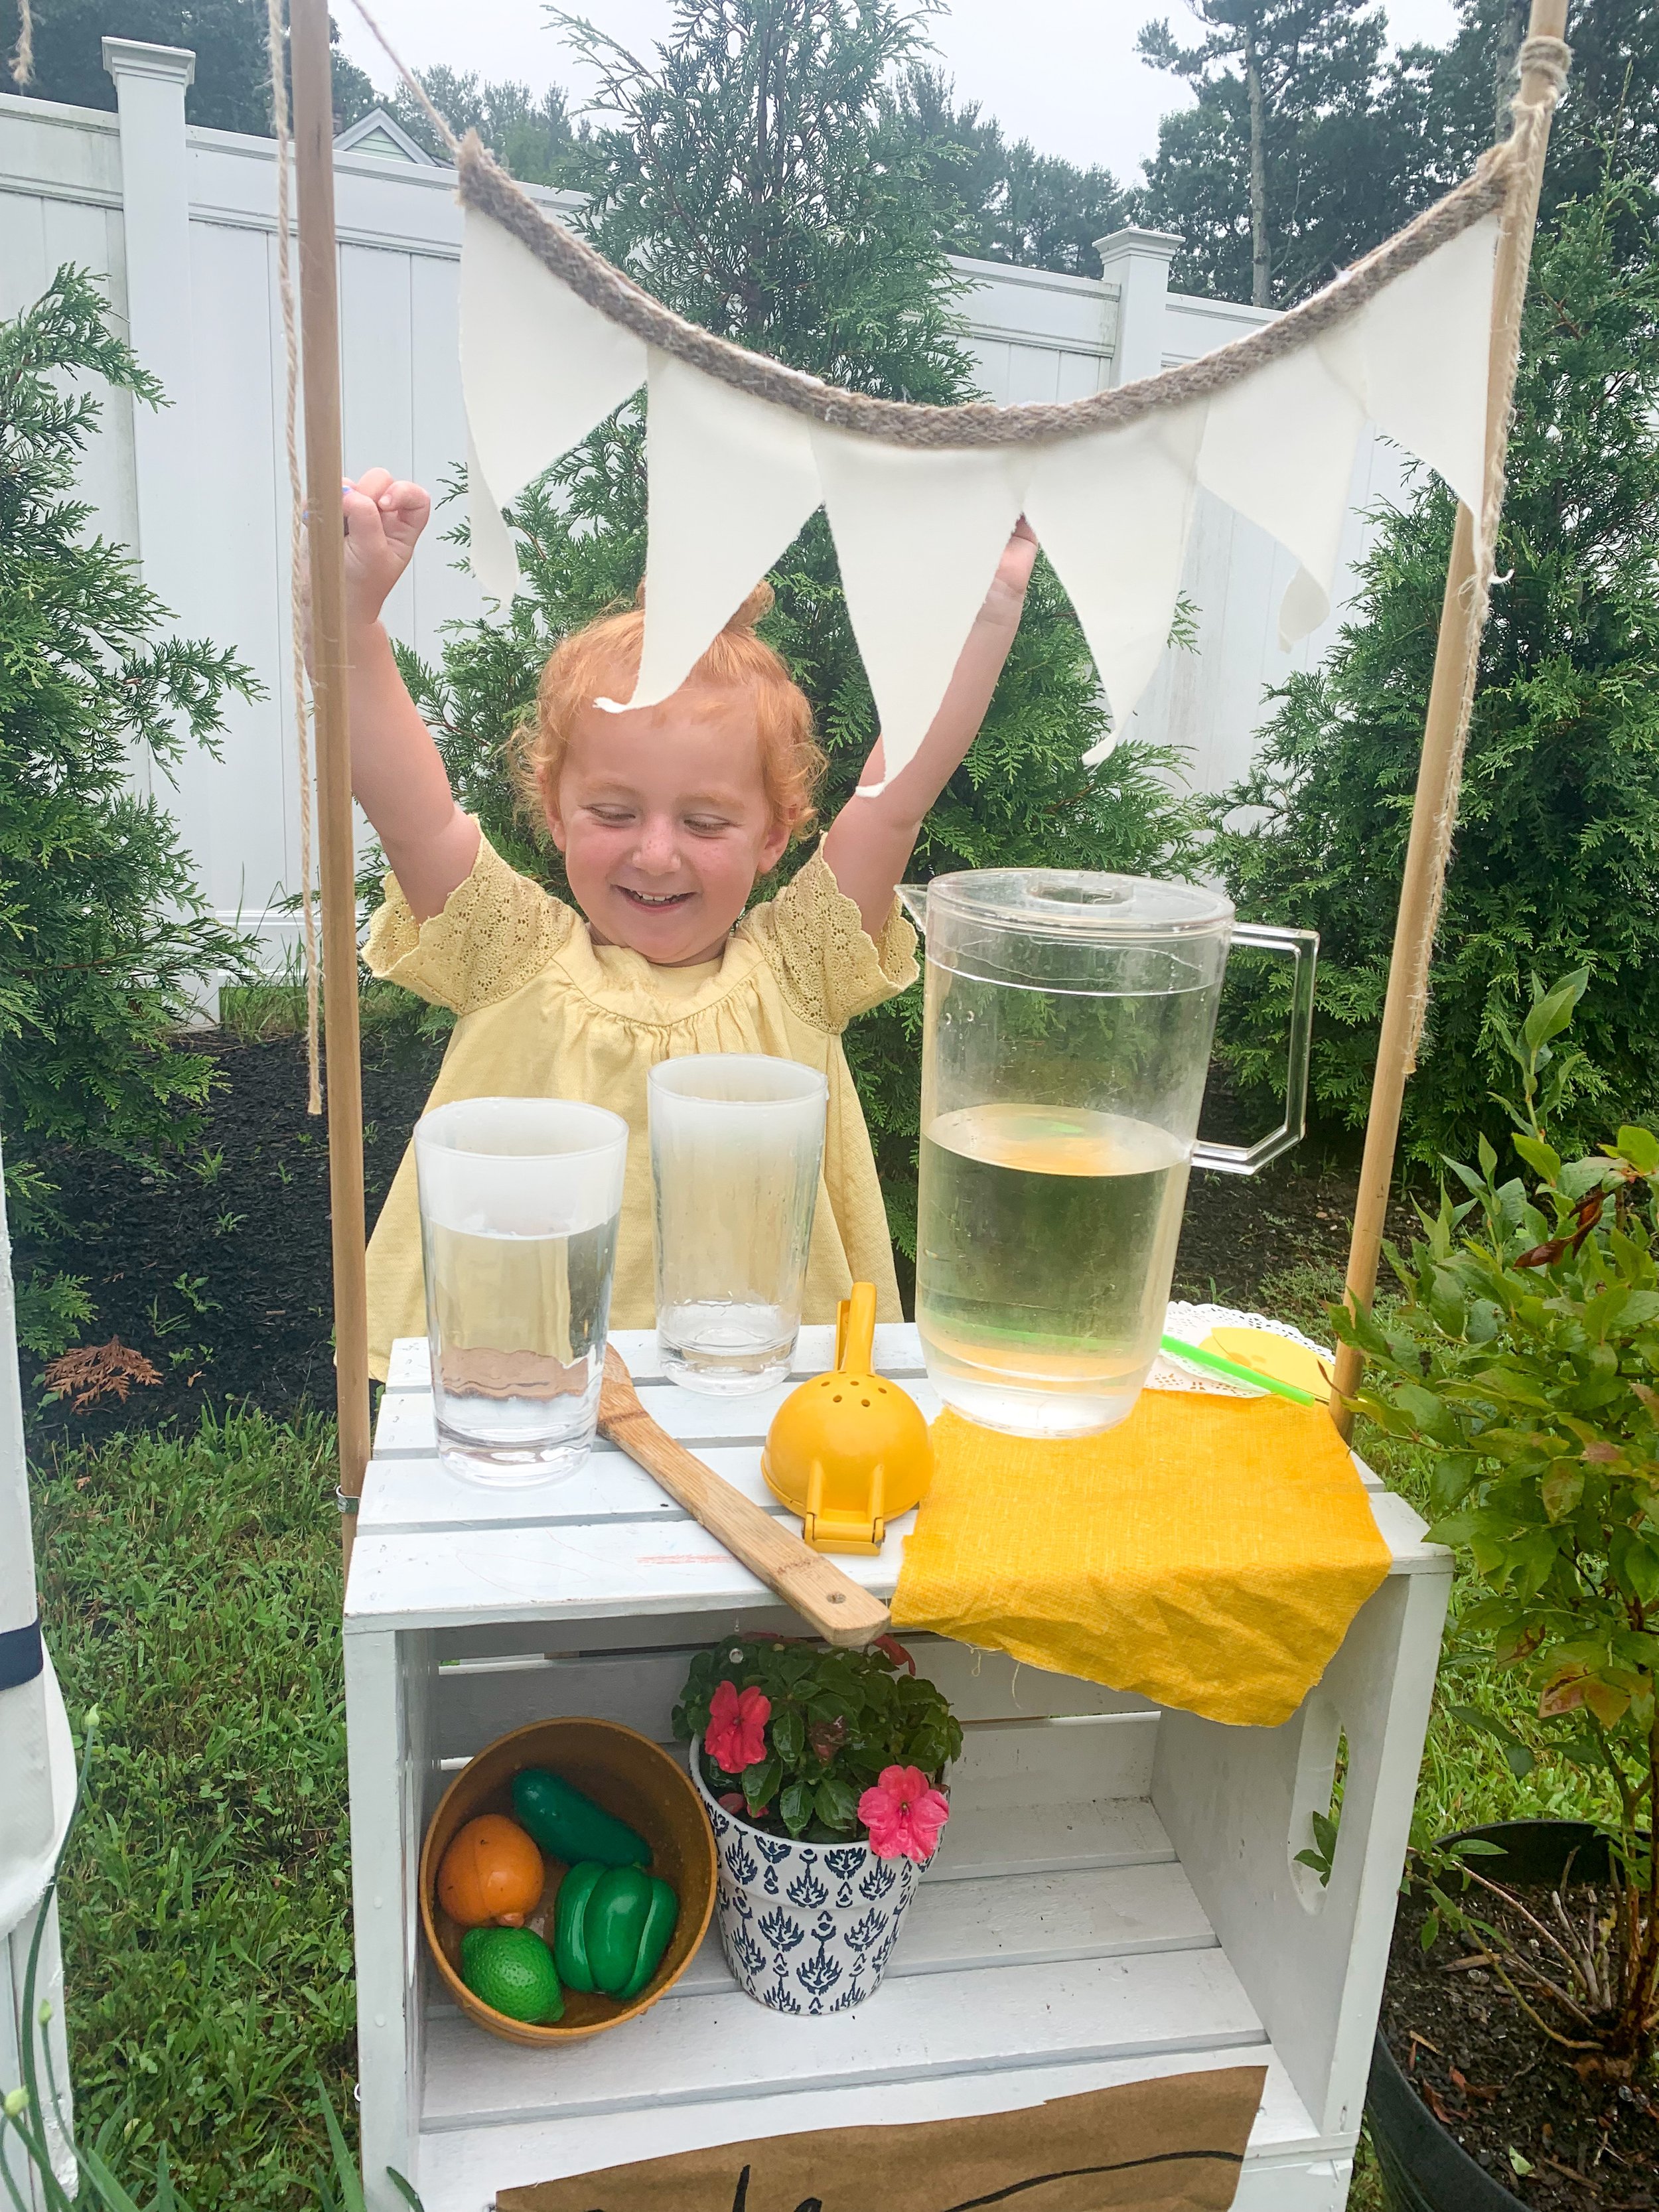

Avery loves to do “pouring” activities so she had a blast making pretend lemonade for all her customers 😉


I kept the whole setup in the yard for days and days because every day at least one of them would go play in that area! It was a fun activity the kids loved and it was easy and free!!
My favorite FREE marketplace items
So much of our house items I snagged for FREE either from a yard sale site, Facebook market place or on the side of the road lol!
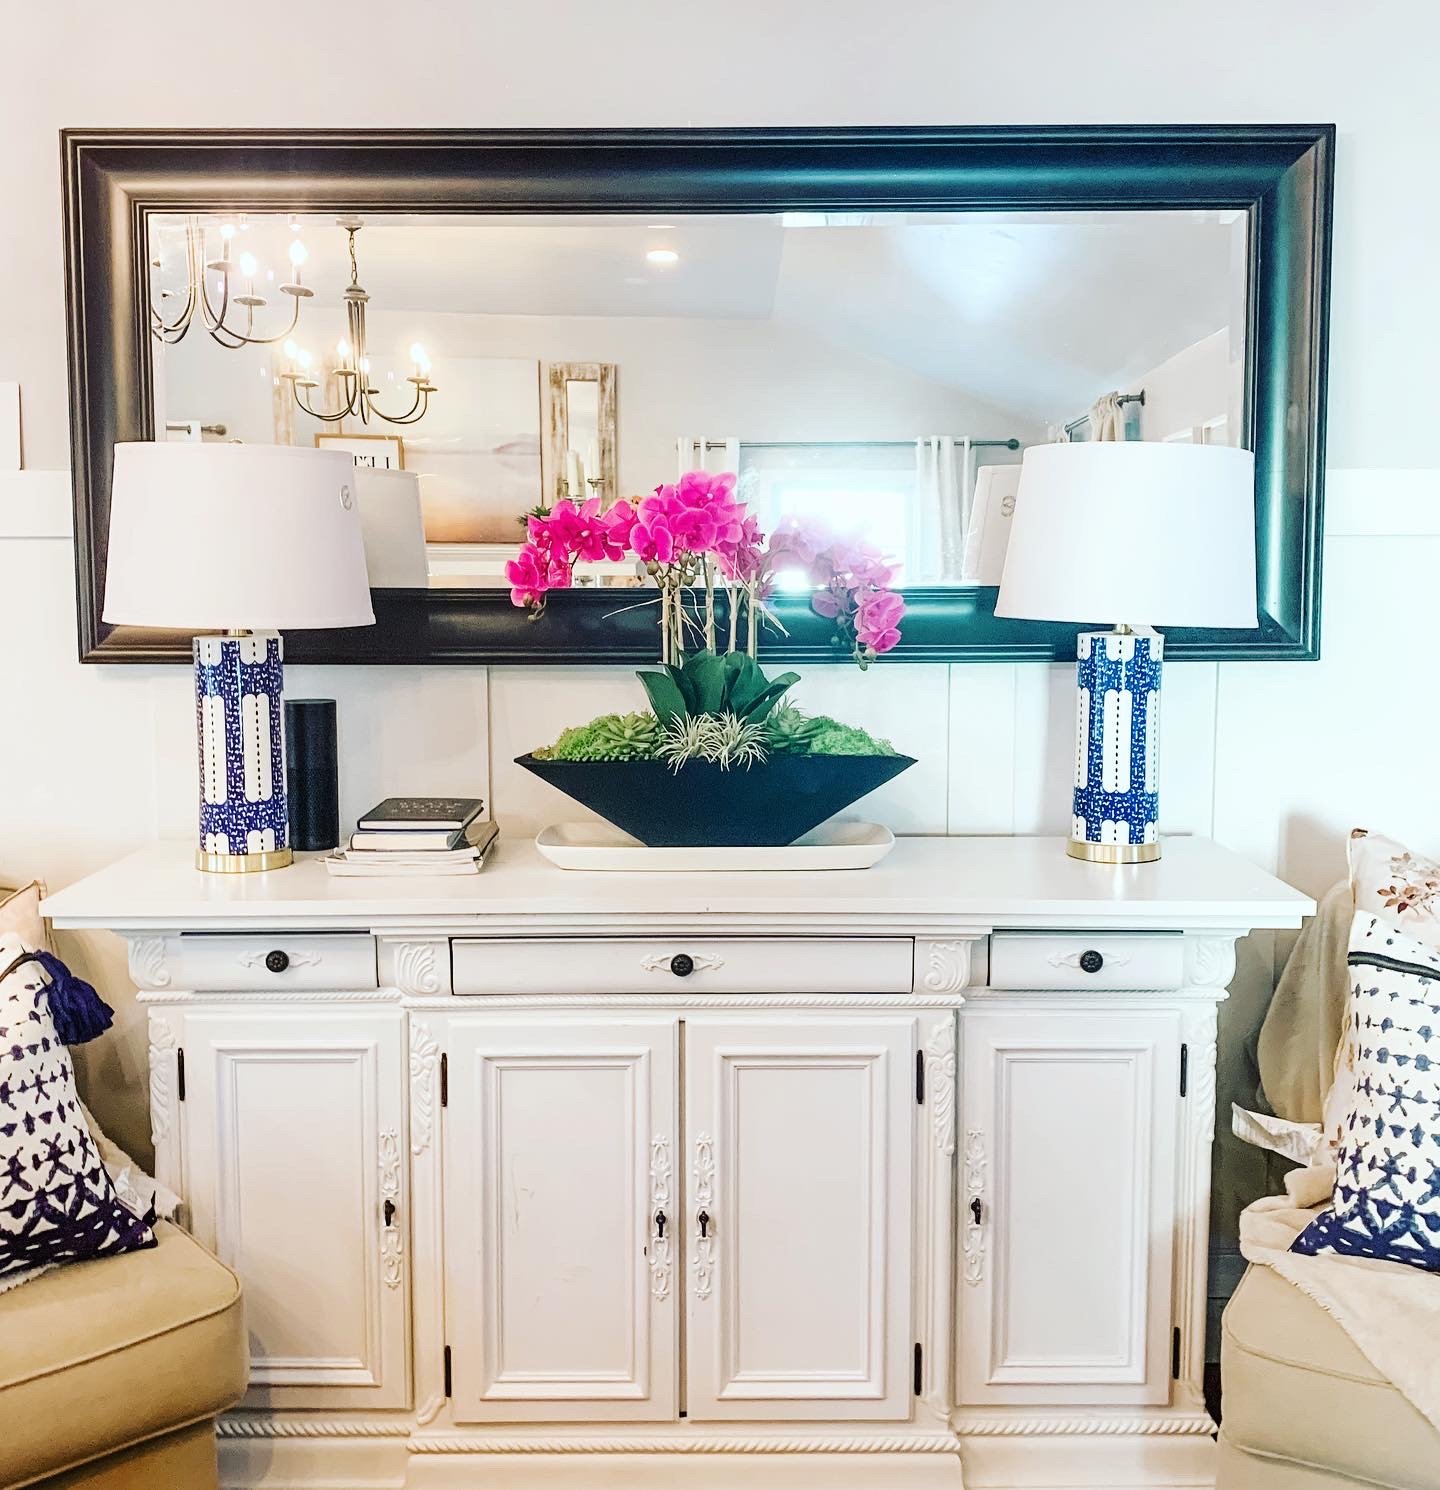
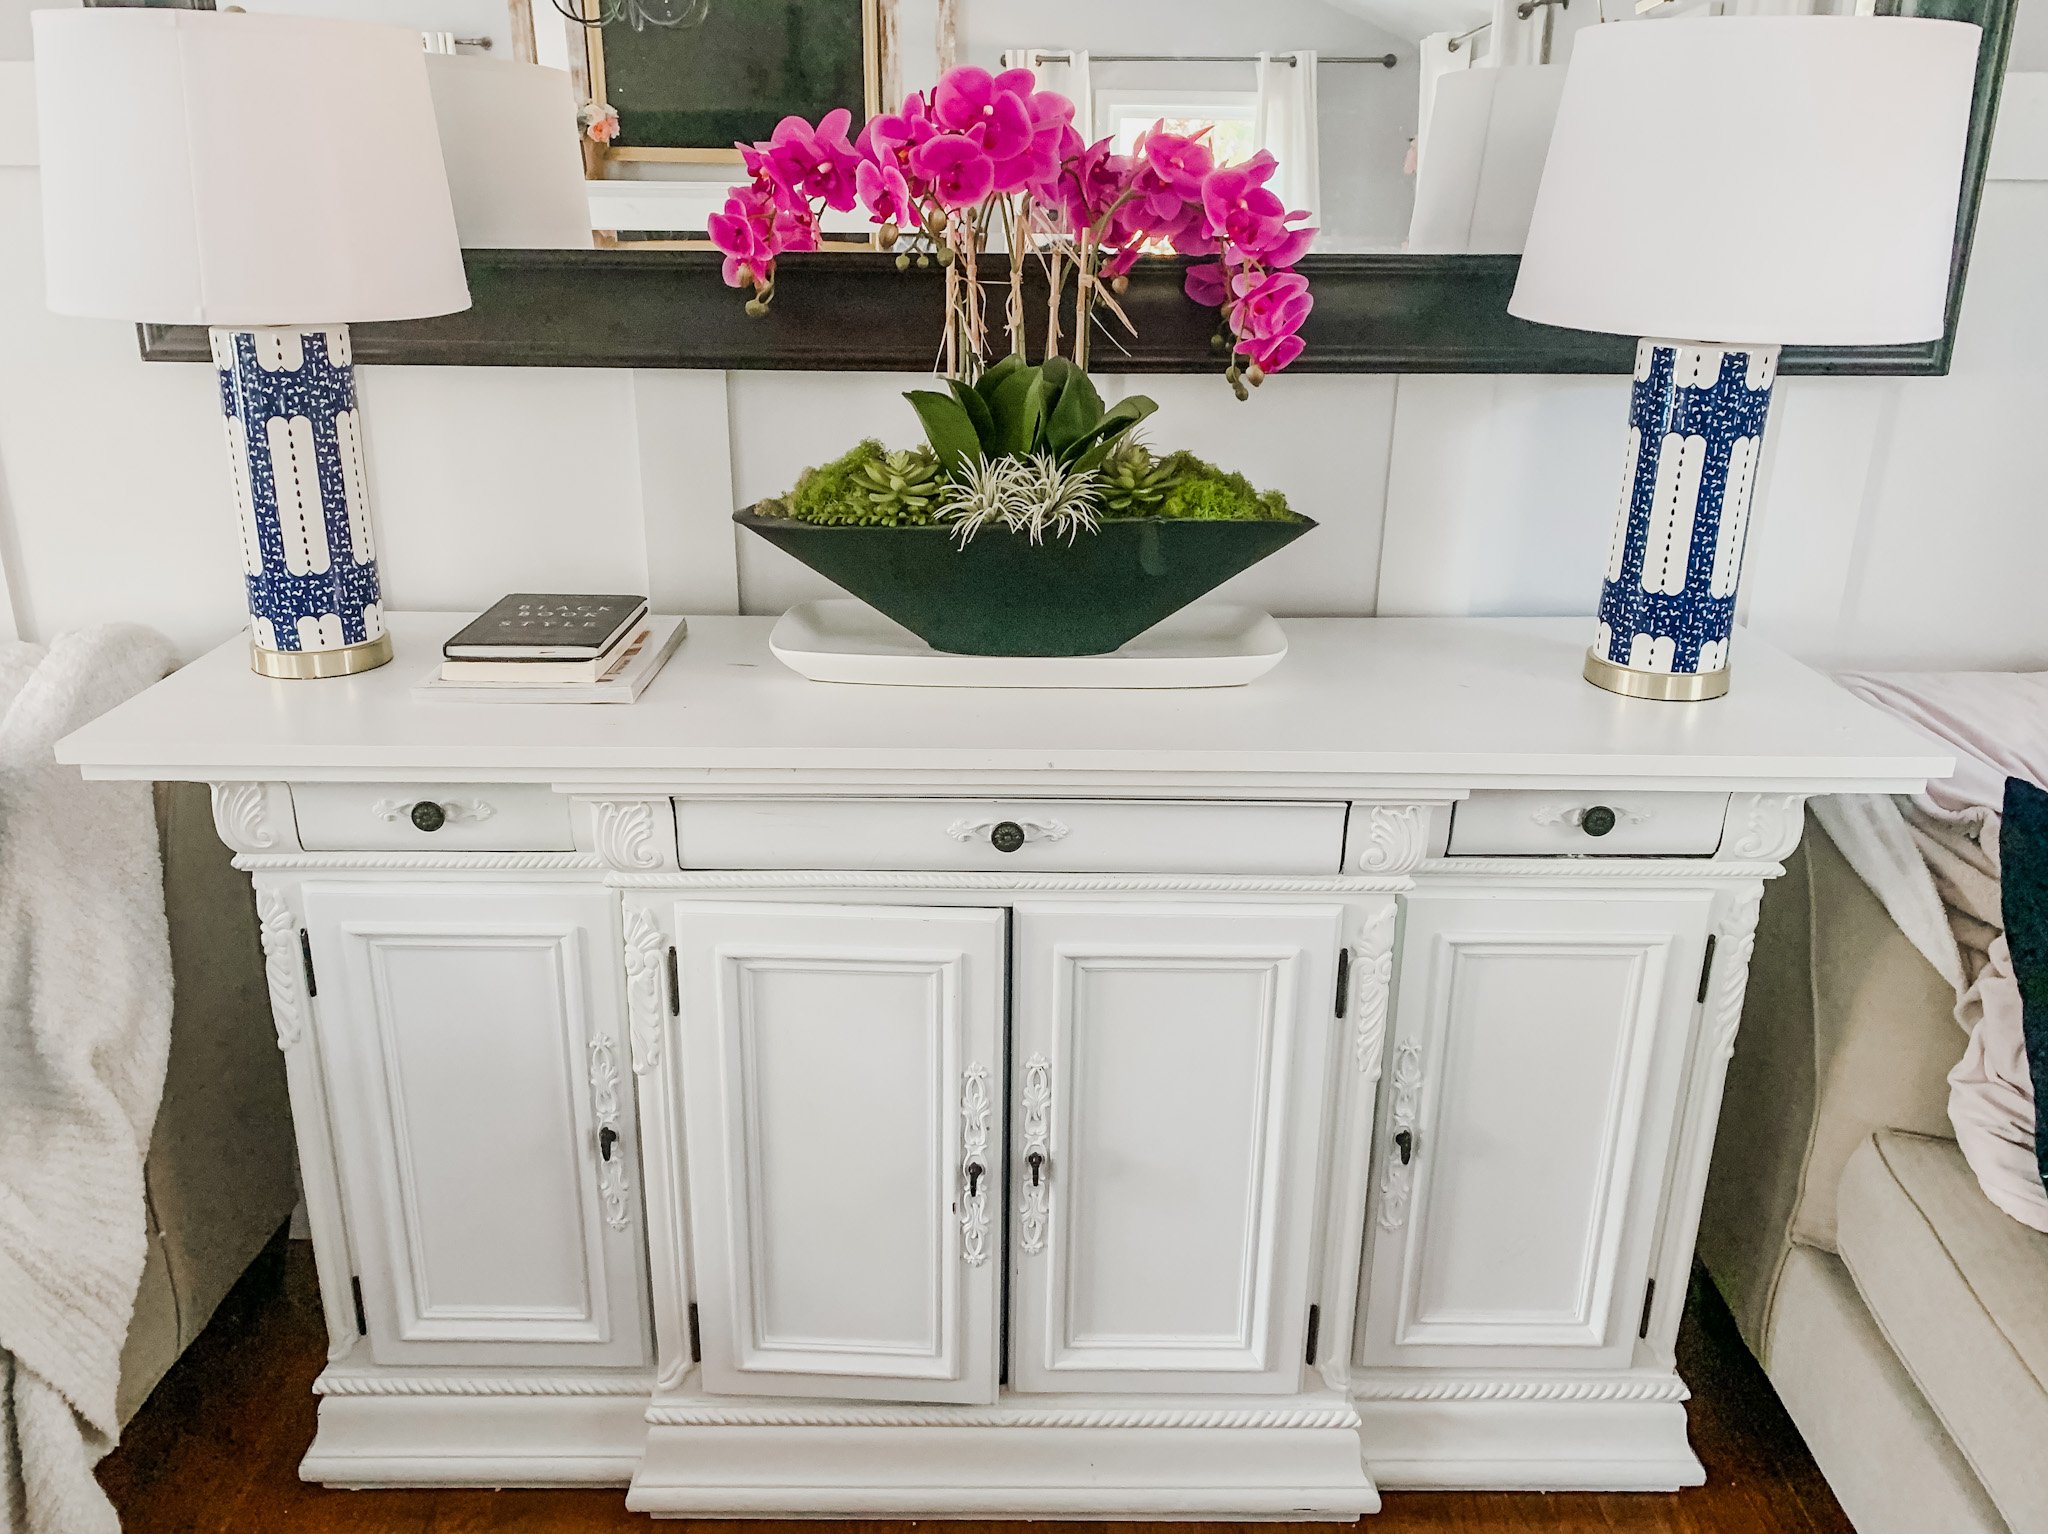
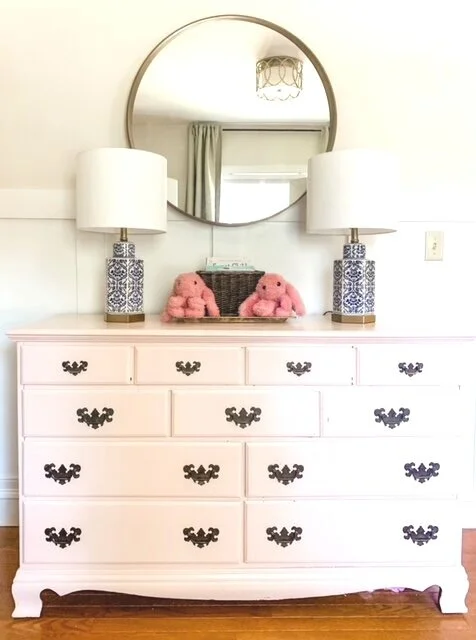
This white sideboard is one of me favorite free steals!! It didn’t look like this when we got it but I knew it would be a perfect addition to our family room. Here’s the before:
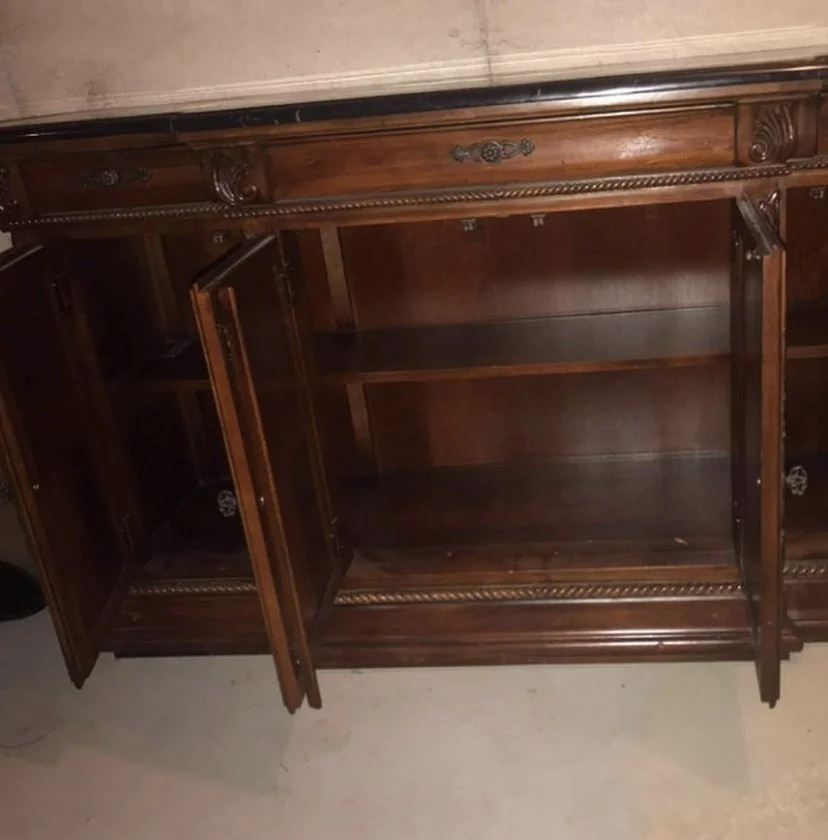
It was dark wood and it came with a black marble top that was sooo heavy and had a big crack in it.
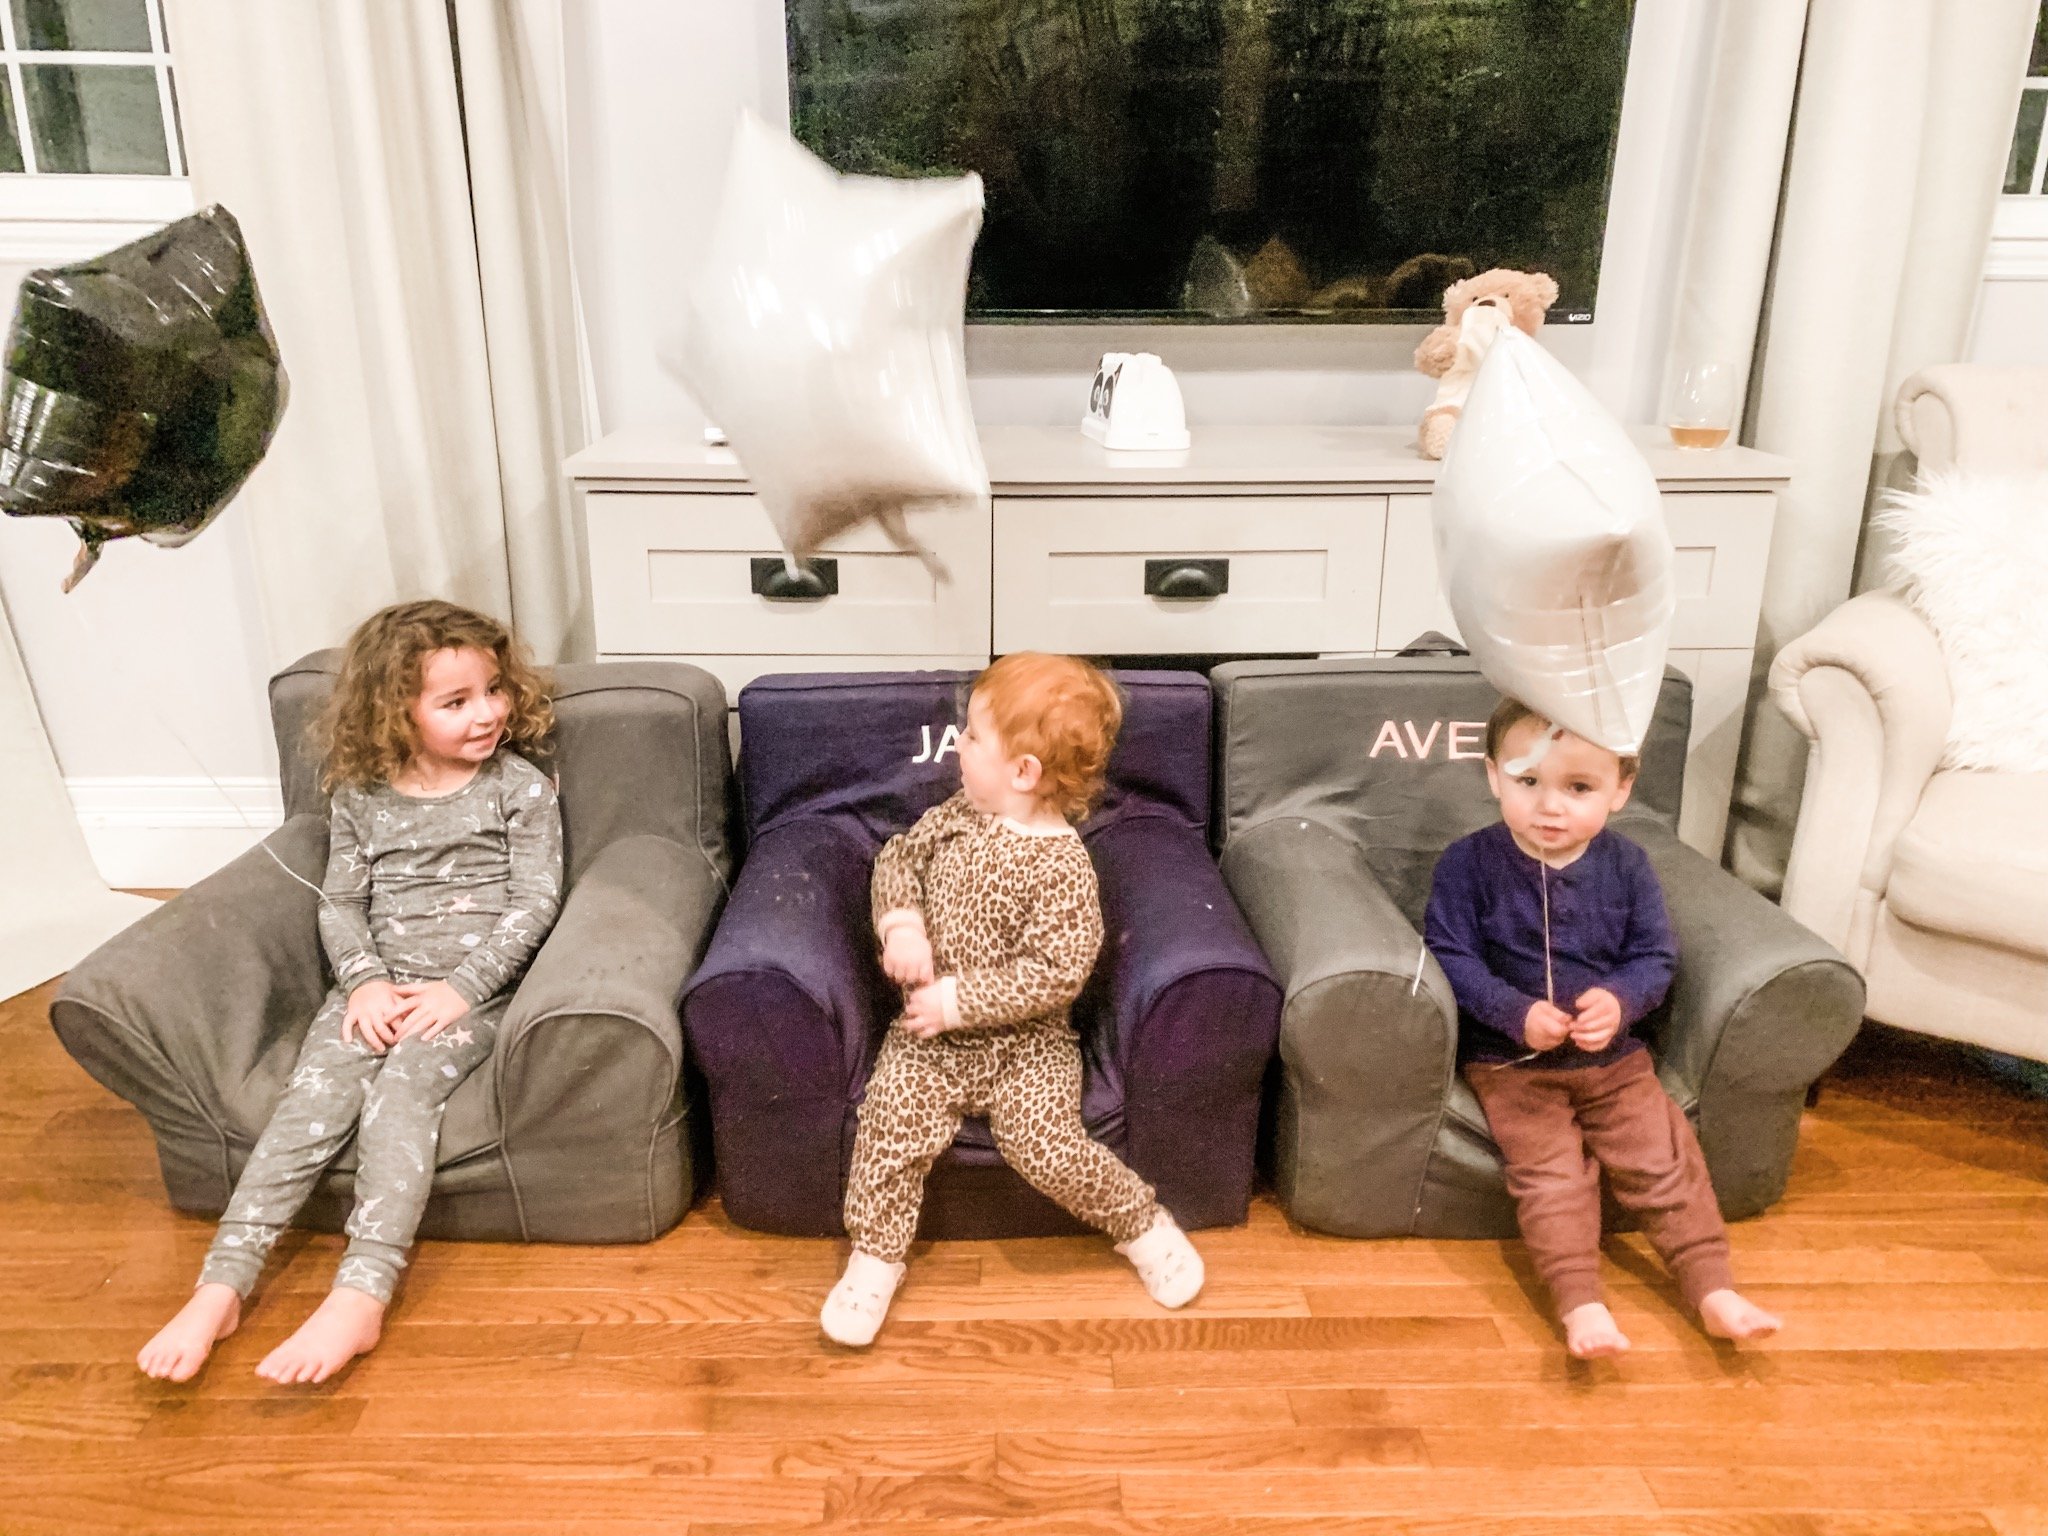
We had an old cheap TV stand that was basically falling apart (can see it in the background behind the kiddos). I was looking to replace it so I decided to take the top off the old peice and smack it on our new free one instead of the cracked black marble. Here’s a progress pic
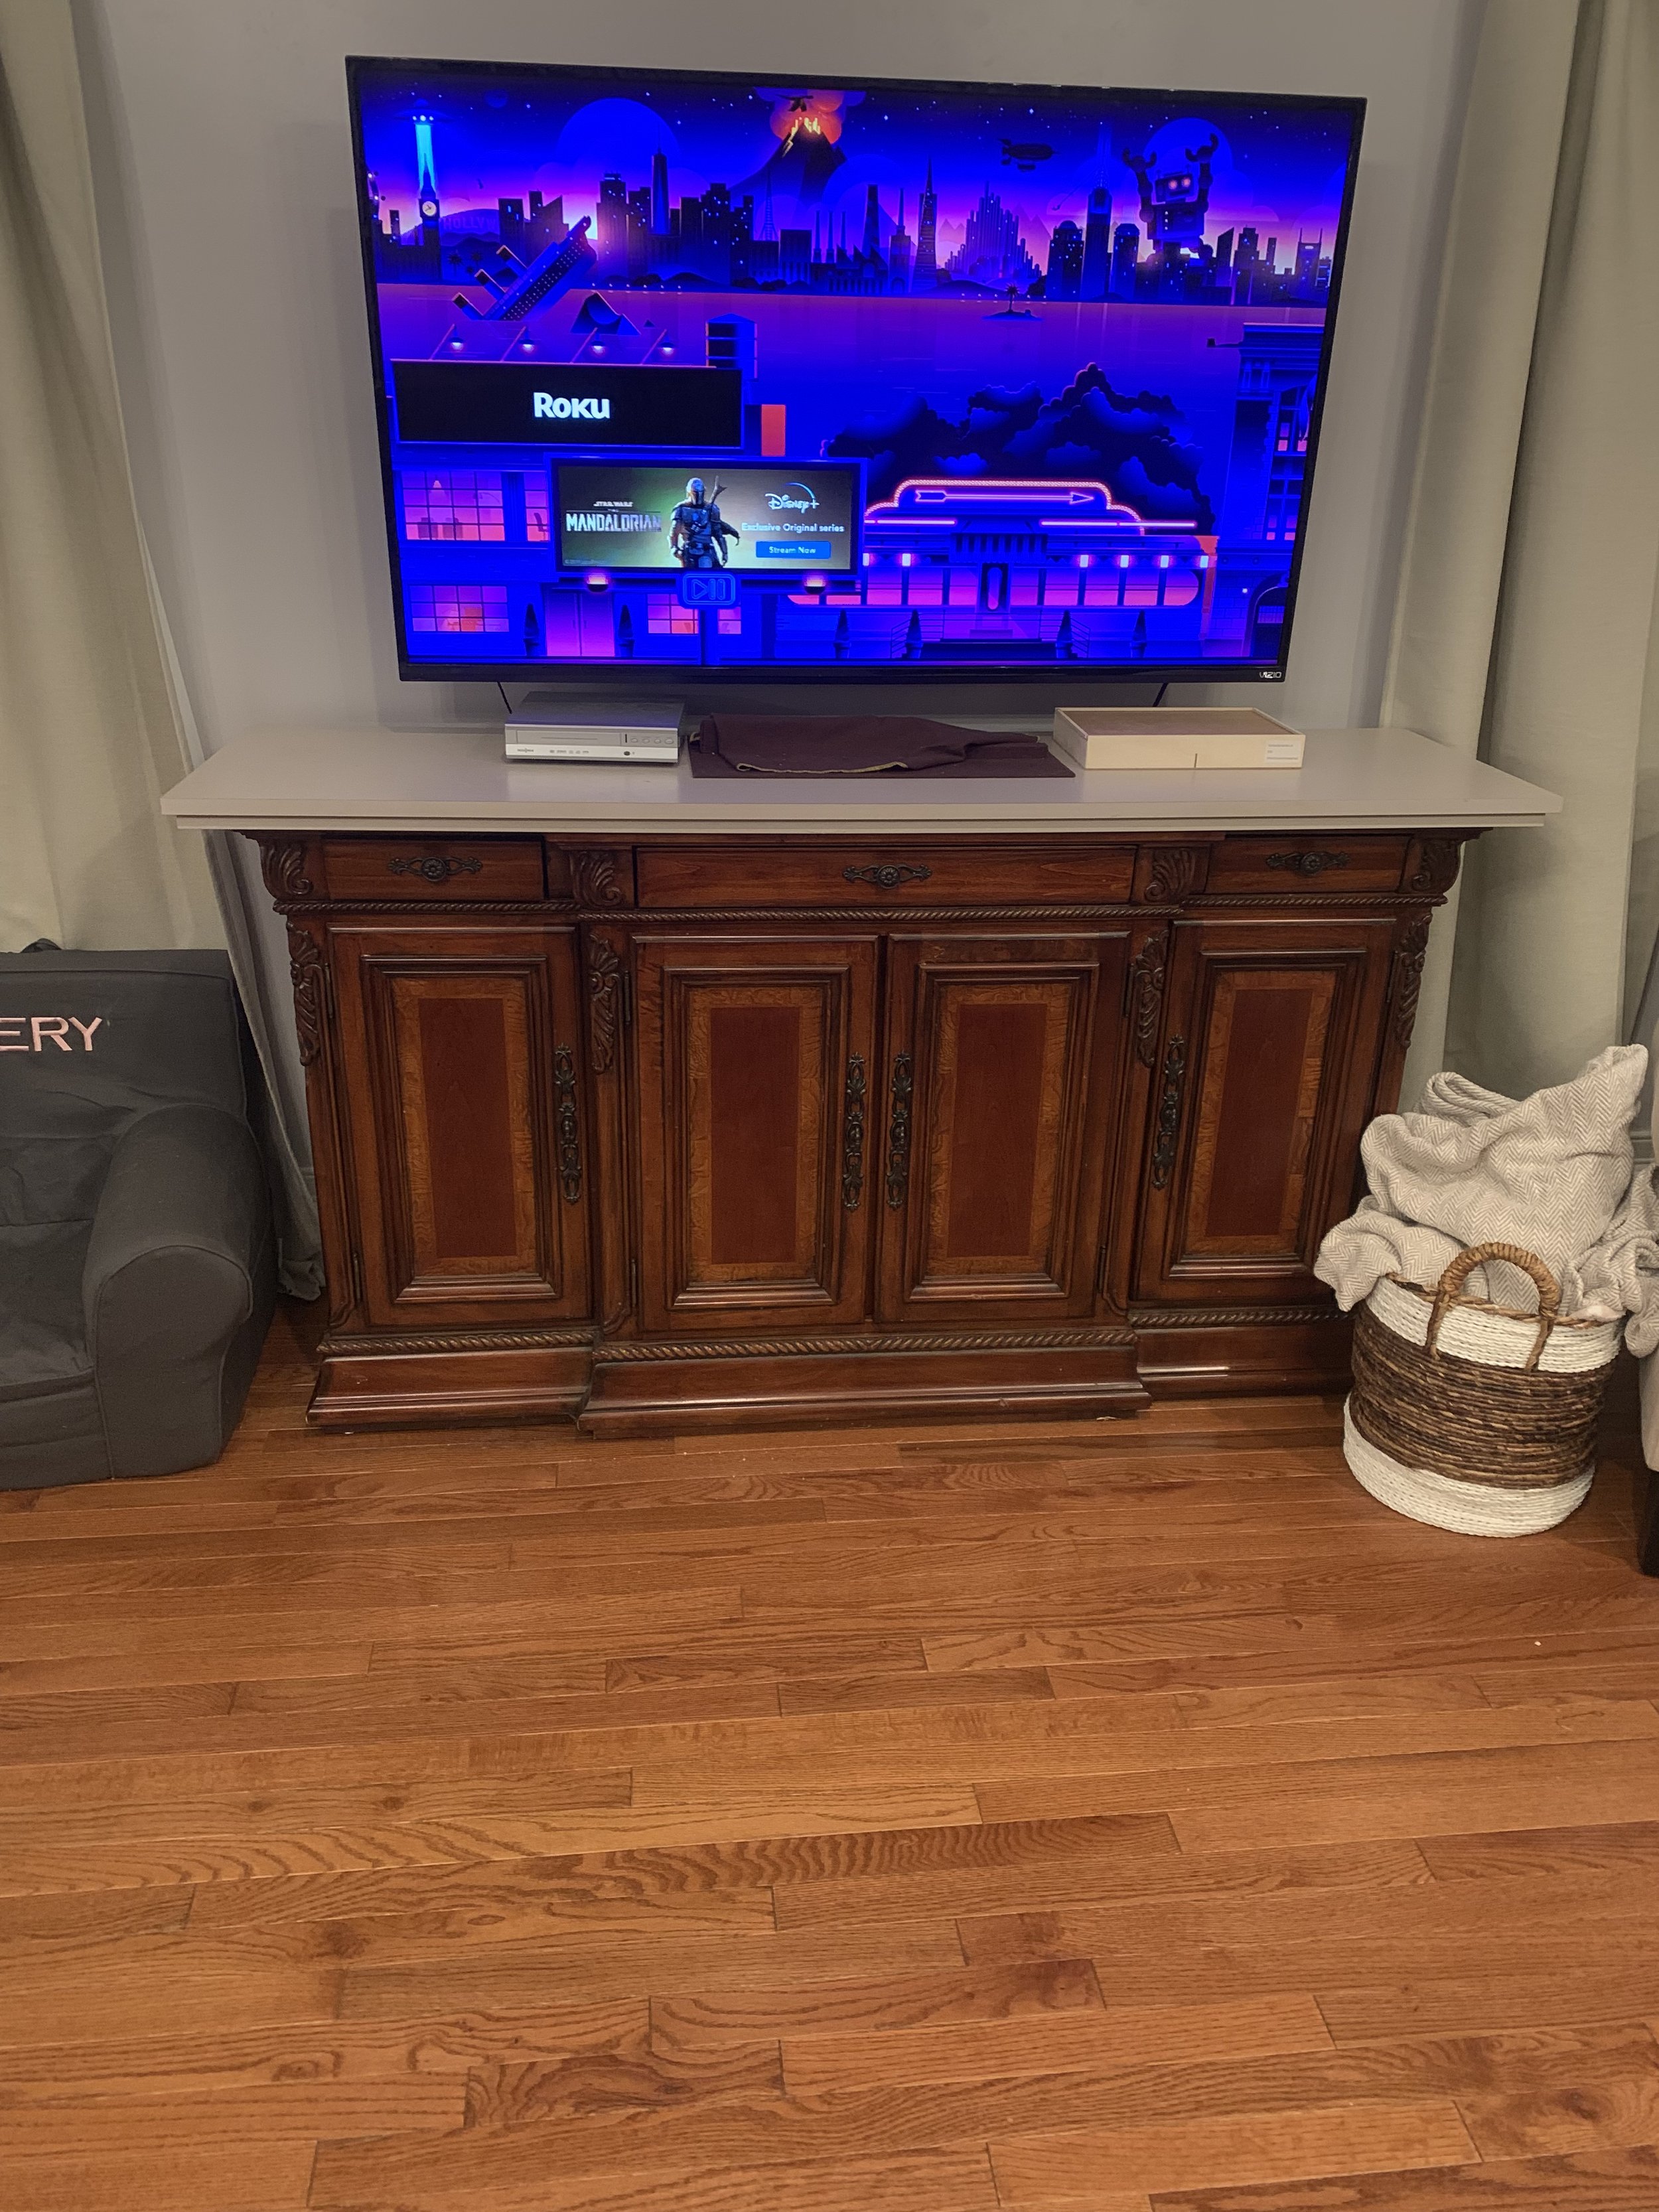

Once the new top was attached I gave the whole thing a nice fresh coat of white paint to blend it all together.
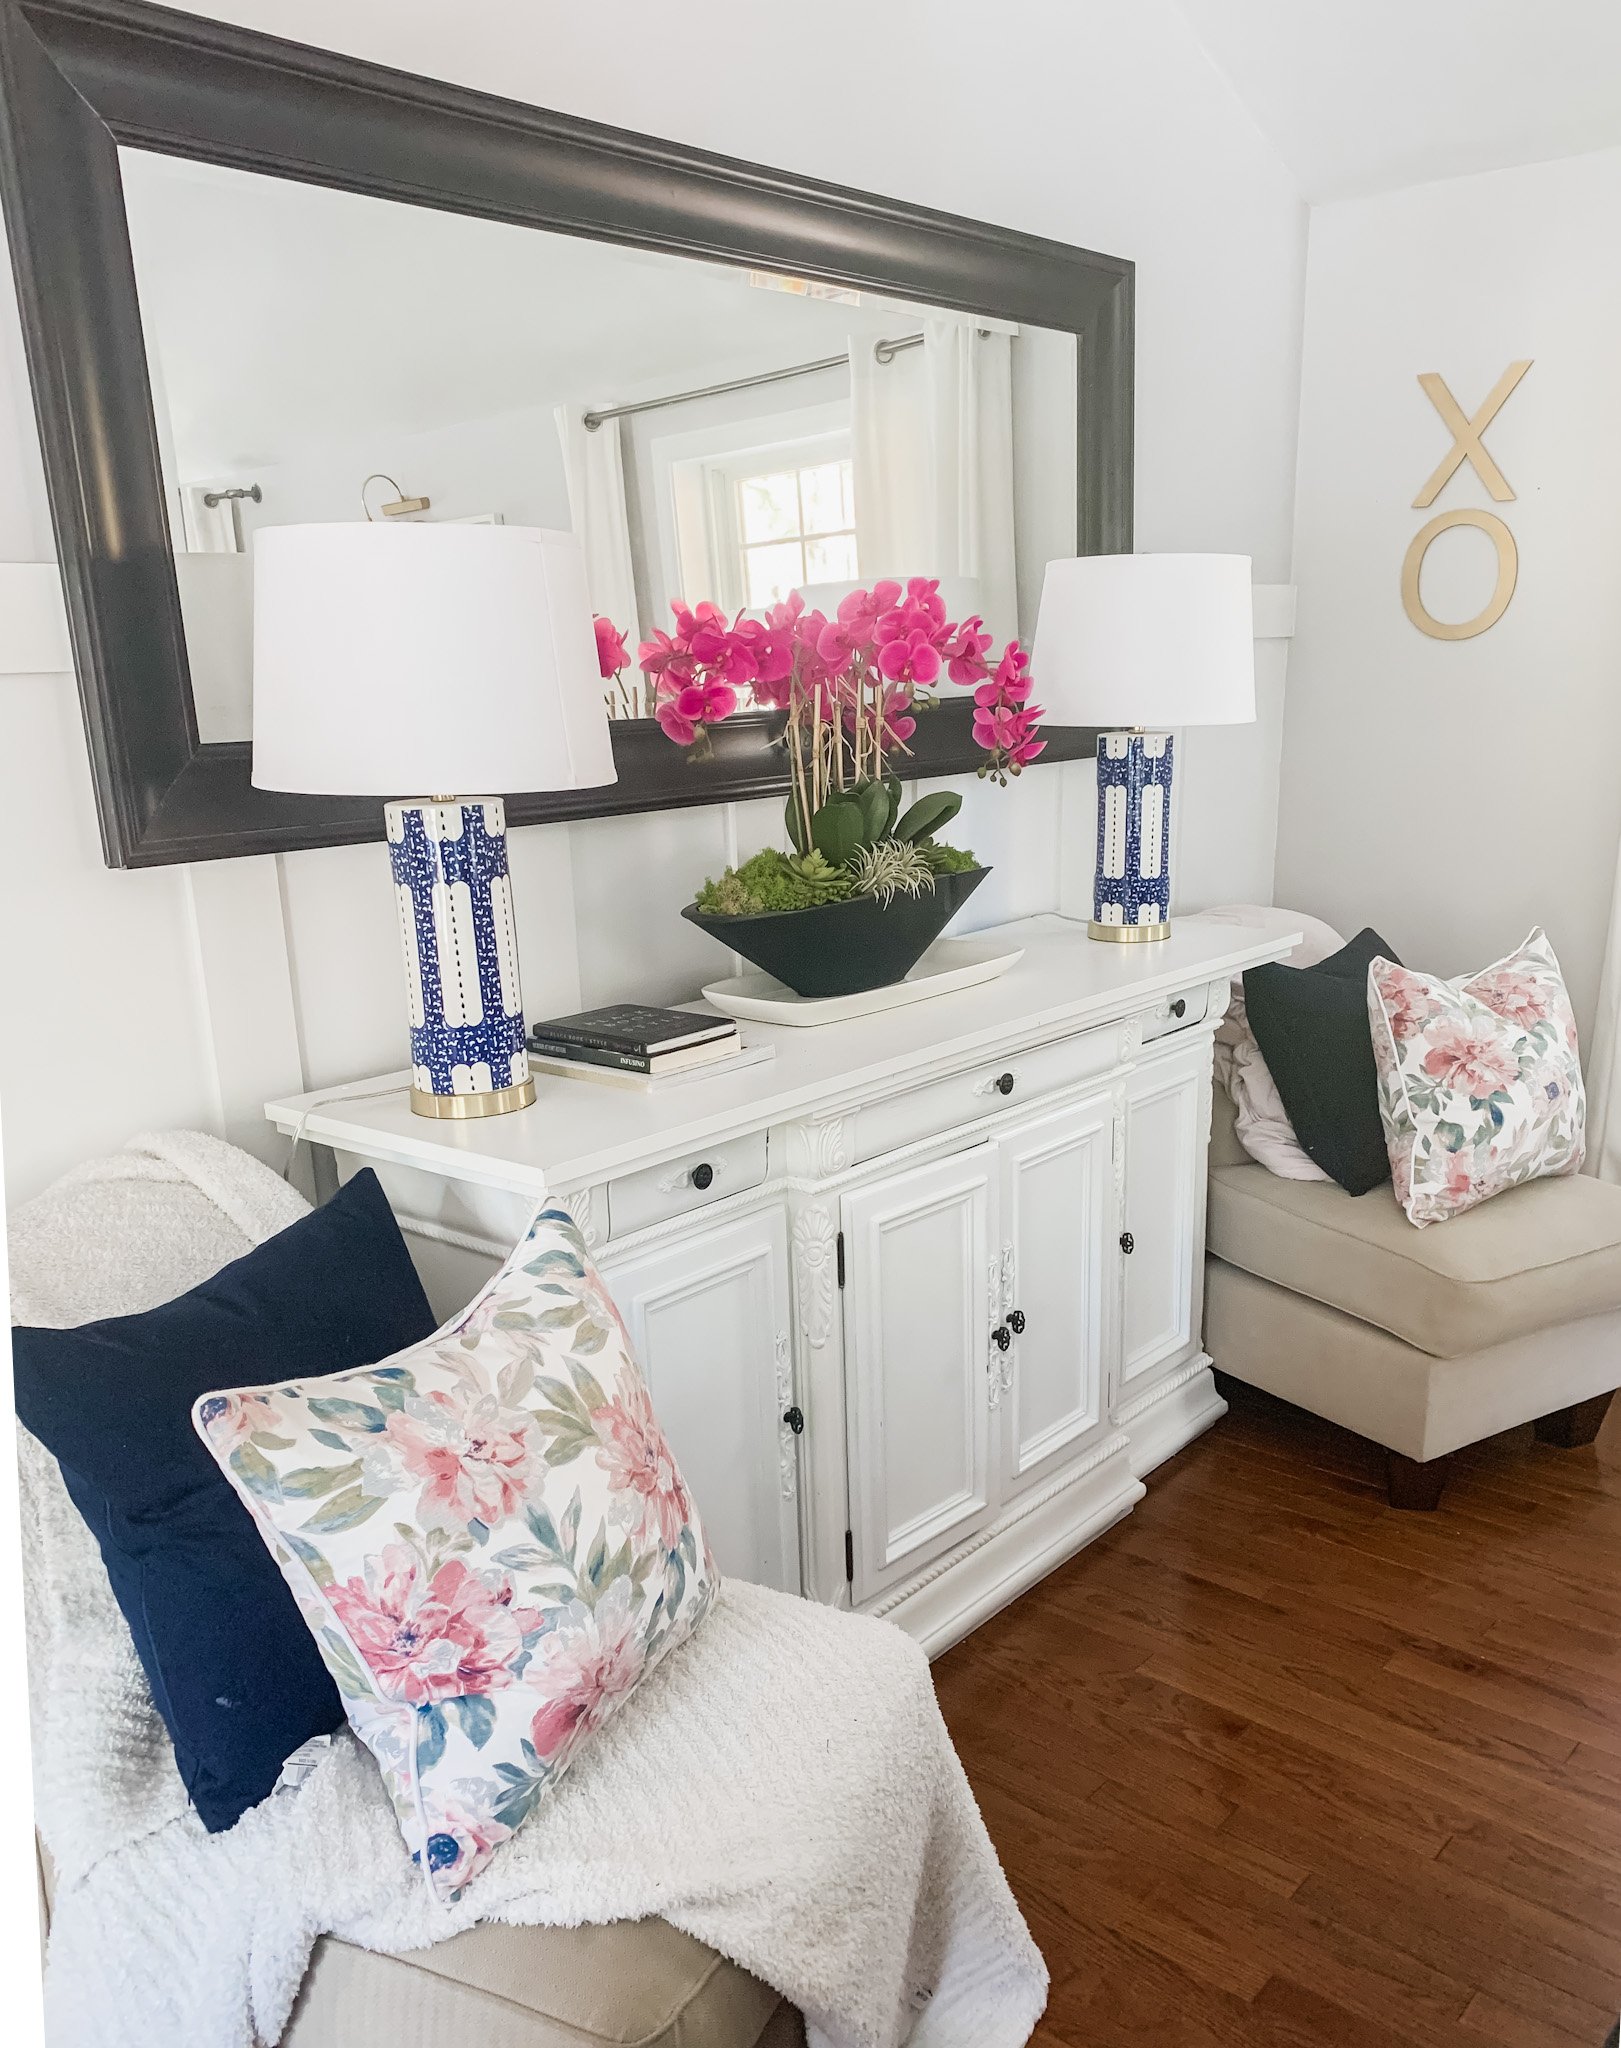


I’m super happy with how it came out! A big solid piece like that can cost thousands and we got it for free! It holds all our kids toys that sneak into the family room from our playroom and I love having the storage for that now. It’s held up great as well!
Spring Garden Updates
My favorite “thyme” of year!
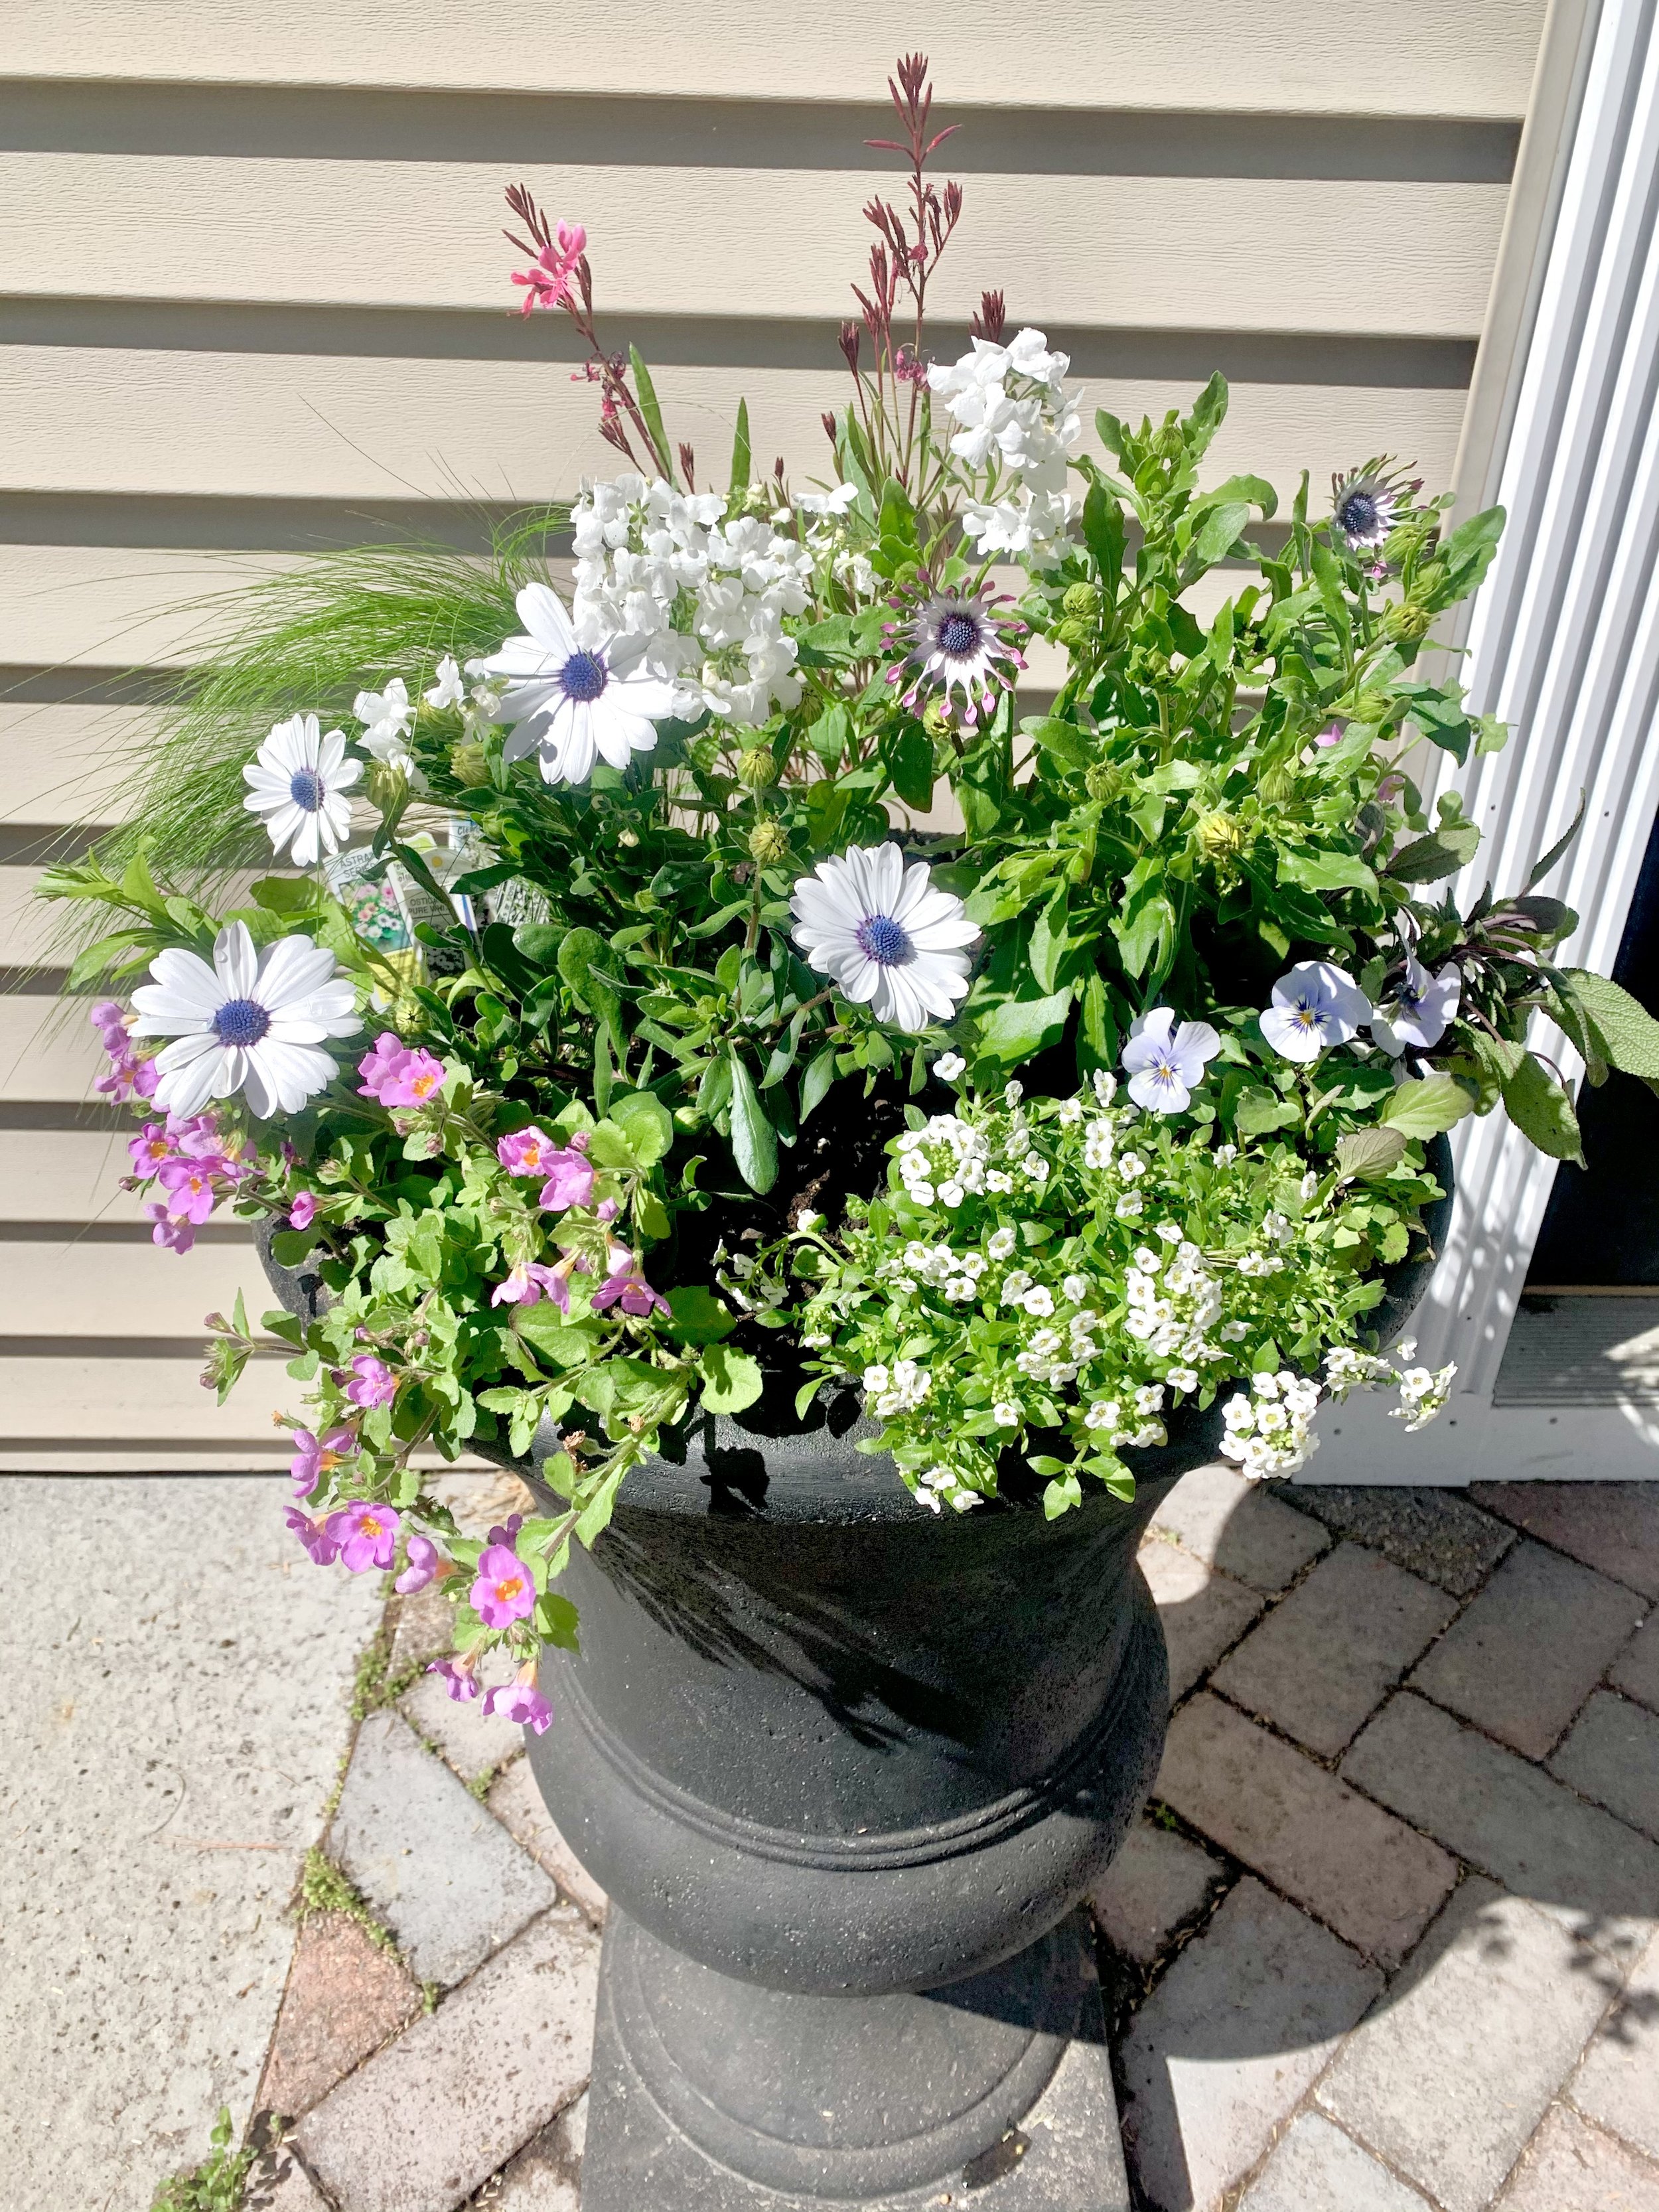
We replaced our dingy old winter planters with some new spring life! They look so bright and fresh! Filled with: osteospermum, alyssum, guara, carex, English thyme, and super bells

Here’s the before! Yuck! Still had Christmas decorations and a bunch of dead branches. Totally ready for it’s spring facelift!

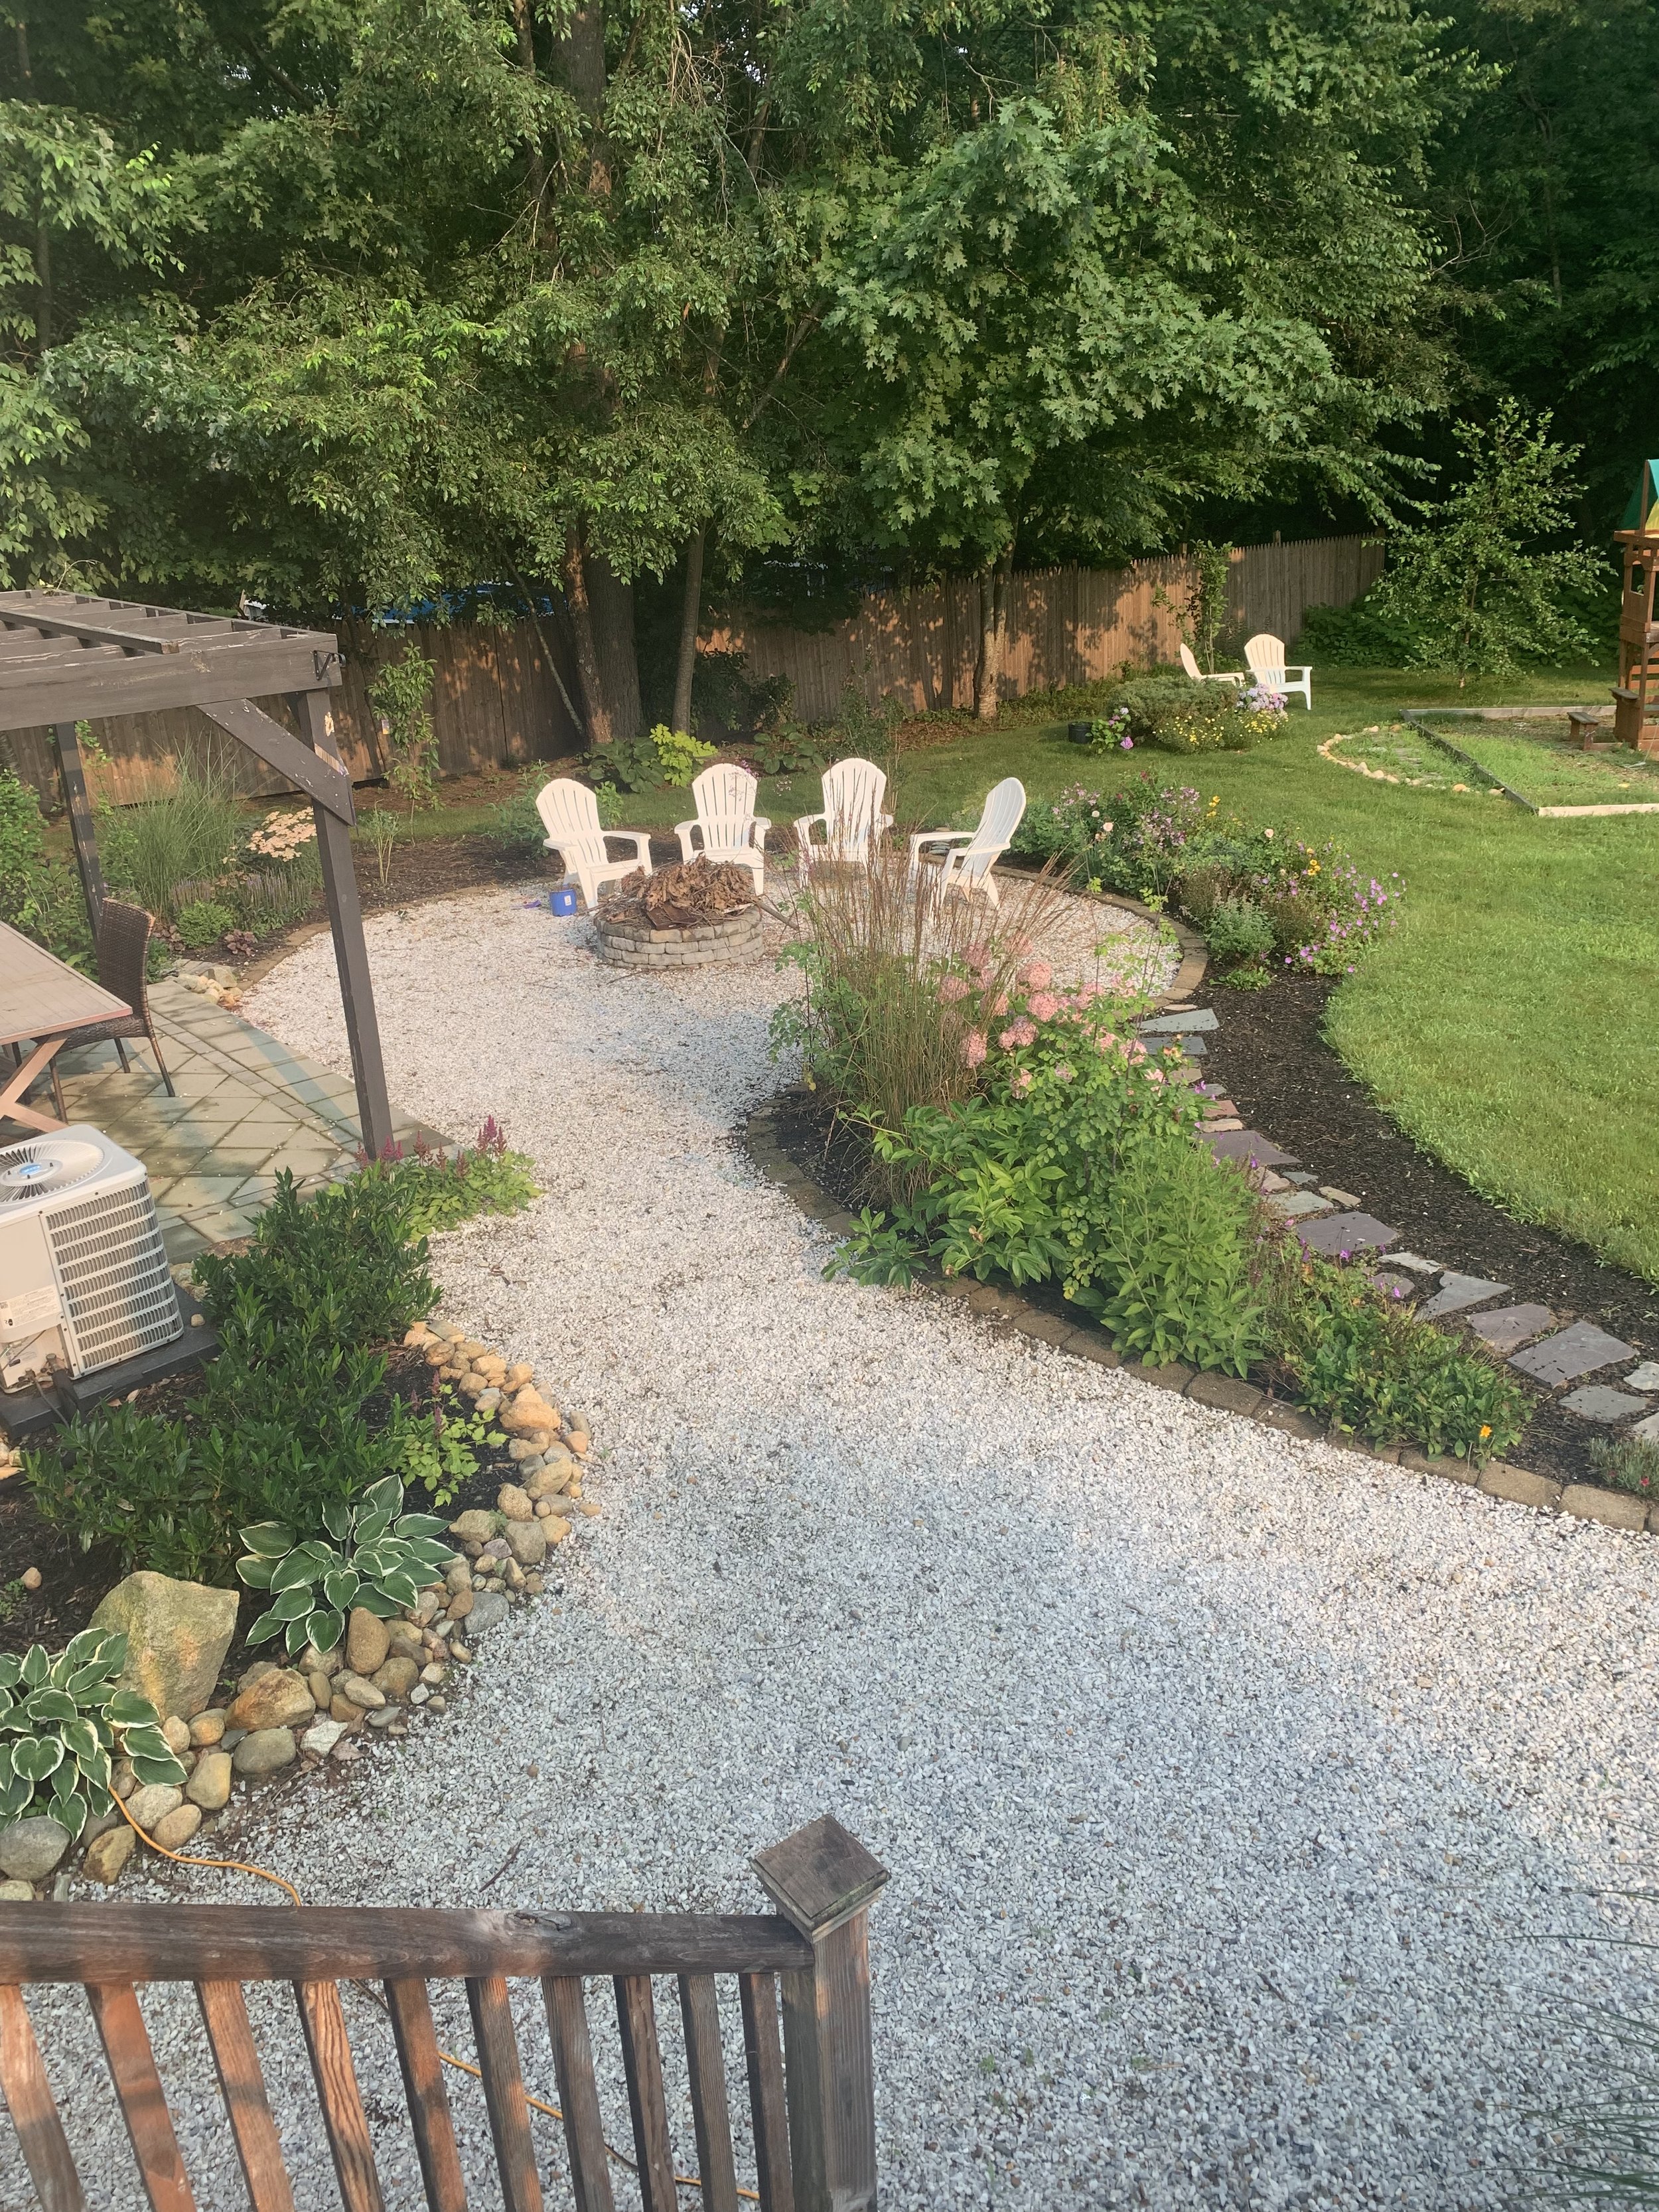
This Spring we finally started tackling the side of our backyard. It got completely destroyed when we did our master bedroom addition and it was finally time to spruce it up.
Here’s some horrible before pictures and they don’t even do the disaster justice! We had broken sprinkler lines sticking out of the ground, gravel, concrete pieces, a broken fence, etc. disaster.

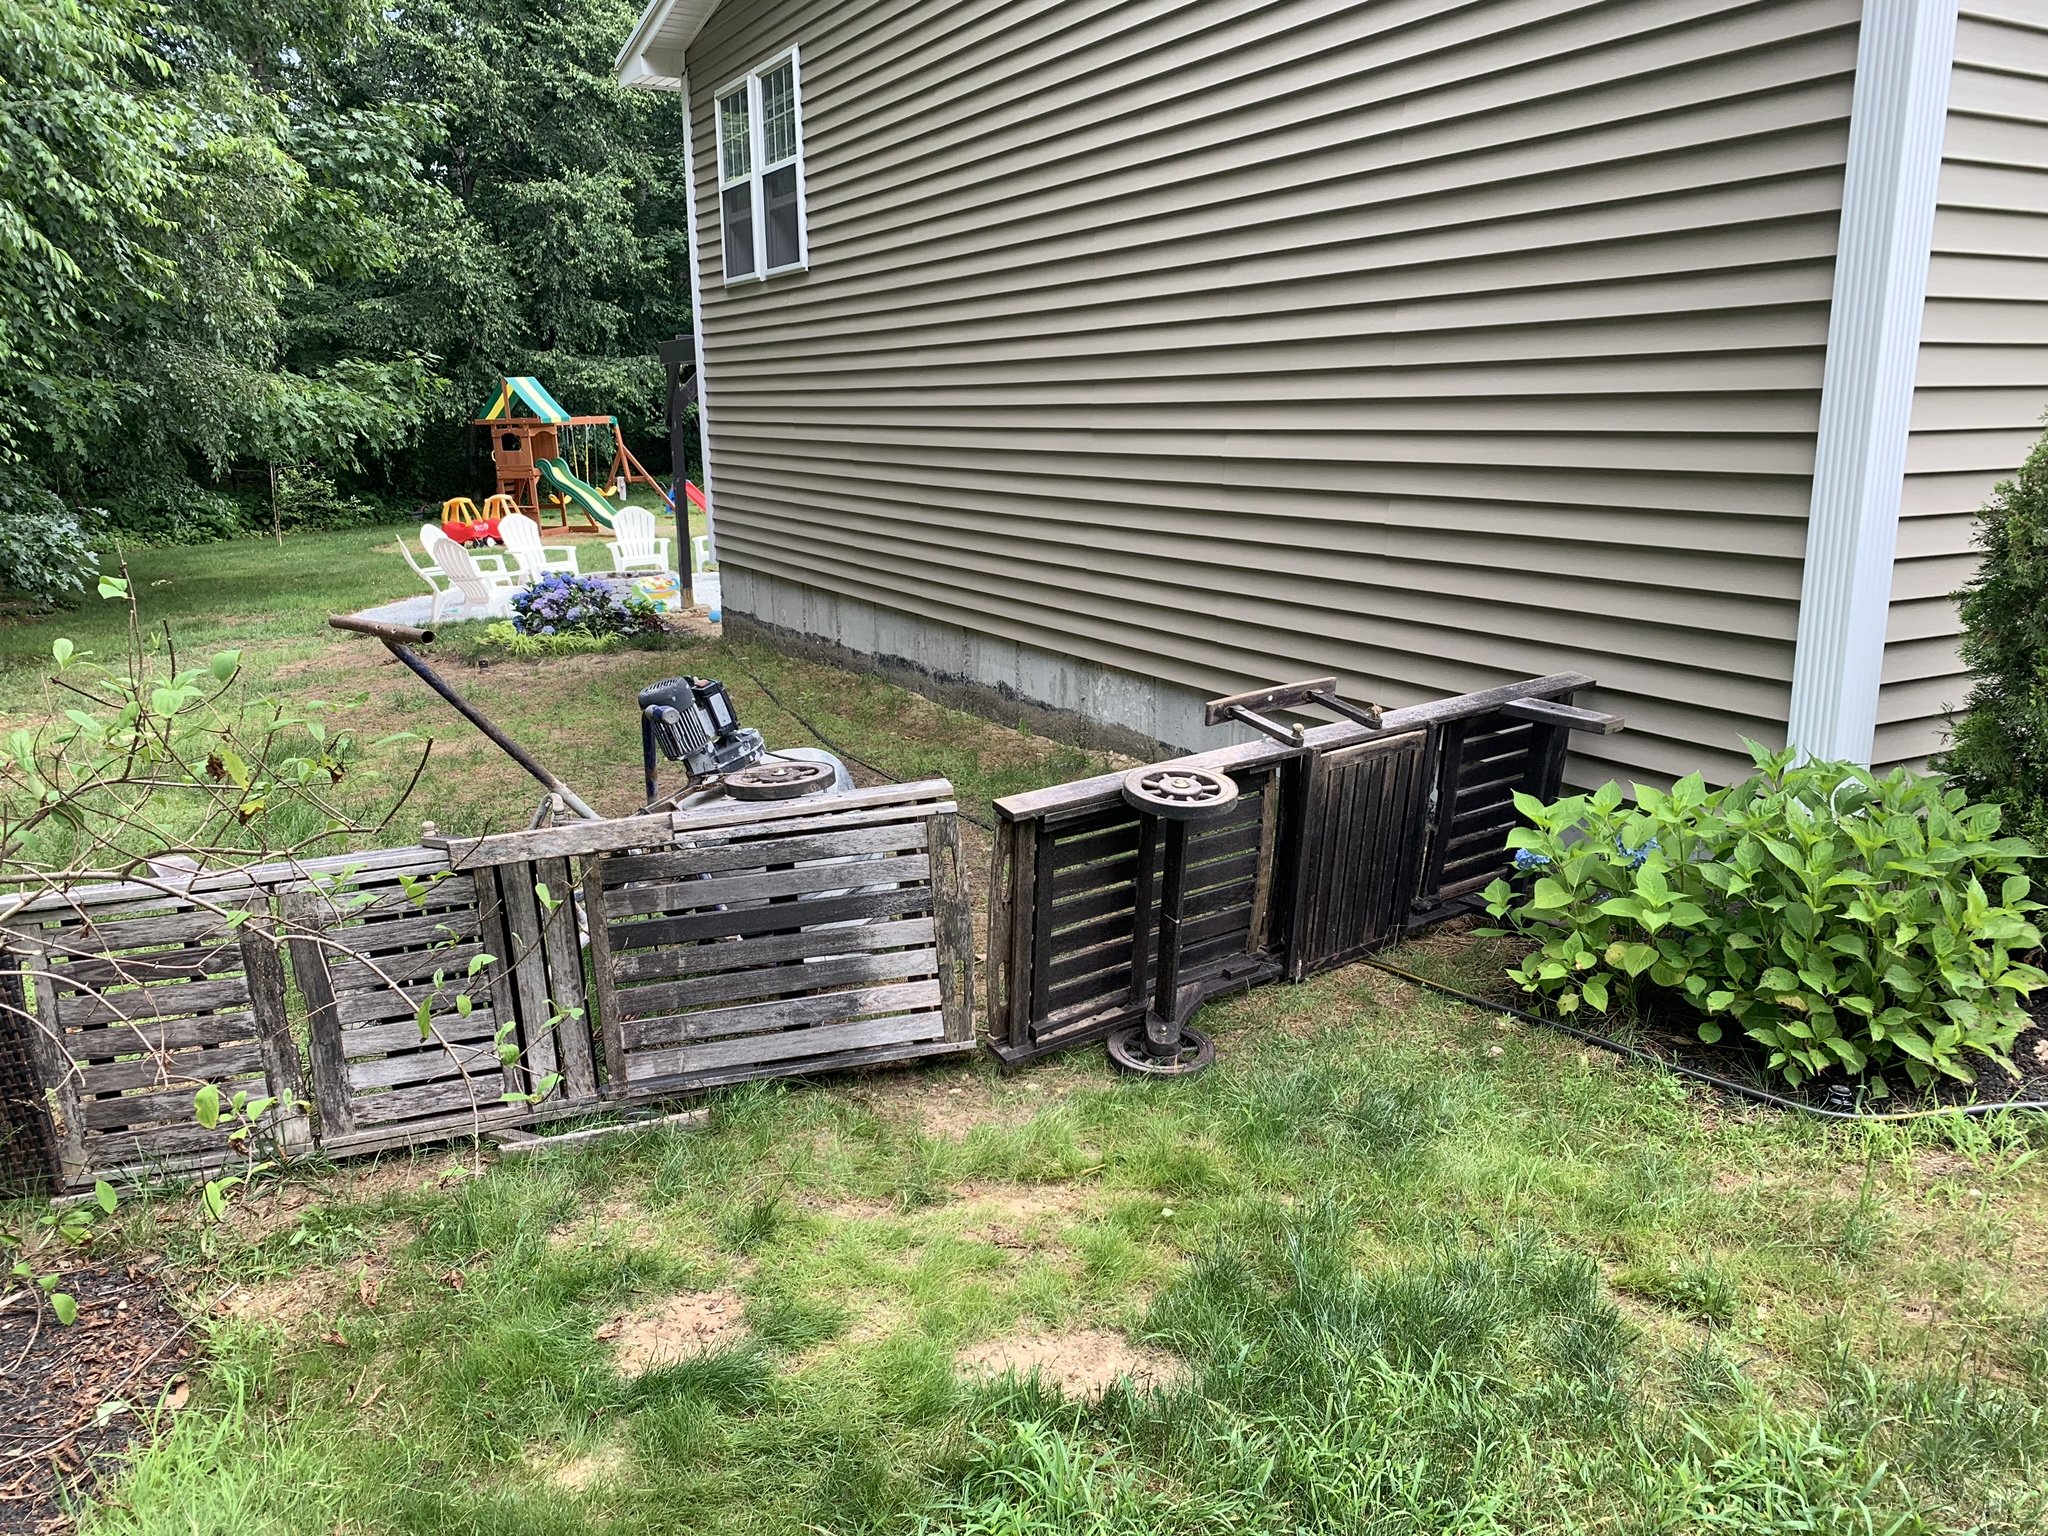

First I had to fix the fence! Before I got around to fixing the fence I still needed away to stop my twins from running into the street, hence the 2 lounge chairs propped up across the yard 😂 I’m sure my neighbors were happy to see that get fixed! We brought in 8 yards of soil, dumped it and spread it ourselves to level the yard from getting torn up by the excavators.

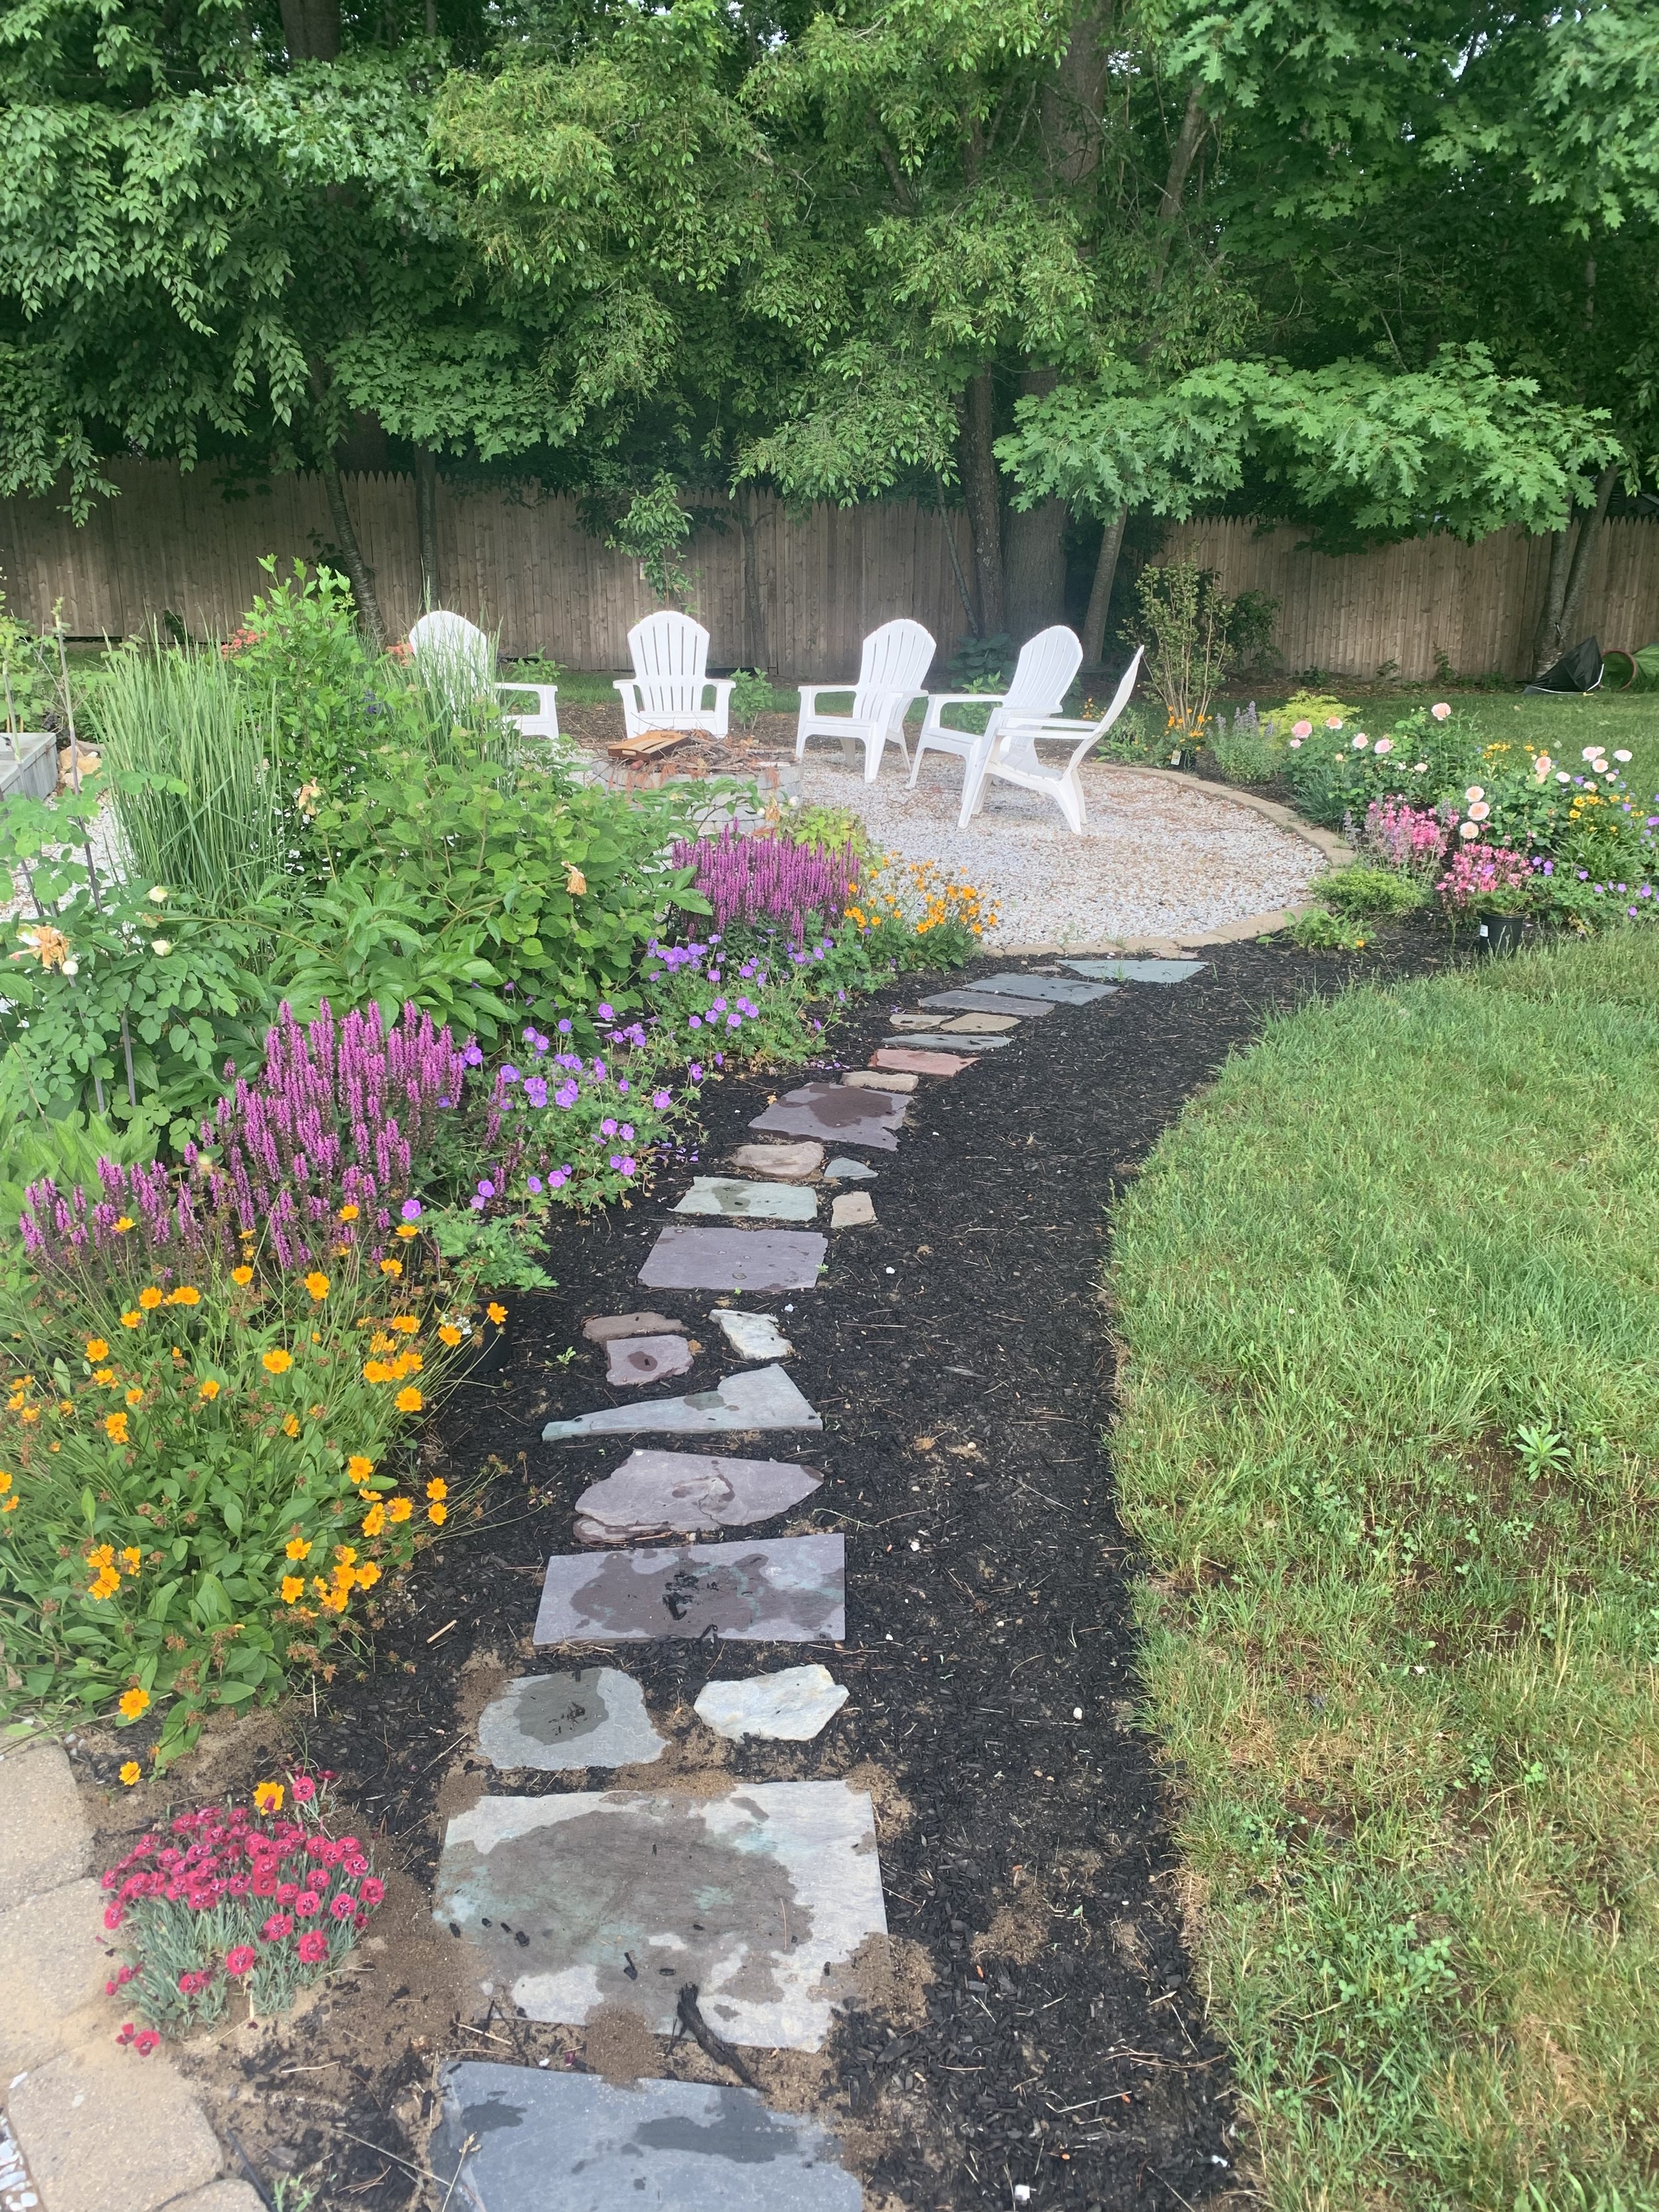
Here’s a picture of the soil just after being laid. I made a pallet walkway to cut through to our side fence and started expanding the flower beds around the fire pit, pergola and fence.

We put down tons of grass seed. We got a mix from Kennedys Country Gardens, a local garden center, near our house that had a seed mix specialized for New England sun and shade areas. You can see it was just starting to fill in.

On the side of the house it’s partial sun so we planted a row of bloomstruck hydrangeas. They love the spot.

Below the hydrangeas we have some yellow columbine, some dark heuchera, a few forget-me-nots, a drift of brunnera, a dogwood shrub, and some spring blooming azaleas (for winter interest) since they are evergreen in our area.

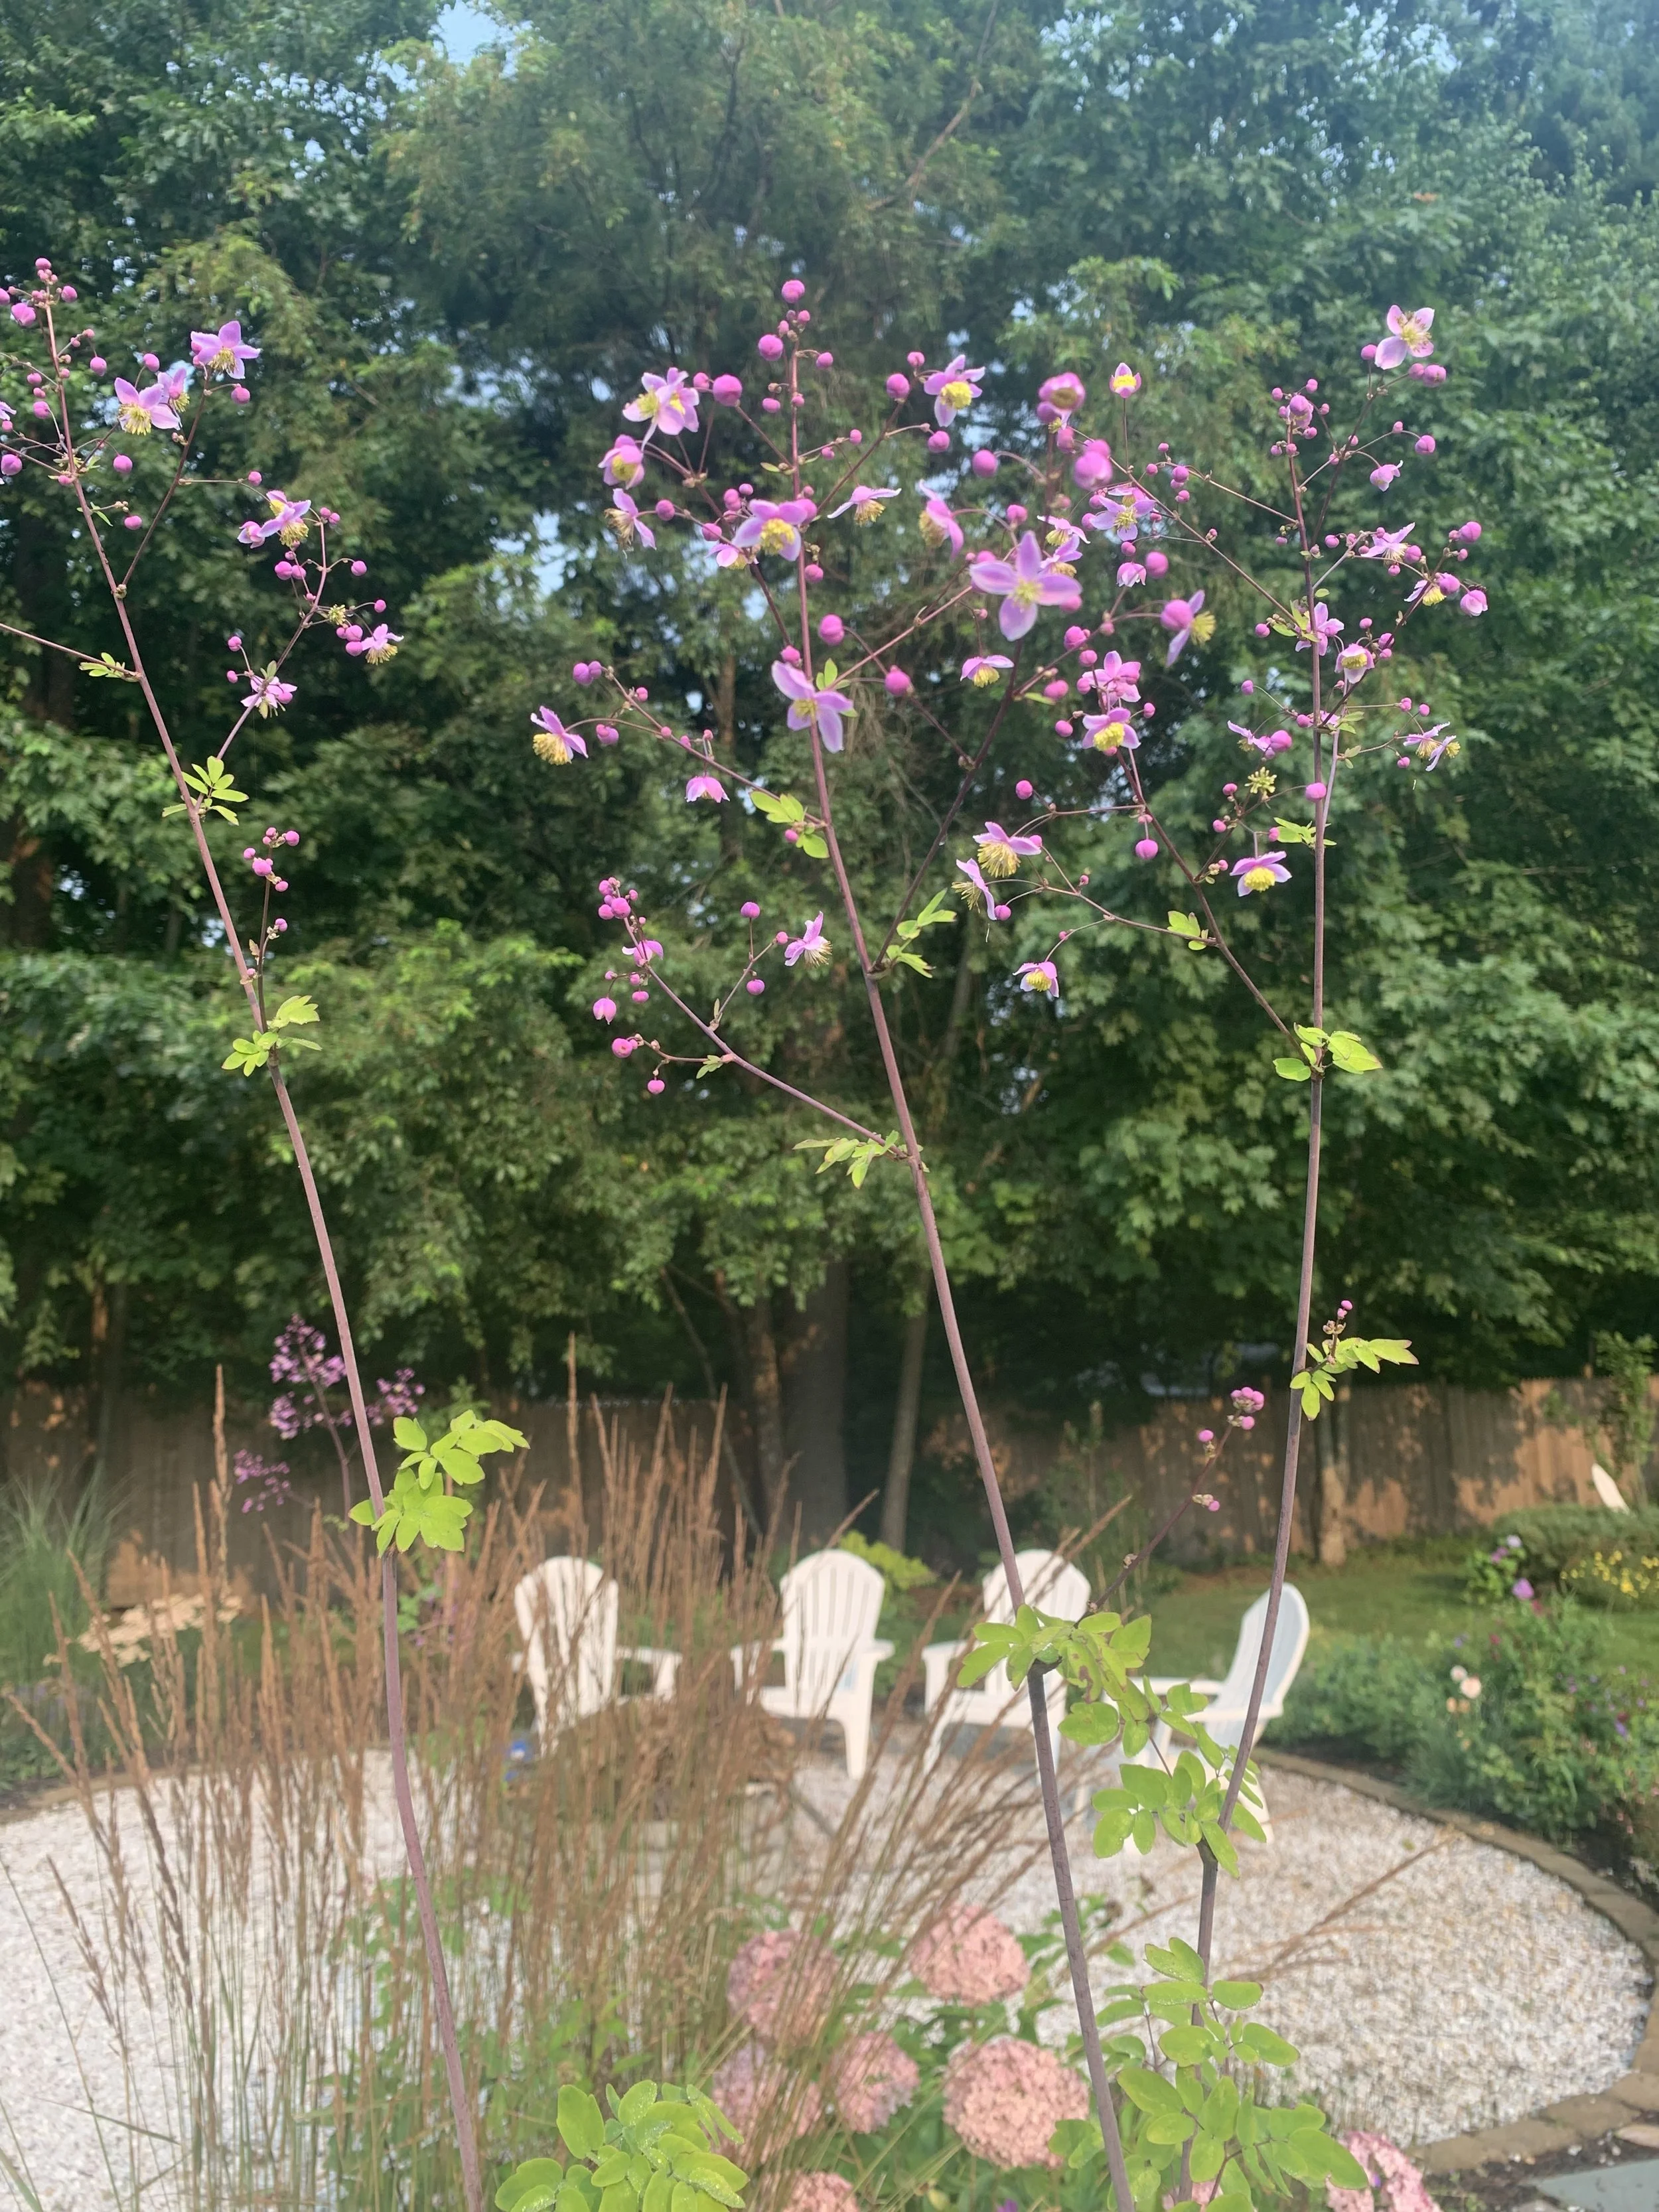
Swooping around the back side of the fire pit we have rose of Sharon, a swoop of penstemon “dark towers” for some dark foliage color, Veronica (the purple spikes) some daisies, beach grass that I divided from another part of our garden (free plants yay!) and some peach yarrow. So far so good and everything is thriving

On the other side of the fire pit we get more sun so I planted a lot of sun loving plants. We have a big crepe myrtle, a butterfly bush, tons of David Austen roses (the lady gardener) hardy geraniums, guara, coreopsis, and some catmint. This is one of my favorite flower beds in the yard. It’s packed with color, something is always blooming and it really gives the whole area a nice cottage garden vibe, which is my favorite type of garden!!


Taco eating contest night
Taco ‘bout a party!

Yup- you read that right! In honor of cinco de Mayo and the warm weather finally coming out- we had a taco night! Which turned into a taco eating competition!

We had plenty of pre-dinner drinks (mostly margaritas) to get us all amped up for the competition!

Phil judged all our tacos to make sure they were full enough and kept track of how many everyone ate!

The champs! From left to right: me second place with 9 tacos, Liz first place with TEN tacos, Windy in third place with 6 tacos.

It was a super fun night with all the girls and their spouses!
Kentucky Derby Themed Shower

Talk Derby to me 😉😉
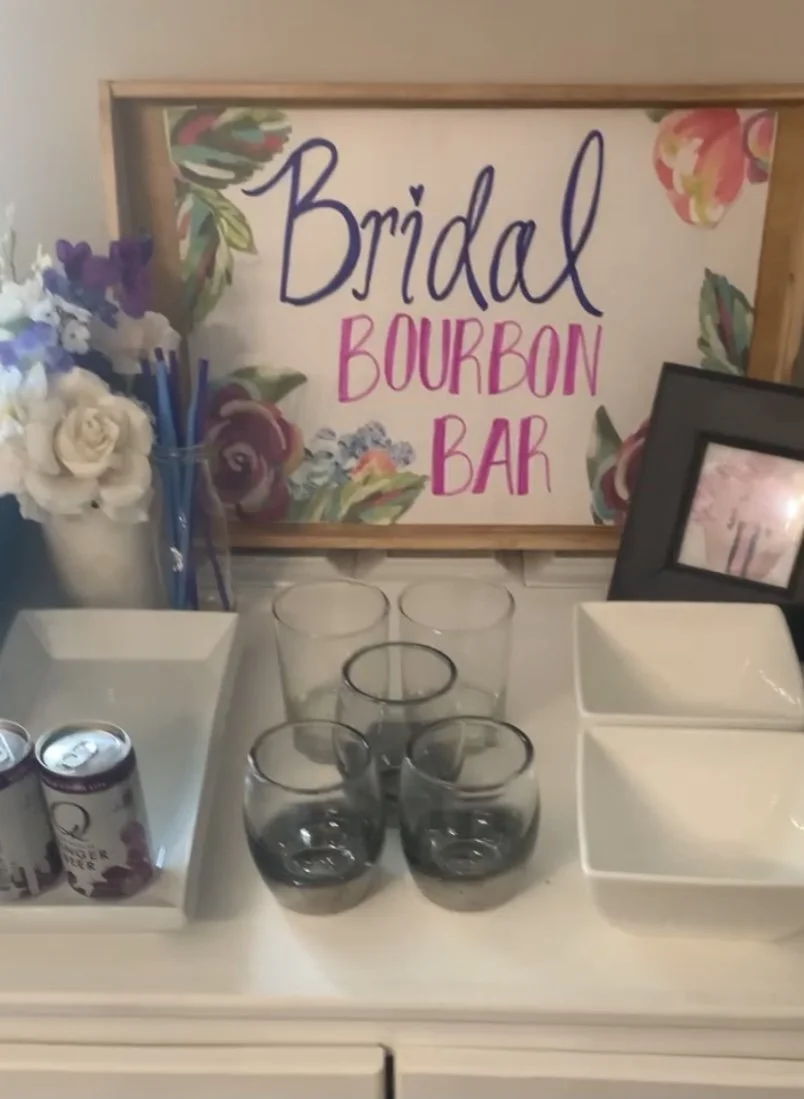
My beautiful friend Mary is getting married in August so this Spring I hosted her “bridal shower”. She had got married in a private ceremony the year before (thanks Covid) so we just had a small gathering of close friends for her shower.

Her and her hubs love Bourbon so we thought it would be perfect to have a Kentucky Derby themed shower! We had a bourbon bar with all the fixin’s to make some delicious cocktails- blackberry simple syrup, mint, ginger beer, basil, blueberries, etc
Since the derby is also called “the running of the roses” we made sure to have tons of flowers everywhere!
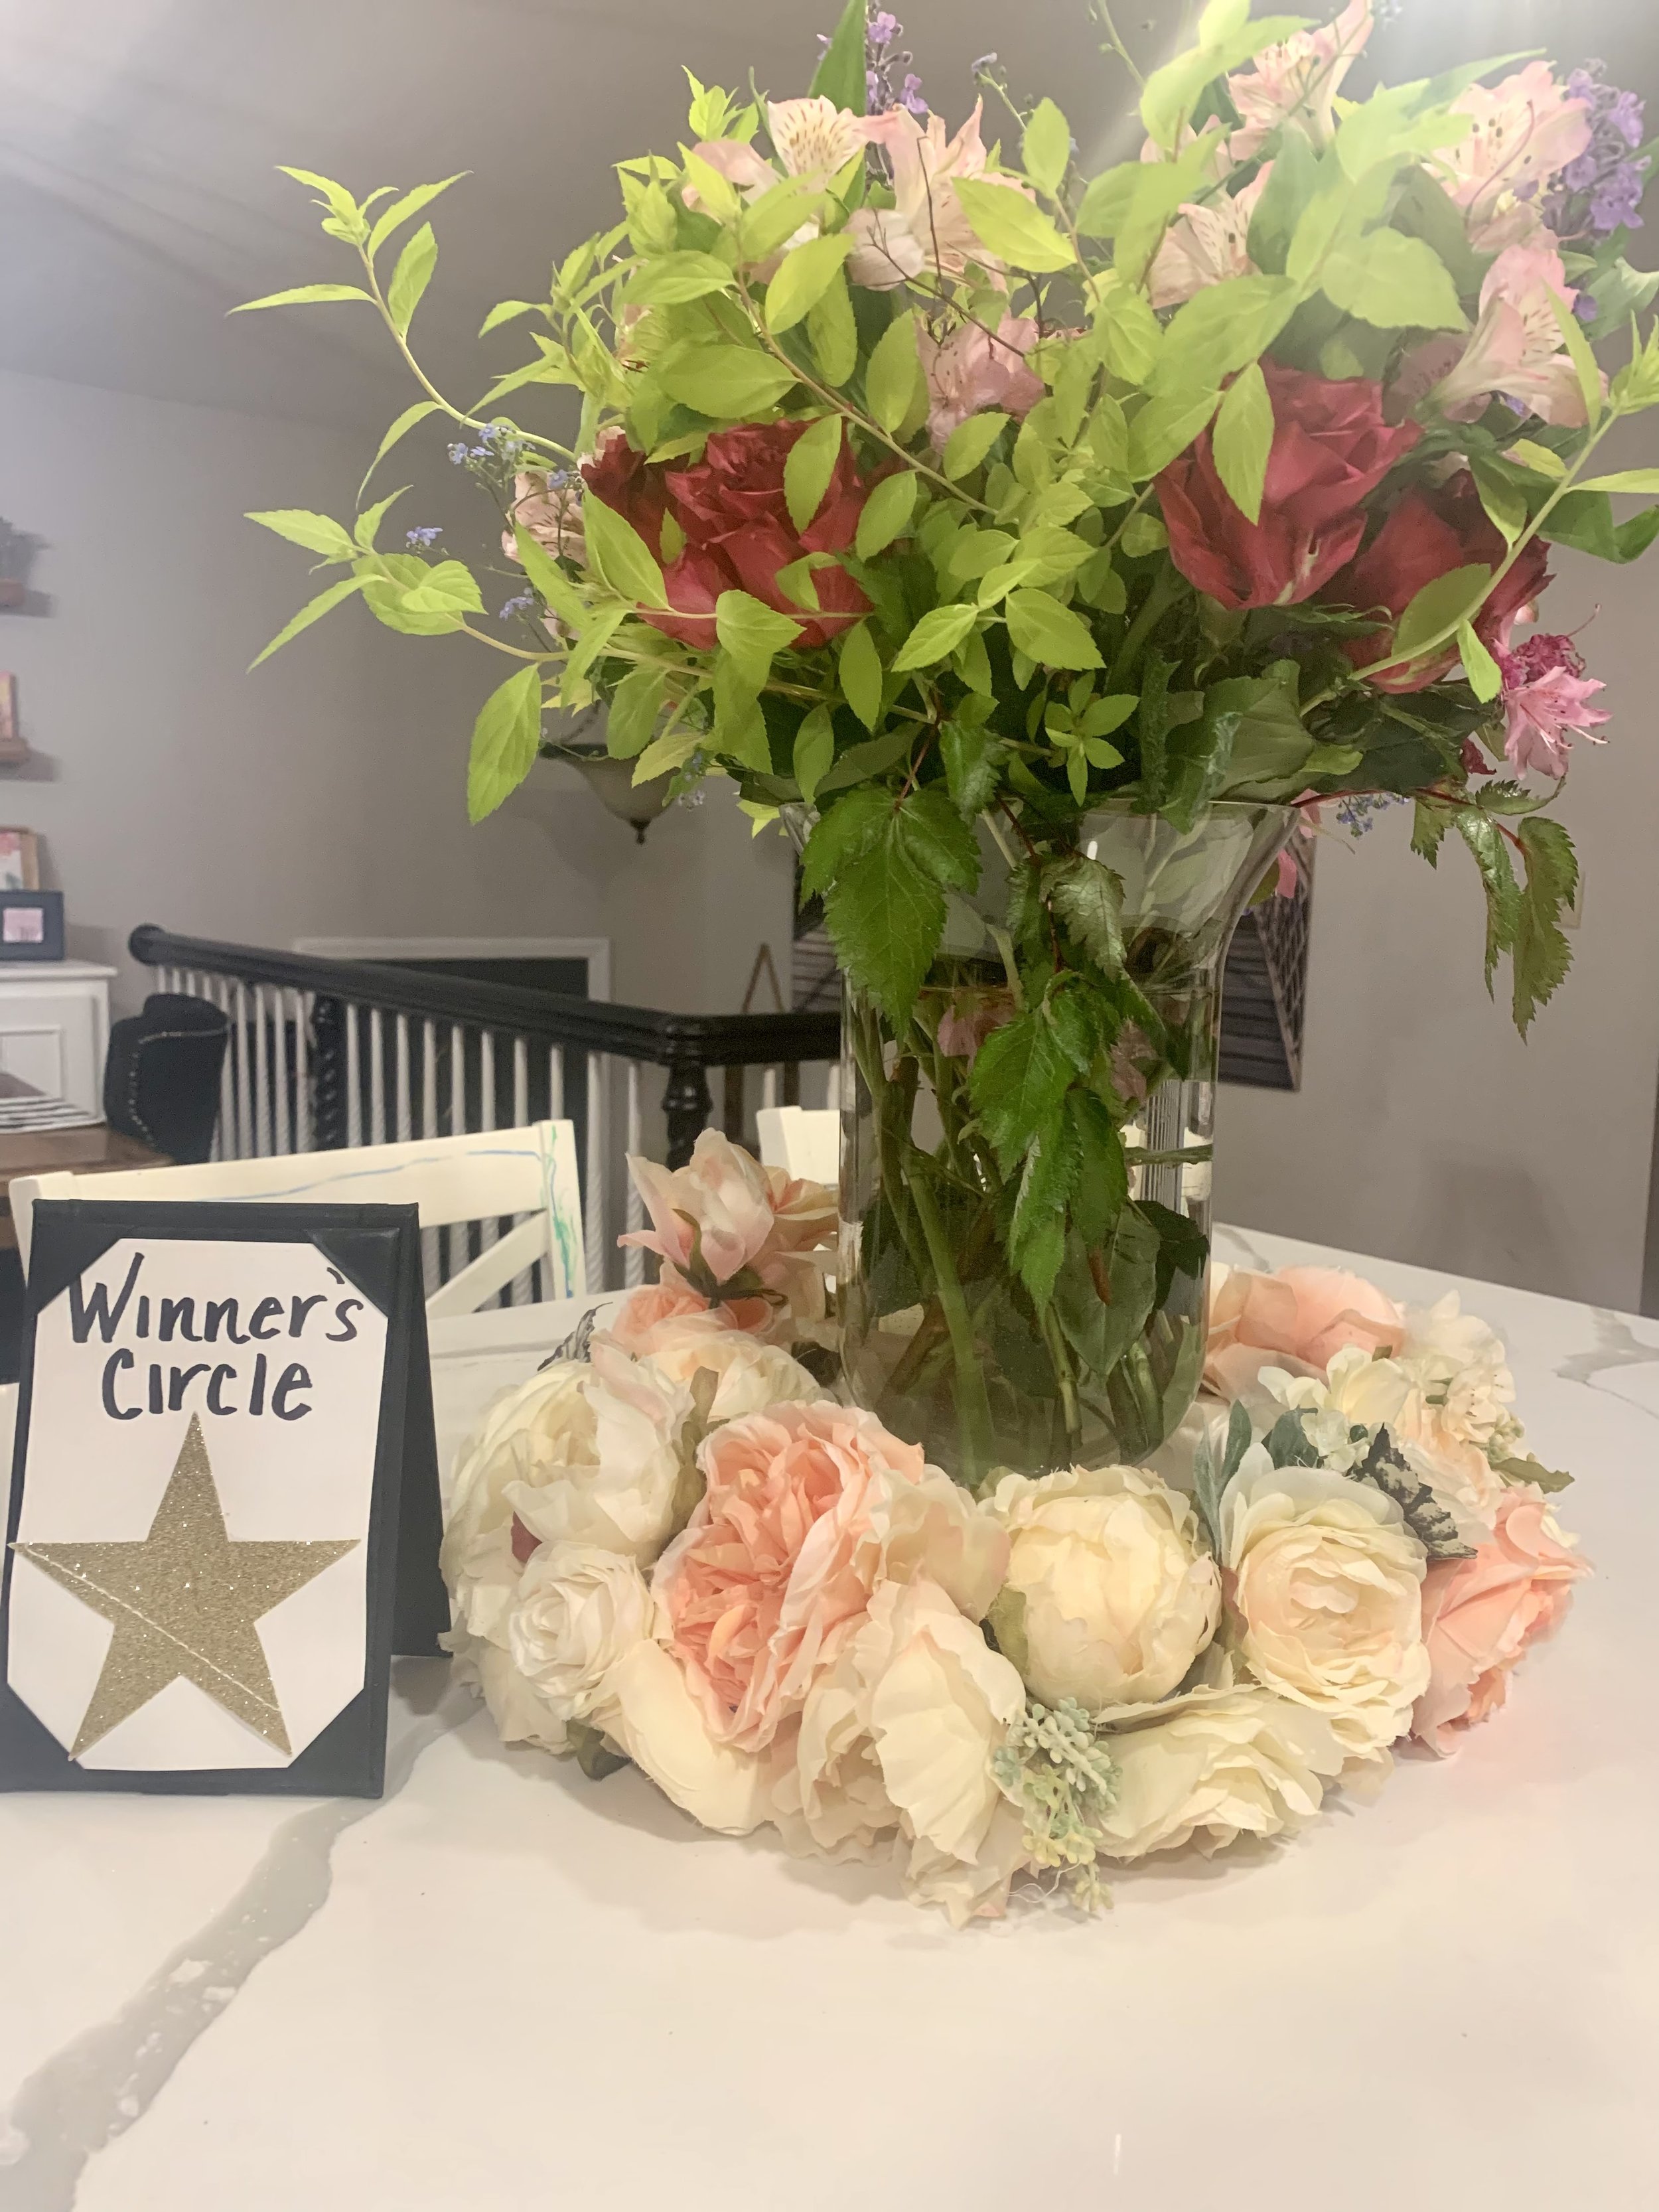
We also had “Mary-mosas”, horse betting with names of all her ex boyfriends, a selfie area, and cute little banners.


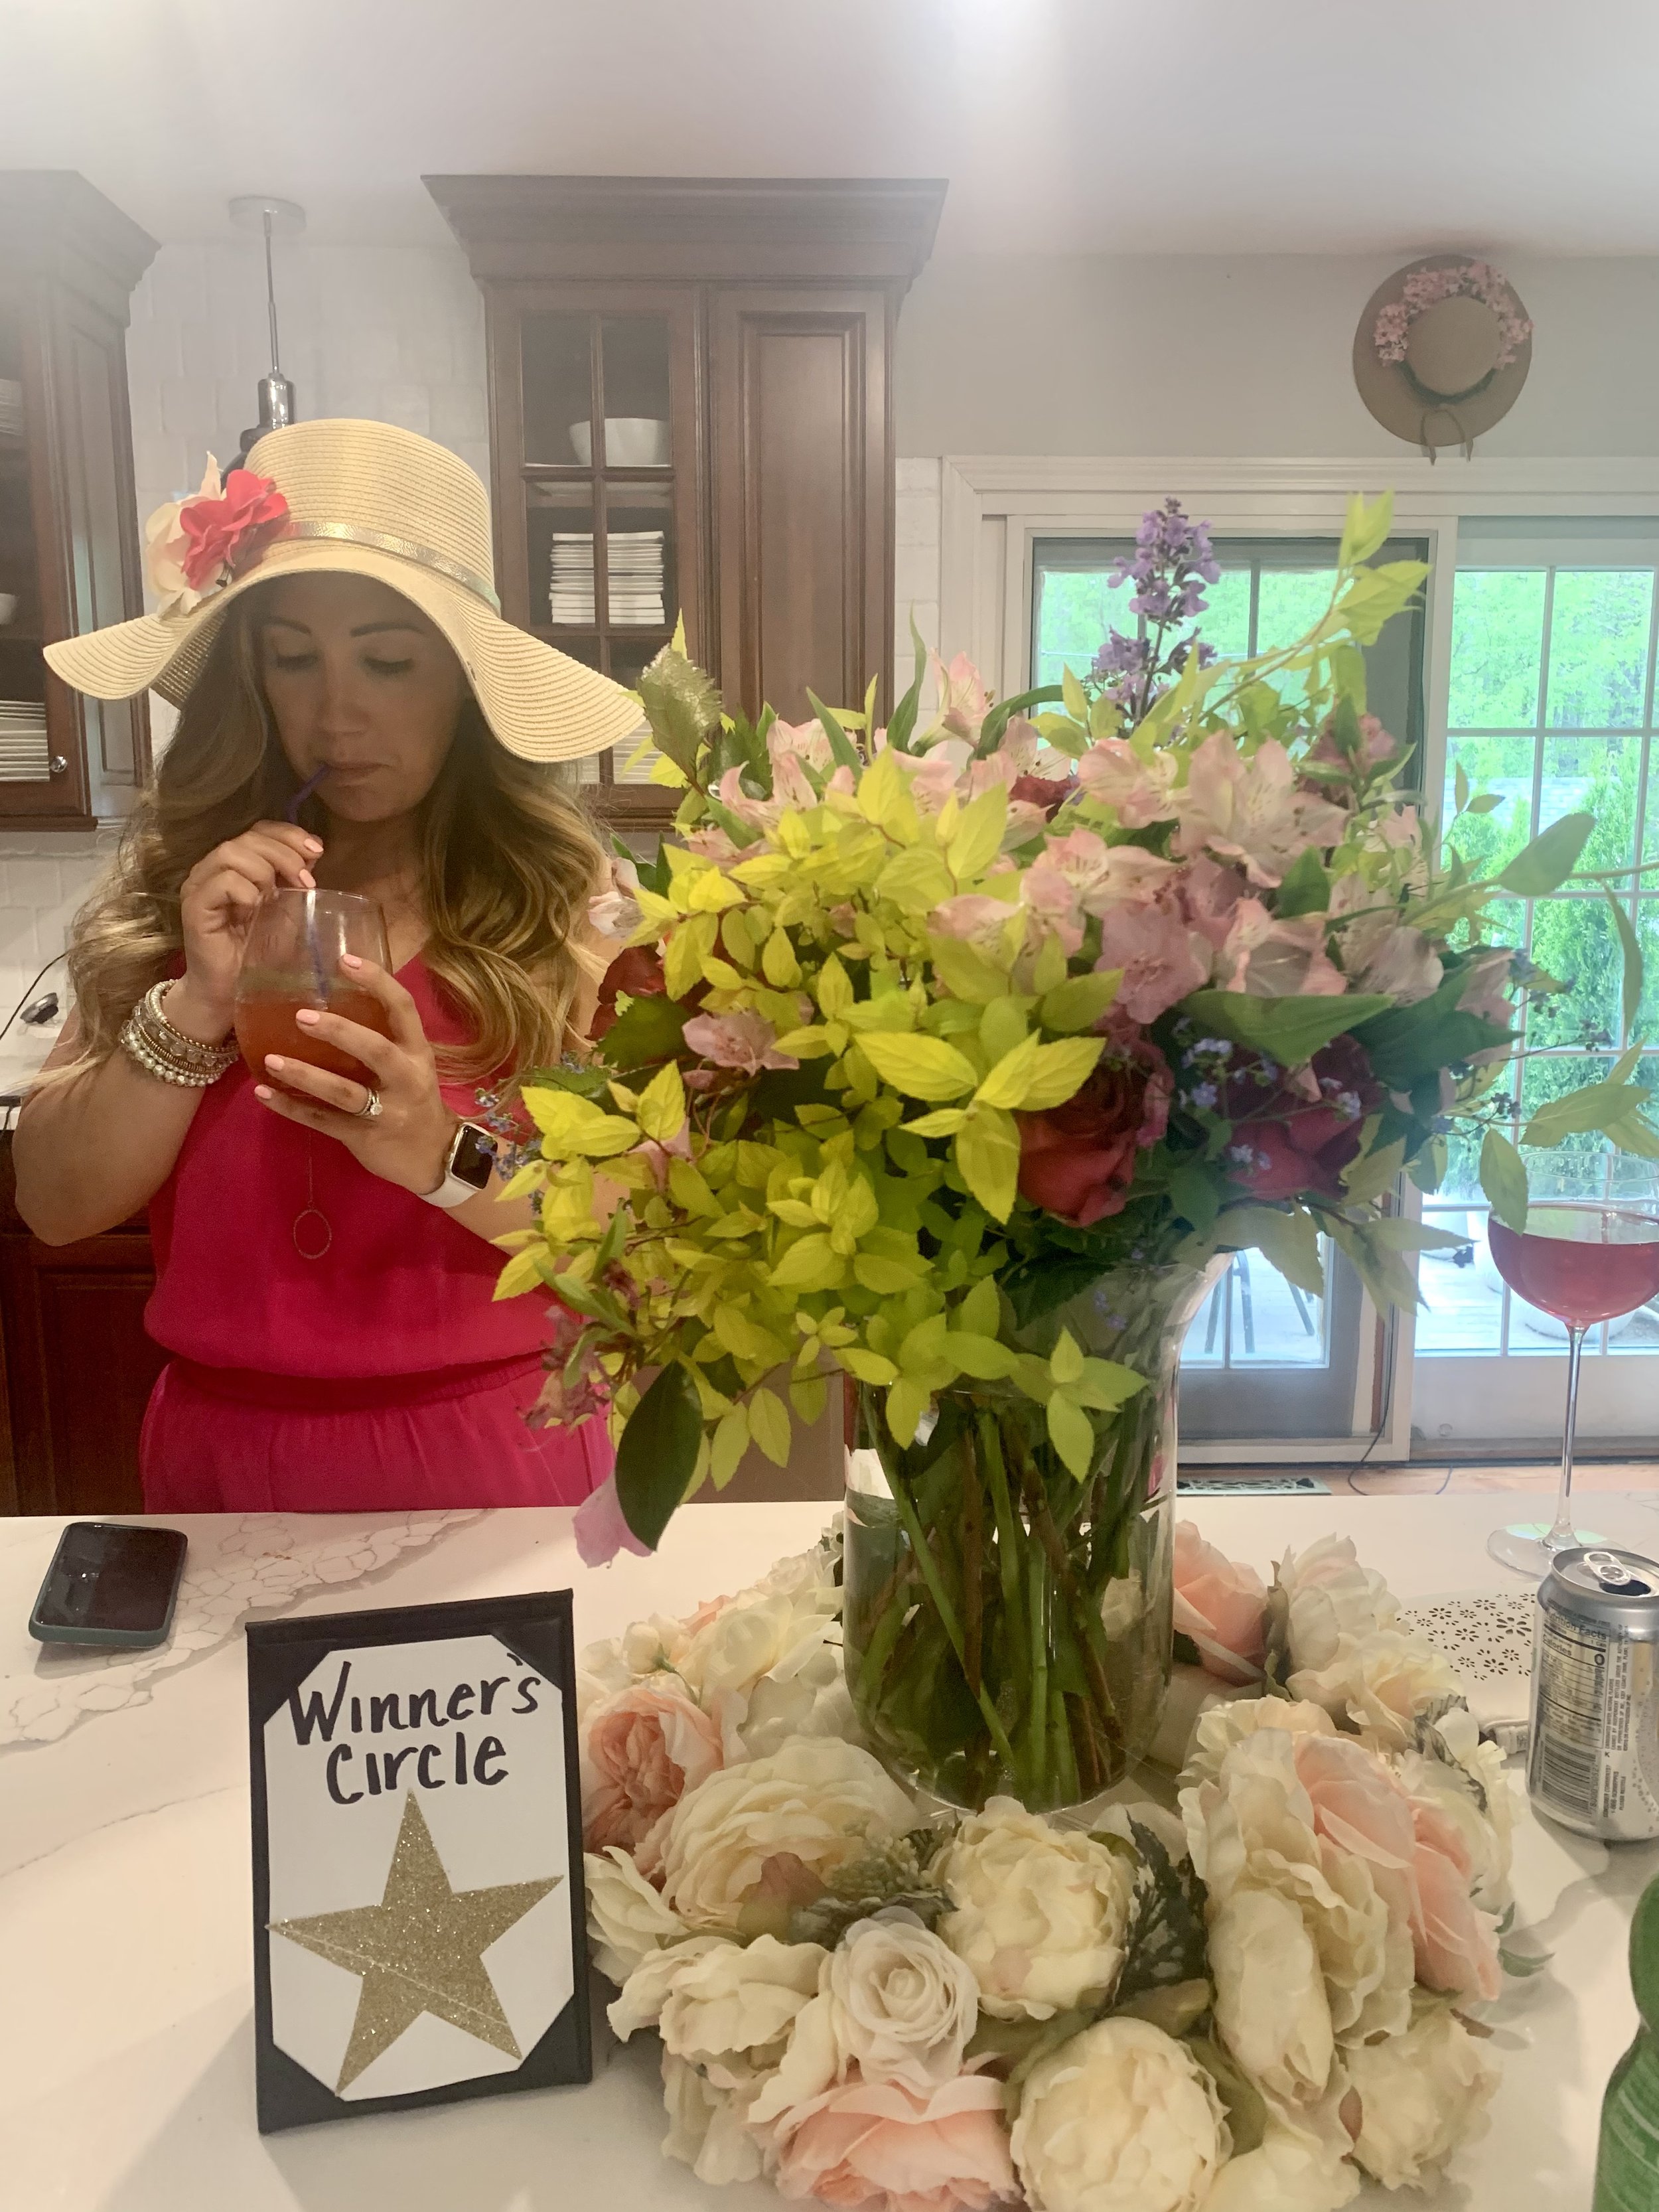
It was a gorgeous day so we spent a lot of the afternoon outside in our derby-wear, including all of our awesome hats!


After we spent some quality time together and opened her gifts from us we treated our bride to be to a fancy dinner in town!

It was a great day/night celebrating a beautiful bride to be!
Easter 2021

Another Easter during the pandemic 🙄
Easter 2020 was during the peak of the pandemic for us but we still tried to make it a special one even though we couldn’t have family or friends visiting and basically everything known to man was sold out online and in every store.

So this year I planned early and tried to think of fun, outdoor, non candy stuff to fill their baskets with! The weather was finally starting to get nice so we did mainly outdoor gifts. My kids like gardening and digging in the dirt so instead of traditional baskets I filled outdoor planters for each of them so they could plant something in the spring. In addition they each got bubbles, sidewalk chalk, kinetic sand, sunglasses, new summer shoes, (natives all around) gardening gloves, markers, and accessories for their swing set!


We were able to do a “framily” Easter egg hunt this year and the kids loved it! Such a big switch from the year before.

Easter morning special breakfast seats!

Family pictures are hard, lol! But it was still a great Easter 2021!

Oak Street - Before & Afters
Before and After pics of our New England home on Oak Street

Kind of in a Winter rut over here. It’s day 7 million of the pandemic and its 19 degrees outside - yuck! so I decided to share some before and after pics of our house to remind myself just how far this little baby has come over the last 7.5 years.
EXTERIOR
The outside looks completely different from when we bought it, mostly because we doubled the size of it by adding on a family room, playroom, master bedroom, walk-in closets, and a master bathroom. Smaller things we did included adding the portico and columns to the front door, a new walkway, fencing the yard, and tons and tons of landscaping!

Before

After

before

after

after

after
FOYER
The front entrance didn’t have as big of an overhaul as the exterior but the changes we made still had a huge difference. I painted the door, railings, spindles, door trim, light and stair kickboards. The hubby added the awesome tile as a Christmas present to me. I added hooks, and a small storage piece with some styling and we have a beautiful entry way!

before

after

after

after
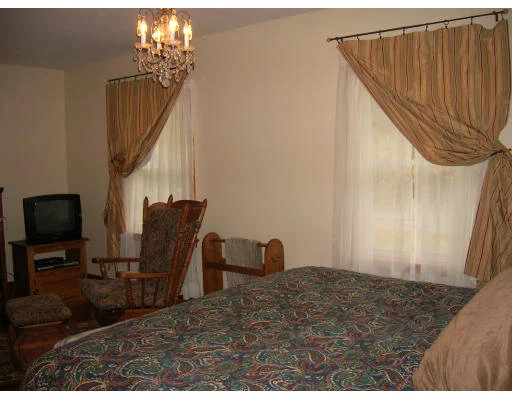
BEDROOM 1
The larger of the kids bedrooms made some serious changes to over the years. We painted the walls and all the orangey oak trim which brightened it way up. Added moulding for interest, added an extra closet, widened it, and changed up all the furniture and decor. My girls love it now!

before

after

before

after

after
BEDROOM 2
This room started out as our guest room. It’s not Jack’s big boy room. We painted the walls a brighter color, moved the closets, replaced the orange oak trim, added mouldings, changed out light fixtures and finished it off with some little boy decor!

before

after

after
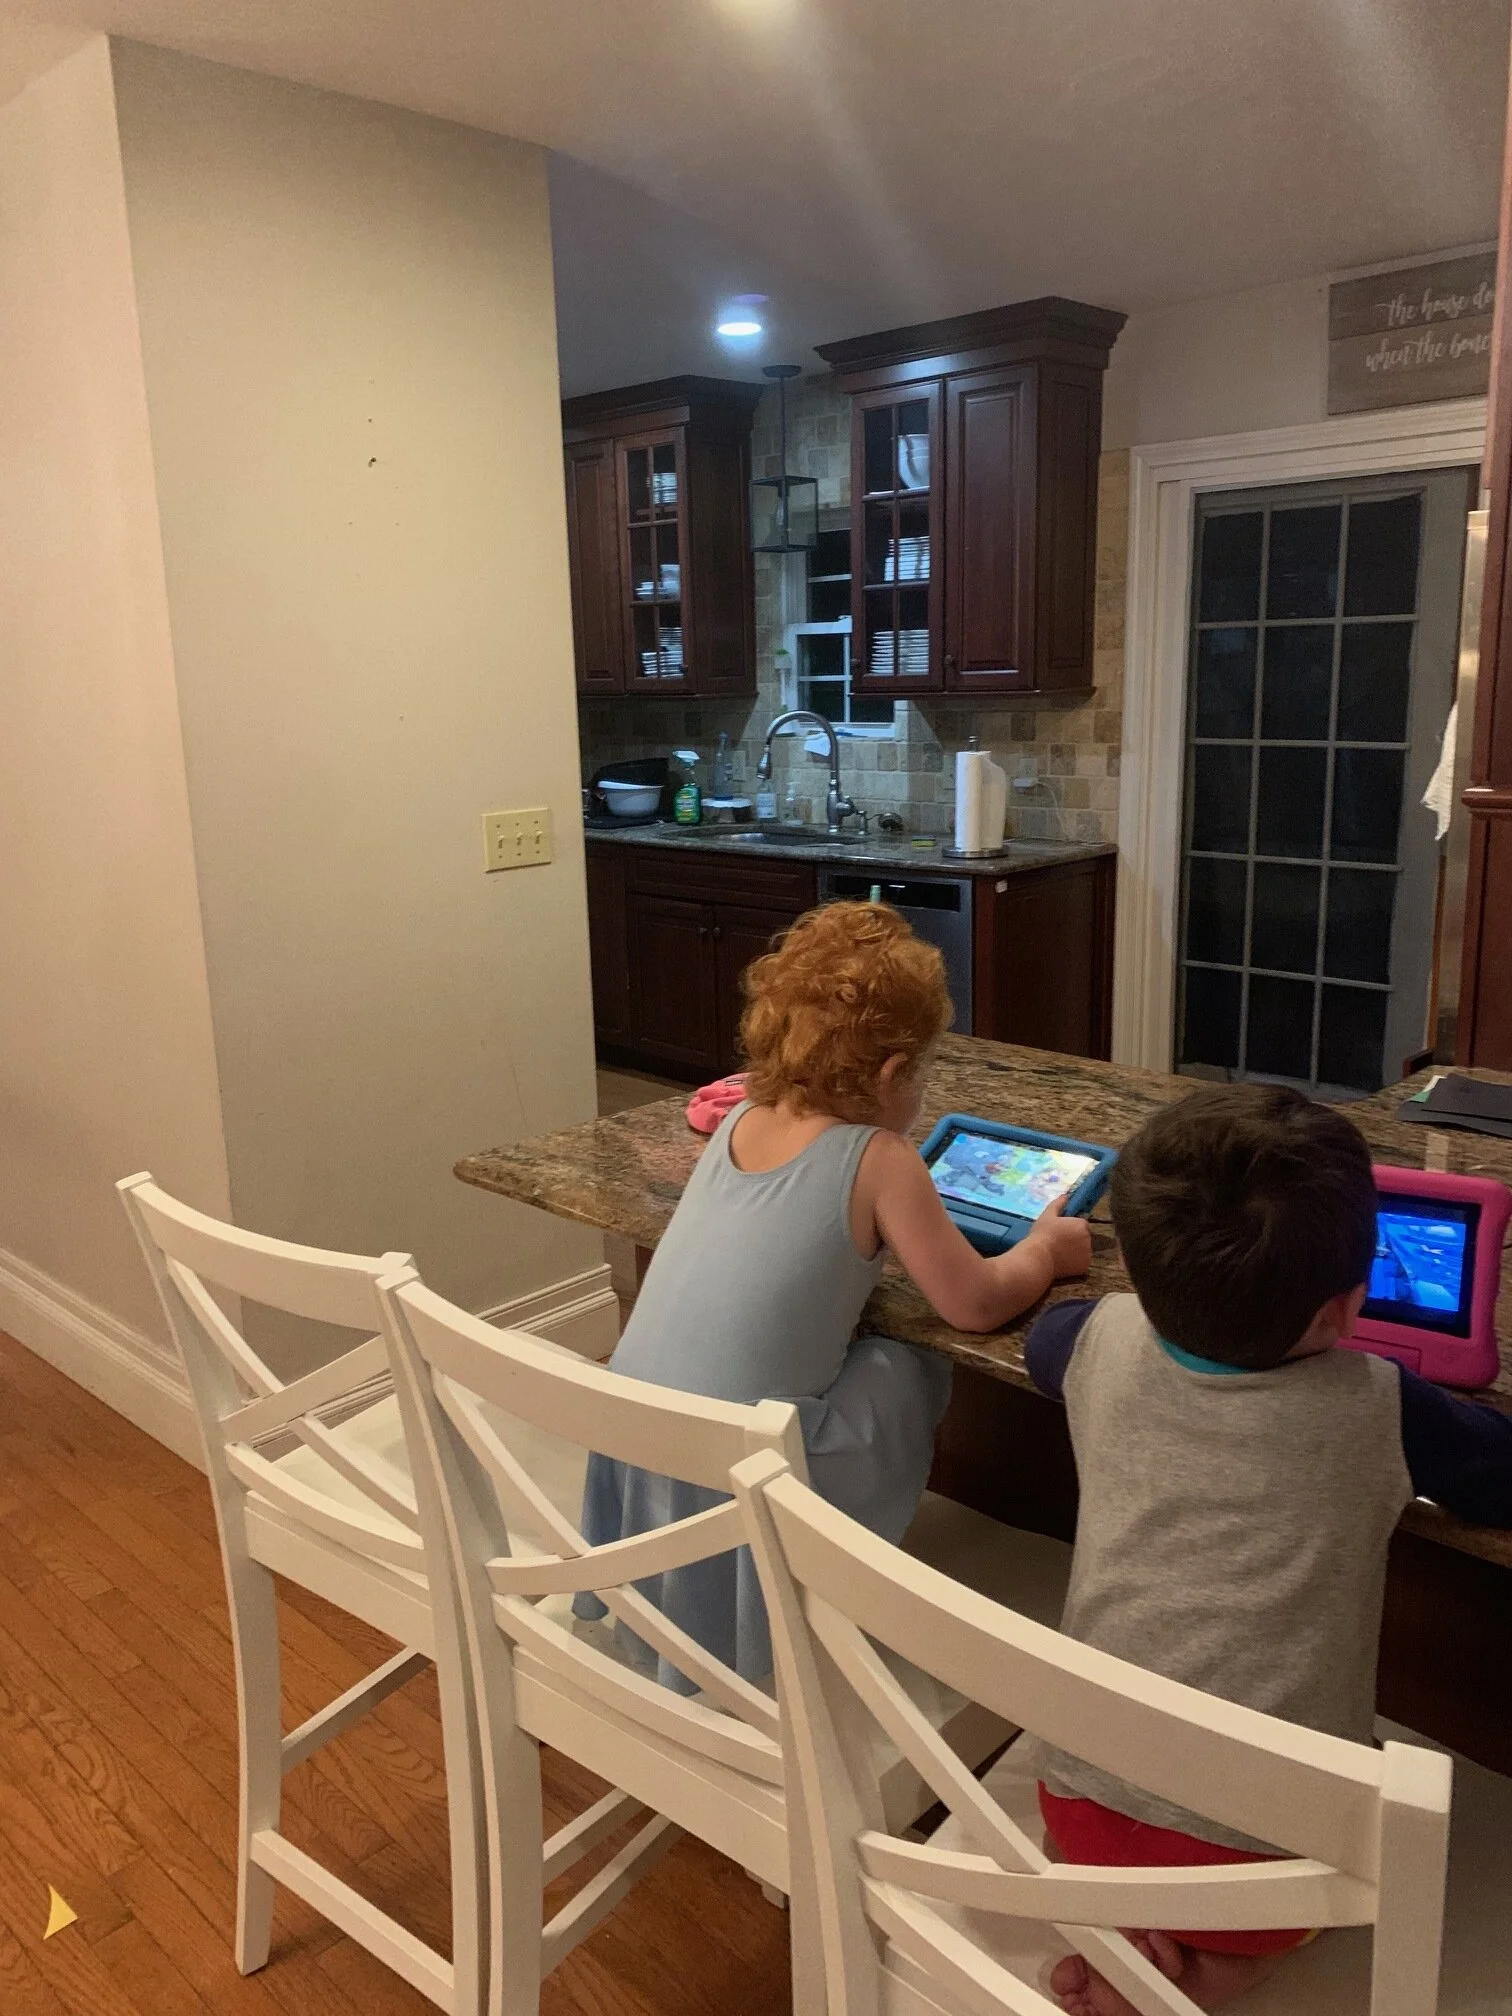
KITCHEN
Our kitchen technically isn’t finished so I don’t have a full “after” picture to show but still it’s come so far already that I had to include it here. The main change was taking out this awful wall that cut the kitchen off from the rest of the house. It already looks so much better. We are still waiting on lighting, countertops, and hardware.

before

before

before

during

during

during
Can’t wait to add the official after pictures of our kitchen once it’s all done! I’ll add more Before and After posts as we continue to update our spaces! We’ve been here almost 8 years and are still updating things as our time and BUDGET, lol) allows! Home takes time, so I’m trying to be patient, but it’s TOUGH!

Thirsty Tuesday
Since we are coming up on the one year mark of corona/quarantine/the never ending pandemic I figured it was a fitting time to share all my favorite cocktails that got me through those first months! Cheers!
Ginger Cosmo

A new twist on an old classic!
1.5 ounces vodka
1 ounce triple sec
1 ounce ginger liquer ( I use Domain de Canton)
Splash of cranberry
Squeeze of a lime
Shake it up and pour in a chilled martini glass
Basil Gimlet

A little sweet and super fresh!
2 ounces vodka
1 ounce triple sec
Fresh lime juice
fresh basil leaves (roll them up before putting them in the shaker to get all the flavor and aroma going)
Shake it up and top with a splash of soda water
Creamsicle

Tastes just like the ice cream, but with booze :-)
1.5 ounces vanilla vodka (I use Stoli)
1.5 ounces orange vodka (I use Stoli for this too)
Splash of simple syrup
A healthy splash of OJ
A heavy squeeze of whipped cream right into the shaker
Shake up vigorously and pour in a martini glass or over ice in a cocktail class. Top with an extra pop of whipped cream
Chocolate Raspberry Martini

The perfect after dinner drink- dessert in a glass
1.5 ounces raspberry vodka (stoli is my fave)
1.5 ounces godiva chocolate liquer
.5 ounces chambord
Shake and pour in a chilled martini glass, garnish with fruit
Pomegranite Martini

This picture is before I added the pomegranate liquer which is why its not pink!
1.5 ounces vodka (I use tito’s for this)
1 ounce pomegranate liquer (I use PAMA- its my fave!!)
.5 ounces triple sec
squeeze of a lime
Shake up and top with a splash of soda water. Add a spring of rosemary or basil for some extra freshness
Bottoms up!

Kitchen Remodel Design Plan
Design plan for our kitchen remodel
We’ve lived in this house for 7.5 years and are JUST finally getting around to giving our kitchen a facelift, even though it was one of the first things we said we would do when we bought it! We have a big-ish family (5 people) and then a large extended family that we like to host often. We have family dinners most Sunday’s in the winter and love to have friends over as well, so we wanted our kitchen to function for that but as it was, it really didn’t. It’s a typical “raised ranch” kitchen with a wall cutting right through it, blocking it off from the rest of the house. Pictures of the before below
BEFORE


The Plan
It’s not in the budget for us to completely rip out all of our existing cabinets/appliances/etc, and they are still in great shape, so we are keeping the cabinets in there now, but we are taking down that horrible wall and putting in a nice island opening up into our dining room/family room! In addition to that we are also getting new countertops, new backsplash, new flooring (it was beat up), new lighting and new hardware! So basically everything is being replace besides the actual cabinets.
The Design

I’m really excited with what we came up with! The 2 larger pendent lights will hang over the island, and the smaller bell light will be over our sink. The larger rectangular chandelier will go over our dining room THAT OUR KITCHEN IS NOW OPEN TO!!! I plan to do an antique-ish looking brick backsplash and a think stark white quartz countertop. Finishing it off with aged silver leaf hardware and a traditional polished nickel faucet and I think it will be beautiful! Of course I will add color in other places. I’m planning to put rug near the sink, a DIY valance above the sink window, a framed piece of art behind the stove, and possible some antique plates hung by our back door. I can’t wait to share the finished product!!
Links
Tips to make your bed look extra fluffy and comfy!

I love having a nice comfy, fluffy, cozy bed to fall into every night, especially now since it’s a pandemic and frigid temps outside. Here are my tips to make your bed look extra scrumptious!
To start with I like to have a nice neutral comforter, coverlet or simple blanket. I usually use white, beige, gray, etc. Then you can layer on all the fun stuff and change things up as needed.
To start with I like to have a nice neutral comforter, coverlet or simple blanket. I usually use white, beige, gray, etc. Then you can layer on all the fun stuff and change things up as needed.

I love to add patterned sheets! It’s a nice way to fancy up a bed without overwhelming the room with tons of different patterns
This is a picture of my son Jack’s bed. He has compass sheets and a striped duvet. I love the pattern play

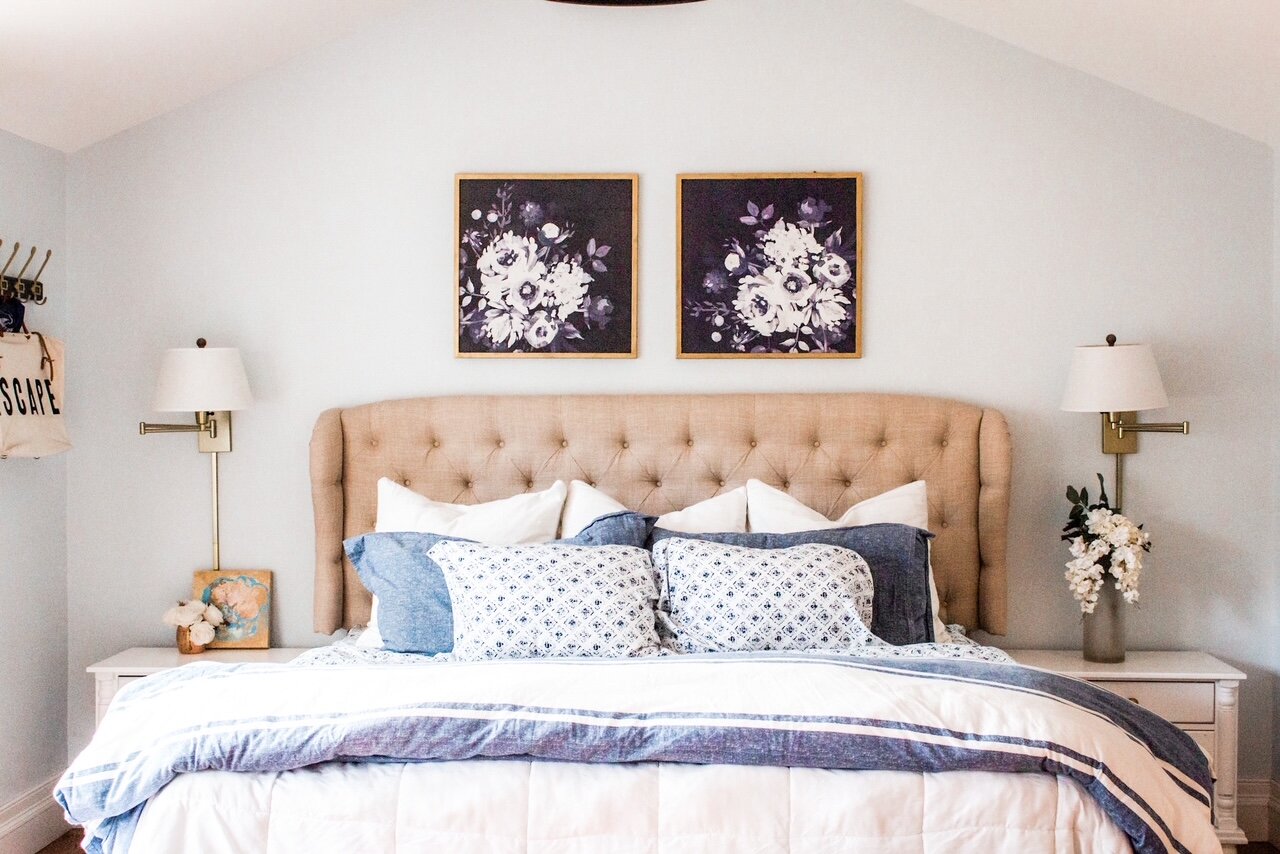
Next, I like to layer a super fluffy duvet at the end of the bed. It just makes you want to jump in bed and pull the covers up. To make sure your duvet looks EXTRA fluffy and full, I recommend sizing up on your down insert. For example: a twin duvet would have a full insert, a queen duvet would have a king insert. For our king size bed I use 2 king inserts.

Now lets talk pillows! I pretty much use the same formula for all my beds. 3 Euros as the back row, then 2 king sized pillows that match the duvet, then 2 or 3 decorative pillows.
Sheets/standard pillow cases (target)

The sleeping pillows are tucked in behind the back row. You can see them here behind our white Euros

To make your pillows look extra full I usually size up on my inserts like I do for my duvets so if my Euro pillow is 24 inches I will get a 26inch insert. If I cant find the next size up, I double up.

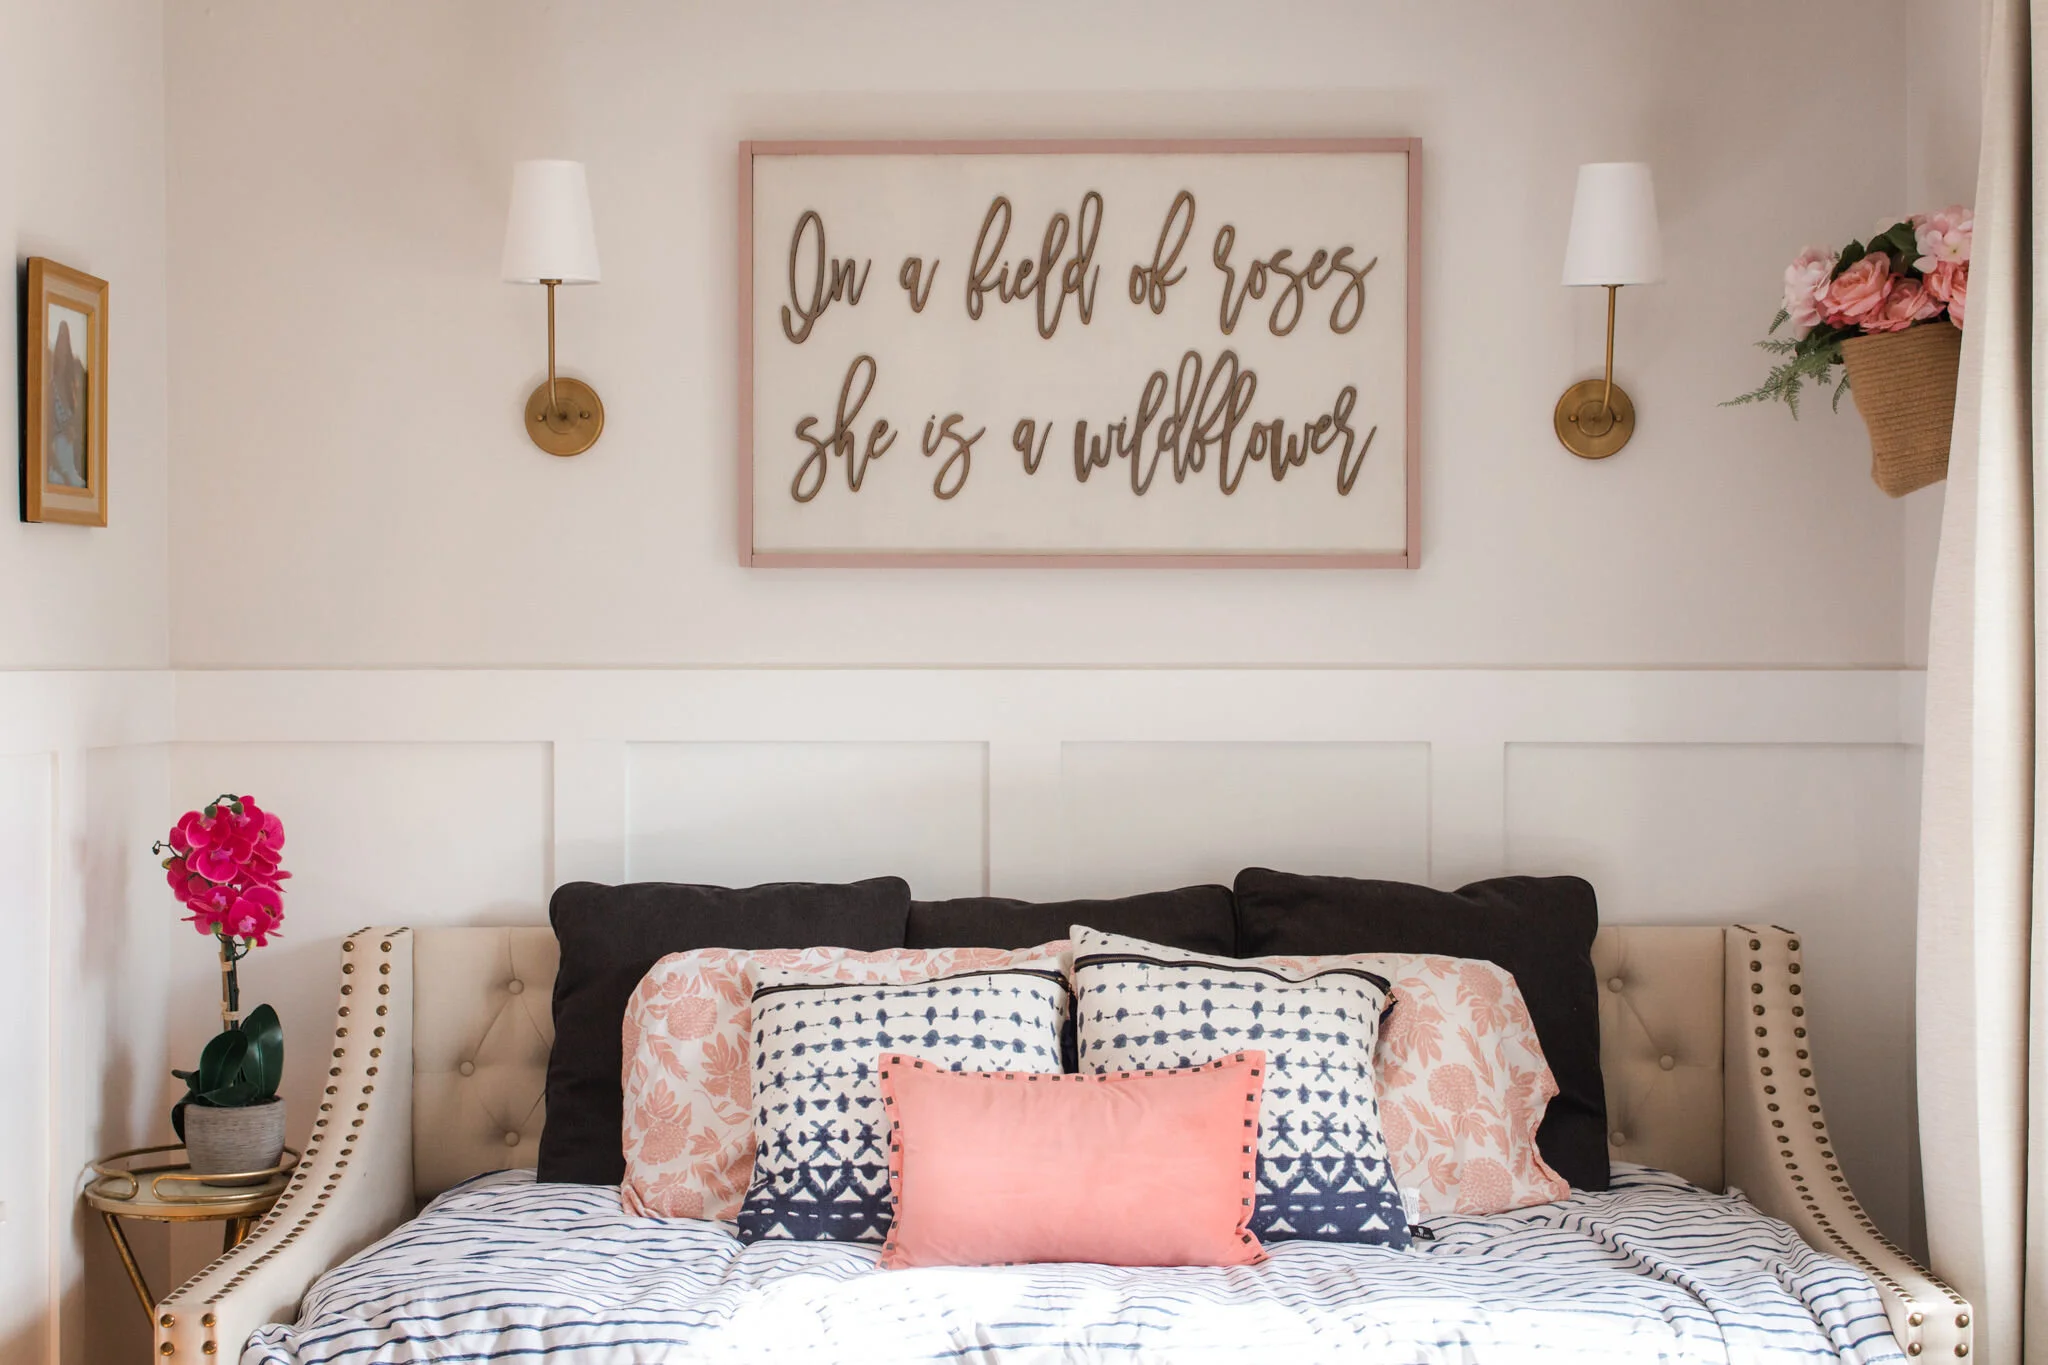
Heres another example of the same formula. 3 Euros, 2 standard size pillows (that match the sheets set) and 2 or 3 decorative pillows

The decorative pillows are another spot I love to add pattern with. You can change them out with the season or your mood

A tip for mixing patterns is to make sure they are not all the same size print. In the picture on the left, the pink floral is a large print, then the blue ikat is medium and the blue stripe is a smaller, finer print. This formula helps everything look pulled together and less “busy”
Happy Snuggling!

Wall Sconce Roundup
Different types of wall sconces and how best to use them

To start- I love wall sconces! They give a custom look to homes, can light art, or a cozy little reading nook, without bulky lamps, etc. So many good uses! There are 3 different types of wall sconce lighting you can have in your house (hard-wired, plug in’s, and the battery trick!)- and we have all three so I’ll walk you through the options! Links for everything I used are at the very bottom :-)
First up: Hard-wired


Hard-wired wall sconces are put in by an electrician and have the power connection through the wall wired into the studs of home. These are definitely the most common and are the best option. The sconces we have in our Master Bathroom and Main Bathroom (above) are hard-wired in from when we built our addition. They are much more permanent than the other options.
Second option: Plug-in’s


Plug in wall sconces are also pretty common as well. You hang them like normal with screws, and there’s a cord that comes out of the bottom to plug into an outlet. They usually come with a cord cover (like second picture above) to keep it neat and hidden. Some people paint the cover the same as the wall, or wallpaper over it. This type in our Master Bedroom was perfect because there were plugs right below where our nightstands go and it’s less permanent than hard wired options if I decde I want a different look later on.
Third Option: Battery trick


The 2 lights pictured above were purchased as “battery operated”. They have a tiny battery compartment in the base and you screw them into the wall just llike any wall decor and they have a little remote to turn them on and off.


The three pictures above (my girls bedroom, my sons bedroom, and our family room) all have the battery trick! For these lights I either couldn’t find something I worked in a plug in option or I didn’t want to have the permanence of having them hardwired in. For my kids rooms I know I will redesign them multiple times so I didnt want to be stuck with wall sconces hardwired in case I needed a change, in comes the battery option!
Order sconces you like based on style and price point (not on hard wired, or electric options
Attach the sconce to the wall like you would normally.
Tuck in any visible wires

Order sconces you like based on style and price point (not on hard wired, or electric options
Attach the back plate to the wall with provided screws

Tuck all wires into the sconce (like pictured)
This one was meant to be hard wired. If you’re using a plug in kind you can just cut the attached cord right off.

Attach light to back plate. This one was just 2 little screws

You could technically stop at the previous step if you just wanted the sconce for looks and not for actual light, but I wanted ours to be functional so I ordered these round battery operated lights

The lights I ordered came with a 3m sticker for the back. Peeled it off and stuck the battery operated light right to wear you would screw in the light bulb!

Use your remote and enjoy your new sconce!


DIY Kids Bakery Upcycle

We’re stuck at home- thanks Corona and never ending New England winter so I’ve been trying to come up with fun activities for the kids to shake up allllll the time spent inside. I decided to makeover this ugly, under used book shelf in our playroom.

This is what we started with. It was just sitting in the playroom completely unused, tucked in a corner.

first step painting it! You technically don’t have to paint it but I thought it could use a refresh!

I used Benjamin Moore “Mountainscape” since we had some leftover from another project

Next up was adding the sides to support the canopy. I used my brad nailer and nailed 4peices of wood to the sides. The front ones are flush with the bottom of the bookshelf and the back ones are higher off the ground.

Stapled a piece of white fabric on all 4 posts!

Then fill’er up with all kinds of baking goodies!! I sed our muffin tins, cupcake liners, mixing bowls and spoons, rolling pins, extra fabric as “dough” to roll out, cheerios for pouring and mixing and their play kitchen accessories.

I tucked our electric fireplace in their “workspace” to use an oven and added the bakery sign, tray and cups!
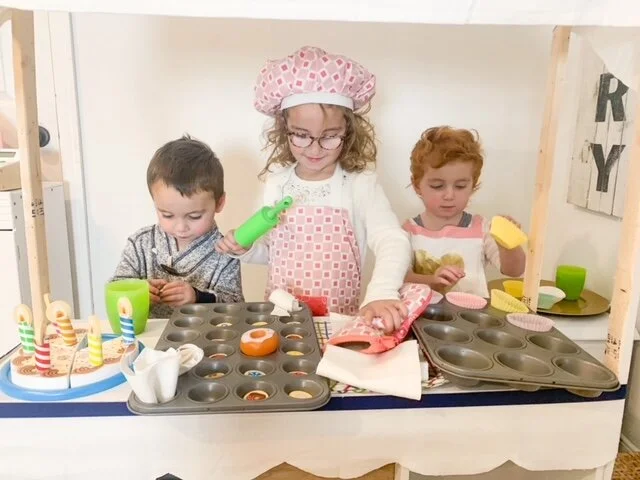
The kids had an absolute blast playing with their “new” bakery! It kep them entertained for a couple hours straight and now it’s in the playroom still being used!

DIY Preppy Coastal Oyster Art
DIY painted oyster shell art
Missing Summer HARD in this household so I decided to make some cutie little coastal art to give me a little warm weather vibe

I have been following @shellsofsouthie for awhile now because I love her painted shells. They are gorgeous and give off the perfect coastal preppy vibe. I knew I wanted them in my house somewhere so I came up with a fun way to display them!

Shells of Southie’s beautiful pink painted oyster shells!

These are the materials I used:
2 6x8 inch canvas boards I found at target for $1.00
Painters tape
Rub ‘n Buff in “antique gold”
Paint sample in “very black” which is actually a really dark navy
The prettiest little oyster shells

First I taped off the edges and painted on the rub ‘n buff

Once that was dry I taped off the gold edges, so I could paint my main background color

Valspar- Very Black- this is the background color I chose. I have it in my bedroom and it looks great with gold
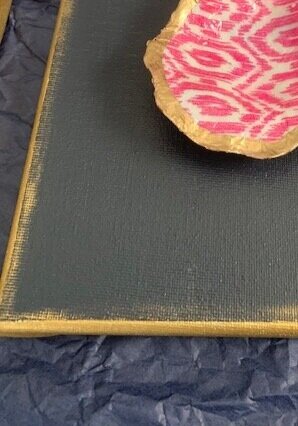
Then I took a veryyyy small amount of rub n buff and lightly brushed the edges so it was less a harsh line between the 2 colors. I think it gives it a little bit of an aged antique look

Last step was using a hot glue gun to secure them to the canvas!
I love the way they turned out!!


Jack’s Big Boy Room Makeover
A nantucket nautical cape cod-ish bedroom makeover for the cutest little man

Jack’s room has gone through a lotttt of changes. It was originally our guest room when we first moved in. Then it ended up being our dumping ground when we were going through our first addition to the house. Next it was his older sisters nursery. Then finally- his nursery! He used to share a nursery with his twin sister, but they were getting each other all riled up and it was affecting their sleep- AND MINE!! So we switched and gave him his own room and it was NOTHING special for the first year or so. I was too busy trying to keep 3 little kids under 3 alive to worry about the decor.

This is the blank slate we started with. One off-centered window, dated trim, patched walls, etc. Not good.

Then it was Quinn’s nursery. Fun fact- this picture was taken 4 days before I went into labor with the twins. Hence why this is the plainest nursery you’ve ever seen. Did. Not. Have. Time.

How it looked when we finally switched him to his own room. Plain plain plain. But he was almost ready for a big bed so I didnt want to spend any energy decorating.
See his little twin Avery coming in for a visit in the new room :-)
The Design Plan

I need to have some idea of what I want the room to look like. His final product isnt this exact replica but its very similar! I knew I wanted a “cape cod/Nantucket” boys room inspired by his tiny little “nantucket” t-shirt I had framed. We live in a beach town but I didn’t want a room that was “themed” or screaming “nautical”.
The Final Product!

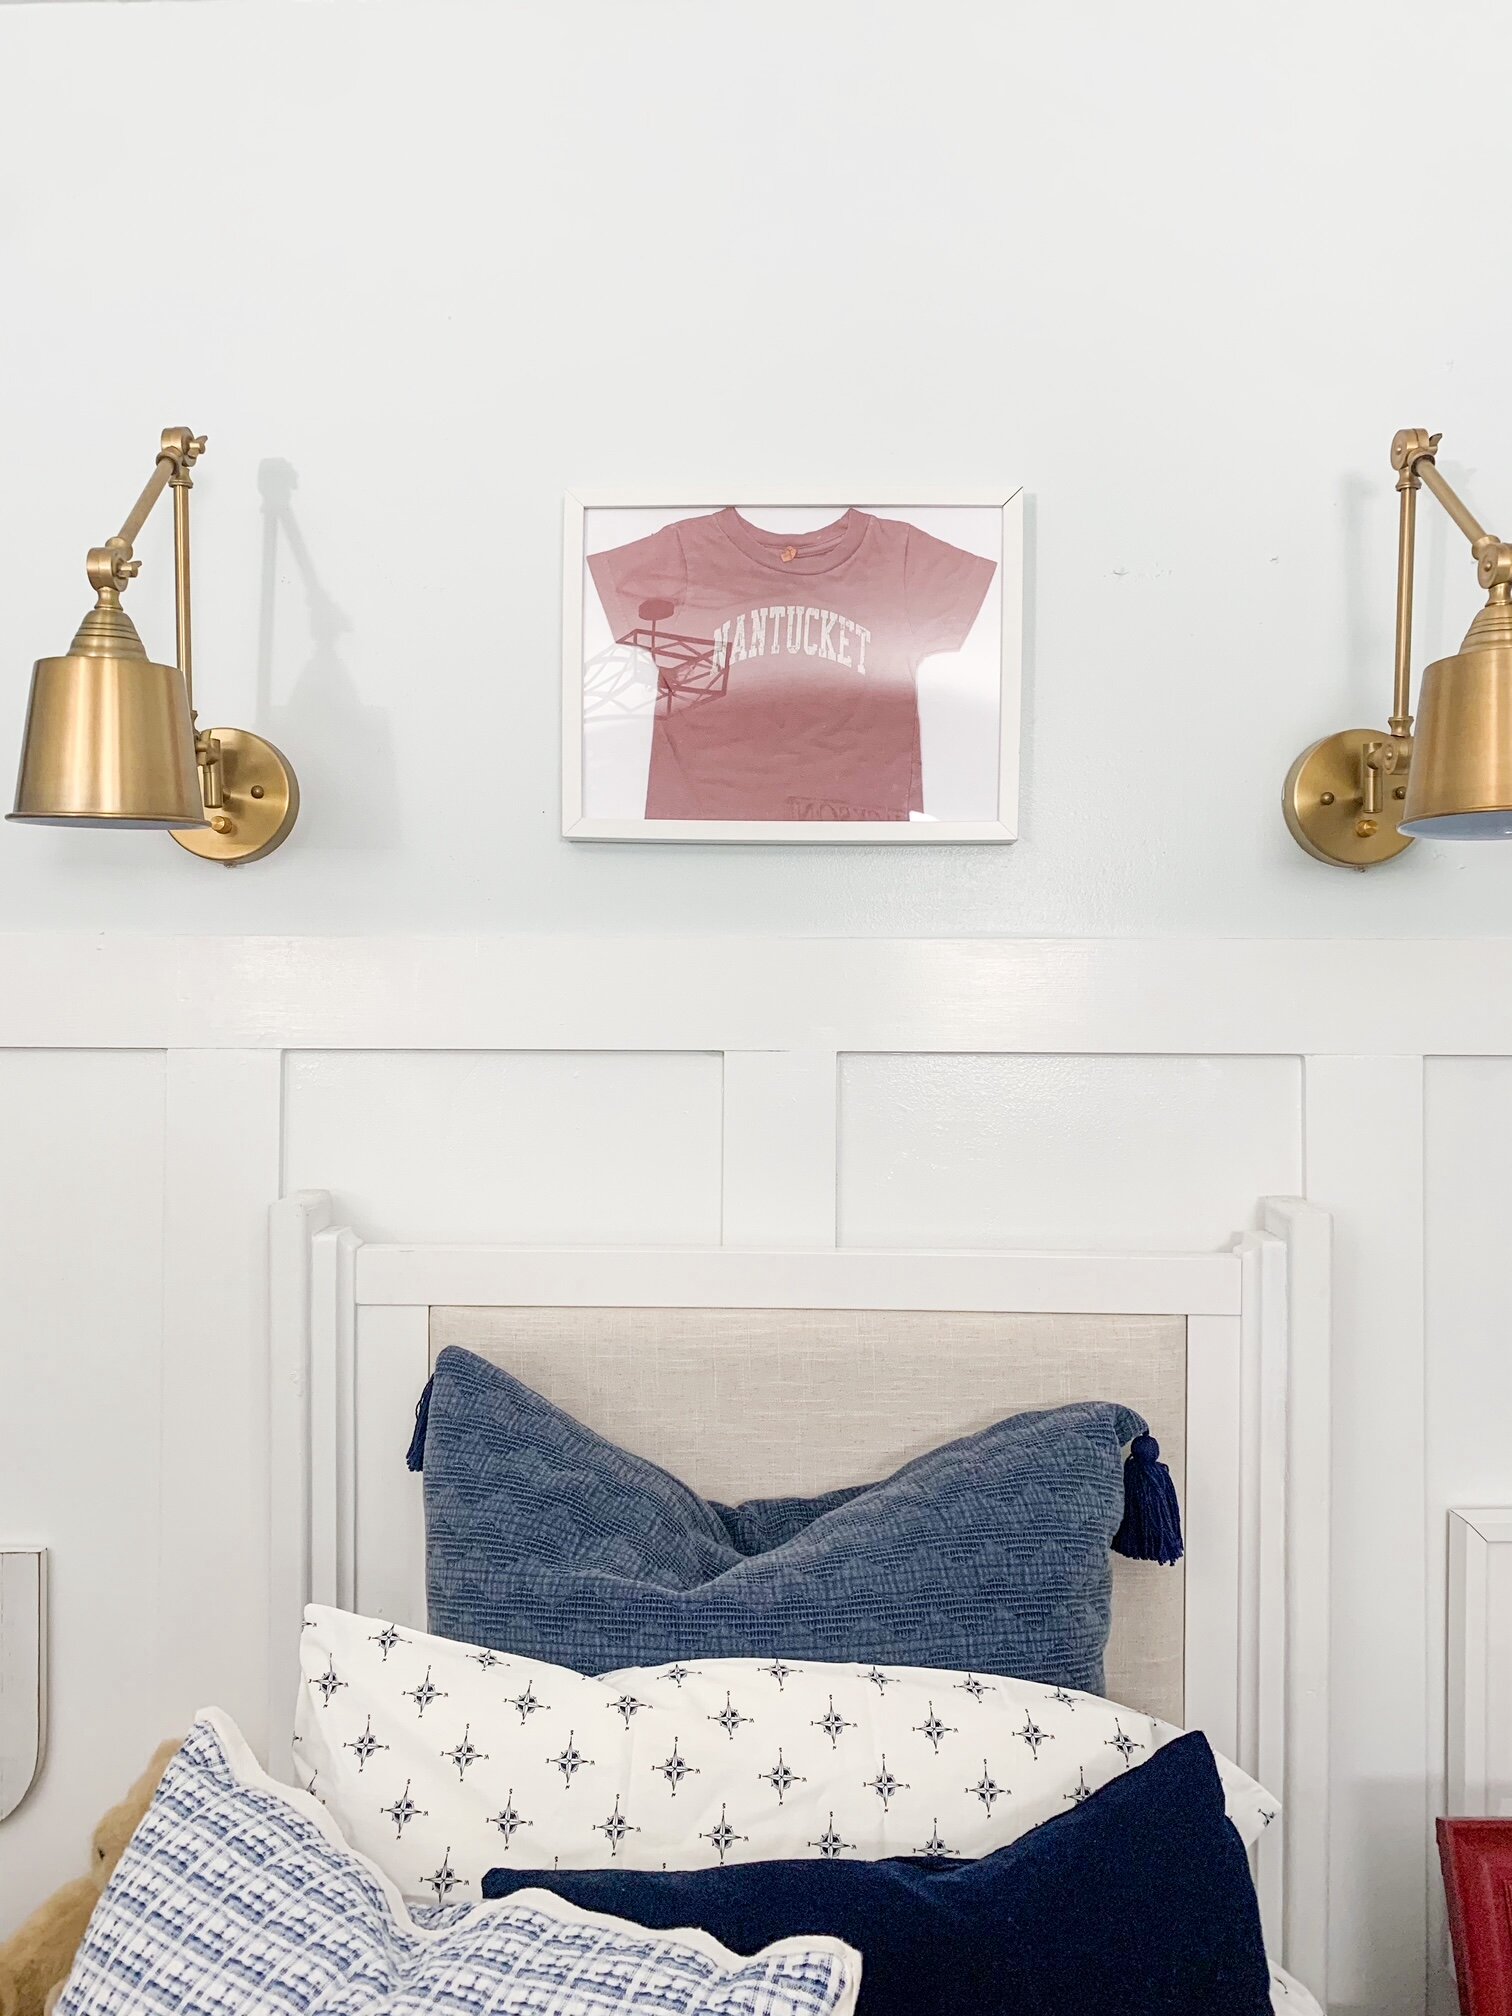
The first thing we did was add board and batten to the back wall. It was extra wood we had from another project and I really needed some interest in this tiny plain box of a room. I still plan to add it on the rest of the walls.

Next up I made his headboard and footboard for the bed out of his old crib ends! I loved his crib and thought it would tie in nicely with the rest of the room so I found a way to repurpose it. Blog post on that coming soon :-)

This bedding is by Ugg found at Home Goods and it is amazingggg! So soft and full and fluffy! I love it!

I’m a big fan of mixing patterns! Gives movement to a room in my opinion. This is a shot of his compass sheets from target by poppy and fritz and his comforter.


There’s still so much more I want to do to this room- finish board and batten, possibly add wallpaper, find a larger piece of art, etc. But for now he’s happy to have his very own big boy room made specially for him so that makes me happy too!

DIY Frame TV
How to make your own Frame TV for a fraction of the price!
Because I didn’t want to spend $2,000 on a new TV when the one we have works just fine

Our family room is perfectly set up to have our TV mounted above our fireplace. It’s the focal point of the room and it can be seen from the dining room, kitchen, etc. But I think our fireplace is so pretty and TV’s just are not, so I’ve always been hesitant to mount it above our mantel. Here’s a pic of our previous set up when our TV was on a different wall.

I loved the way it looked but I still really wanted the TV mounted there without it being such an eye sore. In comes the Samsung “frame TV” which seemed like the perfect solution to my problem, except for the size we have it’s about $1500, if not more! I couldn’t justify spending that on a new TV when ours worked just fine so I decided to figure out a DIY! I’ll list all the materials needed at the end.

The only thing I bought for this project was a different TV mount. Link (amazon)
For the TV to actually look like a framed picture it was going to need to sit flush to the wall and our previous wall mount came out at least 6 inches.
Once we had the TV hung with the new low profile mount, the rest was easy peasy!

First: Measure the height and width of the TV
These are the measurements you will use to make your wood cuts. My TV was 28inches high and 50 inches wide.

Next: Take the measurements to make your wood cuts using a miter saw (thats what makes the nice angle cut like a frame). We had extra window molding that I used to make the frame but pretty much any thin wood would work.

Next lay your frame out and using a staple gun, staple the corners together on all 4 sides, like pictured.The staples don’t need to be pretty bevause they are in the back.
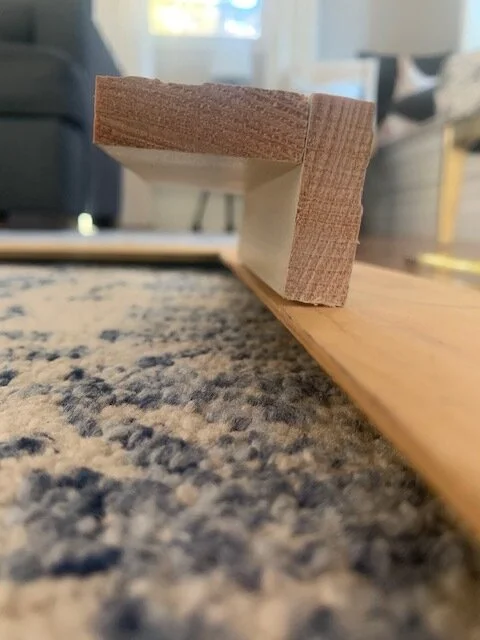
Next we attached 2 “cleats” to the edge of the frame so that the frame would have something to hold it on the TV.
The cleats are just 2 small peices of scrap wood stapled into an L shape (like pictured)

Last- flip it over and paint it however you want. I did a quick coat of gold spray paint because thats all we had on hand and I wanted to get it up
I still plan to add a black or navy trim to it, to make it look even more like a picture frame.

We have just a regular “smart TV” with a roku plug in so iun order to get pictures on it, I needed to download the “artcast channel” for roku. If you have an apple tv or amazon firestick there are other ways to get pictures on your screen.

Heres the DIY frame TV at Christmas
I like that I can change the picture whenever I want for different seasons, or holidays. For Christmas we did this snowy scene and for New Years we had some fireworks- see our New Year’s Eve blog post here!

Once the holidays were over I switched it to this boat painting. I’ve also used sunsets, historical pictures, etc. You can change it to match your decor any time!

I added decor around it, just like I would with a normal peice of art. It definitely helps to make it look more like a picture than a TV with some styled items around it. Thrse are some candle sticks, vases and a plant we had already.

Here we are on Christmas enjoying our DIY frame TV and the fact that we saved $1,500 making it ourselves!!!!

How I only go to the Grocery Store once a MONTH!
Yes! I only go to the grocery store once a month! Even with a big-ish family (5 people) plus hosting our extended family for dinner pretty much every Sunday, I still manage to only step foot in the grocery store every 4 weeks. It’s mostly because I hate grocery shopping. It’s a pain in the butt, then add in 3 small kids, plus a pandemic and its torture so I’ve learned how to make a monthly shopping trip work. Here’s my tips!

Get a second fridge/freezer for your basement, garage, pantry, anywhere it will fit. Check facebook marketplace, yard sale sites, etc. People are always getting rid of older models for cheap or evem FREE.
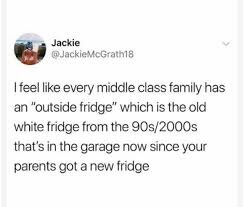
LOL- @JackieMcGrath18 definitely gets it.
2. Take stock of what your regular needs are. We go through a ton of coffee in this house so I make sure I always have at least 5 cans of it in our pantry, with enough creamer to last that amount as well. My kids have peanut butter jelly sandwiches for lunch at least 3 days a week so I know I need to have a TON of bread in the fridge and freezer.

3. Buy MORE of SMALLER sizes of things that go bad if opened. Like Milk. Instead of buying 3 gallons of milk that might go bad if not finished within 5 days of opening it, I buy 6 of the half gallon milks with expiration dates in the next month so I know we will make it until our next big shop.
4. Strategically buy produce items. I plan out our meals ahead of time and if I’m buying something that I know goes bad quickly (like bananas) I make sure we use those first. Vice-versa, I also buy produce that lasts longer so we still have them at the end, like apples. They last so long. I also make sure to stock up on frozen veggies. They still hold their nutritional value but won’t go bad in 2 days.
5. Stock up at the cheapest stores. The cheapest in my area is Market Basket, so I know when I go there I need to double (or triple down) on all the big items. My kids snack allllllll the time, so I make sure I have enough of the cheap, snack food on hands and get store brand as much as I can.

6. Plan for the nights you are just not going to want to cook. They are inevitable. Sometimes kids have activities late into the dinner hour and you don’t have time, or sometimes you plain just don’t feel like it. If you don’t plan ahead you will end up eating takeout, which for a family of 5 adds up fast! Items I keep on hand for these types of nights are frozen pizzas, topped with frozen veggies (I always keep 5 on hand, assuming at least once a week I can slack off of cooking), chicken fingers, french fries, etc. Can just pop them in the oven without having to think about.
7. Save your leftovers. Not in your fridge though because 90% of the time people don’t end up eating it. No one wants to eat something for dinner they just had 2 nights ago. If there is a lot leftover I like to wrap it and freeze it. Then in a couple weeks when I don’t feel like cooking I can pull out a full meal that everyone will eat because its new(ish).
8. Keep stocked up on eggs. Eggs usually have a longgg expiration date and can be used for breakfast lunch and dinner. We have fritattas for dinner a lot. The kids love them, its healthy, and cheap!
9. Pasta and rice. We have SOOOO much of both in this house and I mean SOO much. Right now we have 8 boxes of rice pilaf mix, 2 boxes of spanish rice mix, 2 big boxes of white rice, and 10 boxes of different pastas. Adding 2 items (like chicken and spinach) to a boxed rice mix makes a super easy and complete dinner.

10. Whole foods delivery or farmers markets- for the items that I just can’t wait a whole month for, like certain cheeses, deli meat, salad stuff I either stop by our farmers market or get a whole foods delivery. Spending $35 for a free delivery 2x a monthn so we can have fresh items on hand really is worth it. and it keeps me from the dreaded grocery store whereI will inevitably spend way more then $35.
Easy meals that I know my whole family likes:
Fritattas
Strawberry/blueberry pancakes
Mexican night: fajitas, tacos, enchiladas
Soups
Paninis (basically just jazzed up grilled cheeses, lol)
Scampi
Flatbreads
Caprese rice
Anything in the crockpot

Easy meals the whole family likes:
Fritattas
Strawberry/blueberry pancakes
Mexican night: fajitas, tacos, enchiladas
Soups
Paninis (basically just jazzed up grilled cheeses, lol)
Scampi
Flatbreads
Caprese rice
Anything in the crockpot

Pantry staples I always have on hand:
Frozen chicken, steak, beef, pork
Chicken and beef broth
Snacks
Frozen veggies, fruits
Rice
Pasta
potatoes
eggs
Crackers
Frozen waffles
Cereal
Pancake mix
Baking supplies
January Organization!
Since everyone and their mother is trying to get organized in the new year I thought I’d do a simple post about the things I do to stay organized (and semi-sane).

Monthly Calendars! We have a calendar in our kitchen where everyone can see it with all our obligations for the month. I put every single thing on it, kids dr’s appts, night out with friends, themed days at school etc. They are all also in my phone calendar but keeping them on the hard copy calendar where everyone in the family can see whats going on, helps keep me and my husband on the same page.

Here’s what it looked like at the beginning of March 2020

anddddd, here is what it looked like 3 weeks into March 2020 when we didn’t even know what day it was
Weekly schedule! I keep a weekly schedule of to do’s around the house and with the kiddos so I don’t run around like a chicken with my head cut off.
Weekly House schedule:
Sunday: Laundry, I get all the laundry done (besides bedding) and put away for the week
Monday: change all sheets and wash them
Tuesday: deep clean all bathrooms (my least favorite)
Wednesday: errand day
Thursday: Mopping/Mirrors
Friday: kitchen cleaning, touch up bathroom cleaning
Saturday: stock up day (check pantry, fridge, etc for items we need for the week)
Weekly Kids Schedule: These are the activities I like them to have some supervision with either for safety reasons (cutting) or so they don’t destroy the house (painting- looking at you). These activities are in a labeled box for each day. I pull them out every night while I make dinner so they have something productive to do while I cook besides watch TV. They haven’t gotten bored with them yet.
Monday: magna tiles
Tuesday: play doh
Wednesday: baking
Thursday: cutting activities
Friday: puzzles
Saturday: painting

Big Girl Room Makeover for Quinn and Avery!

Since both of our girls were ready to be in “big girl” beds we thought it was time to finally give their room a makeover! When we had Quinn’s nursery, we were completing our first big addition on the house, so we made her room cute, but not completely styled. Then when the twins were born, we had JUST finished our second big addition. Literally 2 days before they were born we moved our bed into our new master bedroom, so their rooms never really got the complete decorating treatment I wanted.
When quarantine hit, we started thinking about switching both girls to a big bed and came up with our new design plan for their room! Before I start decorating I come up with a “Design board” which is basically just pictures of things I want for the room. It helps me decide the style I want and the overall look. Before I show you the whole makeover- let me show you what we started with!!
What we started with!
“Before”
This is what it looked like when we bought it! Outdated and plain, plain, plain.

This was the “during”
Like I said, we never fully decorated the girls room because we had just finished 2 major additions on the house and added 2 major additions to our family (THE TWINS)
The Design Plan

Quinn and Avery’s Room Makeover Design Board
The Finished Product


As you could tell from the “before” and “during” pictures the room was veryyy plain. The first thing it needed was some interest. We added bright white board and batten to the whole room to help the room look less like a flat little box, plus we have that trim in other parts of our house so it flowed perfectly!
Then I used the “wildflower” print as a jumping off point for the design of the room. We went with light pinks, preppy blue and white elements, and a little big of glam, with the tufted day bed and gold accents. I love the way it turned out! It feels like a room that fits them now, but they could also grow into.
Pictures by Aubrey Elle Photography, construction by J.R. Trubia Construction

Roundup: Most asked about blog/insta items!
all of my most asked for items in one spot
I’ve been getting a lot of the same questions about the same items, so I figured it made sense to round them all up in one spot.

The top most requested items by far is our Christmas trees
Large Christmas tree (amazon) it’s a 9 foot pre-lit flocked tree
Medium Christmas tree (michaels) its 7.5 foot pre lit flocked pine tree
Slim Christmas tree (michaels) its 7 foot skinny pre lit flocked Christmas tree

The second most common question is on all our cleaning supplies!
The Pink Stuff (amazon) is a miracle magic stain eraser. My kids have colored on our walls multiple times with permanent marker (I have no idea how they keep finding them) and this stuff takes it off with one quick swipe!

Another cleaning product! Folex!! We have 3 small kids so everything in our house is always getting stained. I use this stuff on light colored fabric furniture, like our linen chairs, and on our rugs. Its taken out chocolate, coffee, crayon, markers, dirt, etc. Can’t beat it!

Last cleaning product - I swear! But I get asked about it all the time because it’s sooo good! It’s basically a drill with different attachments for cleaning! I use it on all those annoying and hard to scrub spots, like our master bathroom shower. It’s all tile and scrubbing it every week is annoyingggg. This makes it so much quicker and it looks cleaner!

Our foyer tile is also a top request! It was a super affordable makeover but made such a huge impact in our house!

We also always get asked about the kids outfits from our Christmas cards! I love them. They still wear them for other things too which is helpful instead of buying a fancy dress or shirt they wear one time!